- Grades 6-12
- School Leaders
50 Fun Earth Day Crafts and Activities 🌎!
Every product is independently selected by (obsessive) editors. Things you buy through our links may earn us a commission.

45 Cool Chemistry Experiments, Demos, and Science Fair Projects
Don’t forget your safety equipment!

Bunsen burners, colorful chemicals, and the possibility of a (controlled) explosion or two? Everybody loves chemistry experiments! We’ve rounded up the best activities, demos, and chemistry science fair projects for kids and teens. Try them in the classroom or at home.
Easy Chemistry Experiments and Activities for All Ages
Chemistry science fair projects.
These chemistry experiments and activities are all easy to do using simple supplies you probably already have. Families can try them at home, or teachers and students can do them together in the classroom.
Mix up some magic milk
Kids love this colorful experiment, which explores the concept of surface tension. This is one of our favorite chemistry experiments to try at home, since the supplies are so basic and the results are so cool!

Taste the Rainbow
Teach your students about diffusion while creating a beautiful and tasty rainbow. You’ll definitely want to have extra Skittles on hand so your class can enjoy a few as well!
Learn more: Skittles Diffusion

Crystallize sweet treats
Crystal science experiments teach kids about supersaturated solutions. This one is easy to do at home, and the results are absolutely delicious!
Learn more: Candy Crystals
Make elephant-sized toothpaste
This fun project uses yeast and a hydrogen peroxide solution to create overflowing “elephant toothpaste.” You can also add an extra fun layer by having kids create toothpaste wrappers for their plastic bottles.

Blow the biggest bubbles you can
Add a few simple ingredients to dish soap solution to create the largest bubbles you’ve ever seen! Kids learn about surface tension as they engineer these bubble-blowing wands.
Learn more: Giant Soap Bubbles

Demonstrate the “magic” leakproof bag
So simple and so amazing! All you need is a zip-top plastic bag, sharp pencils, and some water to blow your kids’ minds. Once they’re suitably impressed, teach them how the “trick” works by explaining the chemistry of polymers.
Learn more: Leakproof Bag

Use apple slices to learn about oxidation
Have students make predictions about what will happen to apple slices when immersed in different liquids, then put those predictions to the test! Finally, have them record their observations.
Learn more: Apple Oxidation
Float a marker man
Their eyes will pop out of their heads when you “levitate” a stick figure right off the table. This experiment works due to the insolubility of dry-erase marker ink in water, combined with the lighter density of the ink.
Learn more: Floating Marker Man

Discover density with hot and cold water
There are a lot of easy science experiments you can do with density. This one is extremely simple, involving only hot and cold water and food coloring, but the visuals make it appealing and fun.
Learn more: Layered Water

Layer more liquids
This density demo is a little more complicated, but the effects are spectacular. Slowly layer liquids like honey, dish soap, water, and rubbing alcohol in a glass. Kids will be amazed when the liquids float one on top of the other like magic (except it is really science).
Learn more: Layered Liquids

Grow a carbon sugar snake
Easy science experiments can still have impressive results. This eye-popping chemical reaction demonstration only requires simple supplies like sugar, baking soda, and sand.
Learn more: Carbon Sugar Snake

Make homemade bouncy balls
These homemade bouncy balls are easy to make since all you need is glue, food coloring, borax powder, cornstarch, and warm water. You’ll want to store them inside a container like a plastic egg because they will flatten out over time.
Learn more: Make Your Own Bouncy Balls

Create eggshell chalk
Eggshells contain calcium, the same material that makes chalk. Grind them up and mix them with flour, water, and food coloring to make your very own sidewalk chalk.
Learn more: Eggshell Chalk

Make naked eggs
This is so cool! Use vinegar to dissolve the calcium carbonate in an eggshell to discover the membrane underneath that holds the egg together. Then, use the “naked” egg for another easy science experiment that demonstrates osmosis .
Learn more: Naked Egg Experiment
Turn milk into plastic
This sounds a lot more complicated than it is, but don’t be afraid to give it a try. Use simple kitchen supplies to create plastic polymers from plain old milk. Sculpt them into cool shapes when you’re done.

Test pH using cabbage
Teach kids about acids and bases without needing pH test strips. Simply boil some red cabbage and use the resulting water to test various substances—acids turn red and bases turn green.
Learn more: Cabbage pH

Clean some old coins
Use common household items to make old oxidized coins clean and shiny again in this simple chemistry experiment. Ask kids to predict (hypothesize) which will work best, then expand the learning by doing some research to explain the results.
Learn more: Cleaning Coins
Blow up a balloon (without blowing)
Chances are good you probably did easy science experiments like this when you were in school yourself. This well-known activity demonstrates the reactions between acids and bases. Fill a bottle with vinegar and a balloon with baking soda. Fit the balloon over the top, shake the baking soda down into the vinegar, and watch the balloon inflate.
Learn more: Balloon Experiments
Assemble a DIY lava lamp
This 1970s trend is back—as an easy science experiment! This activity combines acid/base reactions with density for a totally groovy result.

Explore how sugary drinks affect teeth
The calcium content of eggshells makes them a great stand-in for teeth. Use eggs to explore how soda and juice can stain teeth and wear down the enamel. Expand your learning by trying different toothpaste and toothbrush combinations to see how effective they are.
Learn more: Sugar and Teeth Experiment
Mummify a hot dog
If your kids are fascinated by the Egyptians, they’ll love learning to mummify a hot dog. No need for canopic jars ; just grab some baking soda and get started.
Extinguish flames with carbon dioxide
This is a fiery twist on acid-base experiments. Light a candle and talk about what fire needs in order to survive. Then, create an acid-base reaction and “pour” the carbon dioxide to extinguish the flame. The CO2 gas acts like a liquid, suffocating the fire.

Send secret messages with invisible ink
Turn your kids into secret agents! Write messages with a paintbrush dipped in lemon juice, then hold the paper over a heat source and watch the invisible become visible as oxidation goes to work.
Learn more: Invisible Ink
Set popcorn dancing
This is a fun version of the classic baking soda and vinegar experiment, perfect for the younger crowd. The bubbly mixture causes popcorn to dance around in the water.
Learn more: Dancing Popcorn Experiment
Shoot a soda geyser sky-high
You’ve always wondered if this really works, so it’s time to find out for yourself! Kids will marvel at the chemical reaction that sends diet soda shooting high in the air when Mentos are added.
Learn more: Mentos and Coke Experiment
All of these chemistry experiments are perfect for using the scientific method. Form a hypothesis, alter the variables, and then observe the results! You can simplify these projects for younger kids, or add more complexity for older students.

Break apart covalent bonds
Difficulty: Medium / Materials: Medium
Break the covalent bond of H 2 O into H and O with this simple experiment. You only need simple supplies for this one. Turn it into a science fair project by changing up the variables—does the temperature of the water matter? What happens if you try this with other liquids?
Learn more: Breaking Covalent Bonds
Measure the calories in various foods
Are the calorie counts on your favorite snacks accurate? Build your own calorimeter and find out! This kit from Home Science Tools has all the supplies you’ll need.

Detect latent fingerprints
Forensic science is engrossing and can lead to important career opportunities too. Explore the chemistry needed to detect latent (invisible) fingerprints, just like they do for crime scenes!
Learn more: Fingerprints Project
Use Alka-Seltzer to explore reaction rate
Difficulty: Easy / Materials: Easy
Tweak this basic concept to create a variety of high school chemistry science fair projects. Change the temperature, surface area, pressure, and more to see how reaction rates change.
Determine whether sports drinks really have more electrolytes than other beverages
Difficulty: Medium / Materials: Advanced
Are those pricey sports drinks really worth it? Try this experiment to find out. You’ll need some special equipment for this one; buy a complete kit at Home Science Tools .
Turn flames into a rainbow
You’ll need to get your hands on a few different chemicals for this experiment, but the wow factor will make it worth the effort. Make it a science project by seeing if different materials, air temperature, or other factors change the results.

Discover the size of a mole
The mole is a key concept in chemistry, so it’s important to ensure students really understand it. This experiment uses simple materials like salt and chalk to make an abstract concept more concrete. Make it a project by applying the same procedure to a variety of substances, or determining whether outside variables have an effect on the results.
Learn more: How Big Is a Mole?

Cook up candy to learn mole and molecule calculations
This edible experiment lets students make their own peppermint hard candy while they calculate mass, moles, molecules, and formula weights. Tweak the formulas to create different types of candy and make this into a sweet science fair project!
Learn more: Candy Chemistry

Make soap to understand saponification
Take a closer look at an everyday item: soap! Use oils and other ingredients to make your own soap, learning about esters and saponification. Tinker with the formula to find one that fits a particular set of parameters.
Learn more: Saponification
Uncover the secrets of evaporation
Explore the factors that affect evaporation, then come up with ways to slow them down or speed them up for a simple science fair project.
Learn more: Evaporation
More Chemistry Experiment Science Fair Ideas
These questions and prompts can spark ideas for unique chemistry experiments:
- Compare the properties of sugar and artificial sweeteners.
- Explore the impact of temperature, concentration, and seeding on crystal growth.
- Test various antacids on the market to find the most effective product.
- What is the optimum temperature for yeast production when baking bread from scratch?
- Compare the vitamin C content of various fruits and vegetables.
- How does temperature affect enzyme-catalyzed reactions?
- Investigate the effects of pH on an acid-base chemical reaction.
- Devise a new natural way to test pH levels (such as cabbage leaves).
- What’s the best way to slow down metal oxidation (the form of rust)?
- How do changes in ingredients and method affect the results of a baking recipe?
Like these chemistry experiments? Don’t miss STEM Activities for Kids of All Ages and Interests .
Plus, get all the latest teaching news and ideas when you sign up for our free newsletters.

You Might Also Like

70 Best High School Science Fair Projects in Every Subject
Fire up the Bunsen burners! Continue Reading
Copyright © 2023. All rights reserved. 5335 Gate Parkway, Jacksonville, FL 32256
68 Best Chemistry Experiments: Learn About Chemical Reactions
Whether you’re a student eager to explore the wonders of chemical reactions or a teacher seeking to inspire and engage your students, we’ve compiled a curated list of the top 68 chemistry experiments so you can learn about chemical reactions.
While the theories and laws governing chemistry can sometimes feel abstract, experiments bridge the gap between these concepts and their tangible manifestations. These experiments provide hands-on experiences illuminating the intricacies of chemical reactions, molecular structures, and elemental properties.
1. Covalent Bonds

By engaging in activities that demonstrate the formation and properties of covalent bonds, students can grasp the significance of these bonds in holding atoms together and shaping the world around us.
Learn more: Covalent Bonds
2. Sulfuric Acid and Sugar Demonstration
Through this experiment, students can develop a deeper understanding of chemical properties, appreciate the power of chemical reactions, and ignite their passion for scientific exploration.
3. Make Hot Ice at Home
Making hot ice at home is a fascinating chemistry experiment that allows students to witness the captivating transformation of a liquid into a solid with a surprising twist.
4. Make a Bouncing Polymer Ball

This hands-on activity not only allows students to explore the fascinating properties of polymers but also encourages experimentation and creativity.
Learn more: Thought Co
5. Diffusion Watercolor Art

This experiment offers a wonderful opportunity for students to explore the properties of pigments, observe how they interact with water, and discover the mesmerizing patterns and textures that emerge.
Learn more: Diffusion Watercolor Art
6. Exploding Baggie

The exploding baggie experiment is a captivating and dynamic demonstration that students should engage in with caution and under the supervision of a qualified instructor.
Learn more: Exploding Baggie
7. Color Changing Chemistry Clock

This experiment not only engages students in the world of chemical kinetics but also introduces them to the concept of a chemical clock, where the color change acts as a timekeeping mechanism.
Learn more: Color Changing Chemistry Clock
8. Pipe Cleaner Crystal Trees

By adjusting the concentration of the Borax solution or experimenting with different pipe cleaner arrangements, students can customize their crystal trees and observe how it affects the growth patterns.
Learn more: Pipe Cleaner Crystal Trees
9. How To Make Ice Sculptures

Through this experiment, students gain a deeper understanding of the physical and chemical changes that occur when water freezes and melts.
Learn more: Ice Sculpture
10. How to Make Paper

Through this hands-on activity, students gain a deeper understanding of the properties of cellulose fibers and the transformative power of chemical reactions.
Learn more: How to Make Paper
11. Color Changing Chemistry
Color changing chemistry is an enchanting experiment that offers a captivating blend of science and art. Students should embark on this colorful journey to witness the mesmerizing transformations of chemicals and explore the principles of chemical reactions.
12. Gassy Banana
The gassy banana experiment is a fun and interactive way for students to explore the principles of chemical reactions and gas production.
Learn more: Gassy Banana
13. Gingerbread Man Chemistry Experiment

This hands-on activity not only introduces students to the concepts of chemical leavening and heat-induced reactions but also allows for creativity in decorating and personalizing their gingerbread creations.
Learn more: Gingerbread Man Chemistry Experiment
14. Make Amortentia Potion

While the love potion is fictional, this activity offers a chance to explore the art of potion-making and the chemistry behind it.
Learn more: How to Make Amortentia Potion
15. Strawberry DNA Extraction
This hands-on experiment offers a unique opportunity to observe DNA, the building blocks of life, up close and learn about its structure and properties.
16. Melting Snowman

The melting snowman experiment is a fun and whimsical activity that allows students to explore the principles of heat transfer and phase changes.
Learn more: Melting Snowman
17. Acid Base Cabbage Juice

The acid-base cabbage juice experiment is an engaging and colorful activity that allows students to explore the pH scale and the properties of acids and bases.
By extracting the purple pigment from red cabbage leaves and creating cabbage juice, students can use this natural indicator to identify and differentiate between acidic and basic substances.
Learn more: Acid Base Cabbage Juice
18. Magic Milk

The magic milk experiment is a mesmerizing and educational activity that allows students to explore the concepts of surface tension and chemical reactions.
By adding drops of different food colors to a dish of milk and then introducing a small amount of dish soap, students can witness a captivating display of swirling colors and patterns.
Learn more: Magic Milk
19. Melting Ice with Salt and Water

Through this hands-on activity, students can gain a deeper understanding of the science behind de-icing and how different substances can influence the physical properties of water.
Learn more: Melting Ice with Salt and Water
20. Barking Dog Chemistry Demonstration

The barking dog chemistry demonstration is an exciting and visually captivating experiment that showcases the principles of combustion and gas production.
21. How to Make Egg Geodes

Making egg geodes is a fascinating and creative chemistry experiment that students should try. By using common materials like eggshells, salt, and food coloring, students can create their own beautiful geode-like crystals.
Learn more: How to Make Egg Geodes
22. Make Sherbet

This experiment not only engages the taste buds but also introduces concepts of acidity, solubility, and the chemical reactions that occur when the sherbet comes into contact with moisture.
Learn more: Make Sherbet
23. Hatch a Baking Soda Dinosaur Egg

As the baking soda dries and hardens around the toy, it forms a “shell” resembling a dinosaur egg. To hatch the egg, students can pour vinegar onto the shell, causing a chemical reaction that produces carbon dioxide gas.
Learn more: Steam Powered Family
24. Chromatography Flowers

By analyzing the resulting patterns, students can gain insights into the different pigments present in flowers and the science behind their colors.
Learn more: Chromatography Flowers
25. Turn Juice Into Solid

Turning juice into a solid through gelification is an engaging and educational chemistry experiment that students should try. By exploring the transformation of a liquid into a solid, students can gain insights of chemical reactions and molecular interactions.
Learn more: Turn Juice into Solid
26. Bouncy Balls
Making bouncy balls allows students to explore the fascinating properties of polymers, such as their ability to stretch and rebound.
27. Make a Lemon Battery
Creating a lemon battery is a captivating and hands-on experiment that allows students to explore the fundamentals of electricity and chemical reactions.
28. Mentos and Soda Project
The Mentos and soda project is a thrilling and explosive experiment that students should try. By dropping Mentos candies into a bottle of carbonated soda, an exciting eruption occurs.
29. Alkali Metal in Water
The reaction of alkali metals with water is a fascinating and visually captivating chemistry demonstration.
30. Rainbow Flame
The rainbow flame experiment is a captivating and visually stunning chemistry demonstration that students should explore.
31. Sugar Yeast Experiment
This experiment not only introduces students to the concept of fermentation but also allows them to witness the effects of a living organism, yeast, on the sugar substrate.
32. The Thermite Reaction
The thermite reaction is a highly energetic and visually striking chemical reaction that students can explore with caution and under proper supervision.
This experiment showcases the principles of exothermic reactions, oxidation-reduction, and the high temperatures that can be achieved through chemical reactions.
33. Polishing Pennies
Polishing pennies is a simple and enjoyable chemistry experiment that allows students to explore the concepts of oxidation and cleaning methods.
34. Elephant Toothpaste
The elephant toothpaste experiment is a thrilling and visually captivating chemistry demonstration that students should try with caution and under the guidance of a knowledgeable instructor.
35. Magic Potion
Creating a magic potion is an exciting and imaginative activity that allows students to explore their creativity while learning about the principles of chemistry.
36. Color Changing Acid-Base Experiment

Through the color changing acid-base experiment, students can gain a deeper understanding of chemical reactions and the role of pH in our daily lives.
Learn more: Color Changing Acid-Base Experiment
37. Fill up a Balloon
Filling up a balloon is a simple and enjoyable physics experiment that demonstrates the properties of air pressure. By blowing air into a balloon, you can observe how the balloon expands and becomes inflated.
38. Jello and Vinegar

The combination of Jello and vinegar is a fascinating and tasty chemistry experiment that demonstrates the effects of acid on a gelatin-based substance.
Learn more: Jello and Vinegar
39. Vinegar and Steel Wool Reaction

This experiment not only provides a visual demonstration of the oxidation process but also introduces students to the concept of corrosion and the role of acids in accelerating the process.
Learn more: Vinegar and Steel Wool Reaction
40. Dancing Rice

The dancing rice experiment is a captivating and educational demonstration that showcases the principles of density and buoyancy.
By pouring a small amount of uncooked rice into a clear container filled with water, students can witness the rice grains moving and “dancing” in the water.
Learn more: Dancing Rice
41. Soil Testing Garden Science

Soil testing is a valuable and informative experiment that allows students to assess the composition and properties of soil.
By collecting soil samples from different locations and analyzing them, students can gain insights into the nutrient content, pH level, and texture of the soil.
Learn more: Soil Testing Garden Science
42. Heat Sensitive Color Changing Slime

Creating heat-sensitive color-changing slime is a captivating and playful chemistry experiment that students should try.
Learn more: Left Brain Craft Brain
43. Experimenting with Viscosity

Experimenting with viscosity is an engaging and hands-on activity that allows students to explore the flow properties of liquids.
Viscosity refers to a liquid’s resistance to flow, and this experiment enables students to investigate how different factors affect viscosity.
Learn more: Experimenting with Viscosity
44. Rock Candy Science

Rock candy science is a delightful and educational chemistry experiment that students should try. By growing their own rock candy crystals, students can learn about crystal formation and explore the principles of solubility and saturation.
Learn more: Rock Candy Science
45. Baking Soda vs Baking Powder

Baking soda and baking powder have distinct properties that influence the leavening process in different ways.
This hands-on experiment provides a practical understanding of how these ingredients interact with acids and moisture to create carbon dioxide gas.
46. Endothermic and Exothermic Reactions Experiment

The endothermic and exothermic reactions experiment is an exciting and informative chemistry exploration that students should try.
By observing and comparing the heat changes in different reactions, students can gain a deeper understanding of energy transfer and the concepts of endothermic and exothermic processes.
Learn more: Education.com
47. Diaper Chemistry

By dissecting a diaper and examining its components, students can uncover the chemical processes that make diapers so effective at absorbing and retaining liquids.
Learn more: Diaper Chemistry
48. Candle Chemical Reaction
The “Flame out” experiment is an intriguing and educational chemistry demonstration that students should try. By exploring the effects of a chemical reaction on a burning candle, students can witness the captivating moment when the flame is extinguished.
49. Make Curds and Whey

This experiment not only introduces students to the concept of acid-base reactions but also offers an opportunity to explore the science behind cheese-making.
Learn more: Tinkerlab
50. Grow Crystals Overnight

By creating a supersaturated solution using substances like epsom salt, sugar, or borax, students can observe the fascinating process of crystal growth. This experiment allows students to explore the principles of solubility, saturation, and nucleation.
Learn more: Grow Crystals Overnight
51. Measure Electrolytes in Sports Drinks
The “Measure Electrolytes in Sports Drinks” experiment is an informative and practical chemistry activity that students should try.
By using simple tools like a multimeter or conductivity probe, students can measure the electrical conductivity of different sports drinks to determine their electrolyte content.
52. Oxygen and Fire Experiment
The oxygen and fire experiment is a captivating and educational chemistry demonstration that students should try. By observing the effects of oxygen on a controlled fire, students can witness the essential role of oxygen in supporting combustion.
53. Electrolysis Of Water

The electrolysis of water experiment is a captivating and educational chemistry demonstration that students should try.
Learn more: Electrolysis Of Water
54. Expanding Ivory Soap

The expanding Ivory Soap experiment is a fun and interactive chemistry activity that students should try. By placing a bar of Ivory soap in a microwave, students can witness the remarkable expansion of the soap as it heats up.
Learn more: Little Bins Little Hands
55. Glowing Fireworks

This experiment not only introduces students to the principles of pyrotechnics and combustion but also encourages observation, critical thinking, and an appreciation for the physics and chemistry behind.
Learn more: Glowing Fireworks
56. Colorful Polymer Chemistry

Colorful polymer chemistry is an exciting and vibrant experiment that students should try to explore polymers and colorants.
By combining different types of polymers with various colorants, such as food coloring or pigments, students can create a kaleidoscope of colors in their polymer creations.
Learn more: Colorful Polymer Chemistry
57. Sulfur Hexafluoride- Deep Voice Gas
This experiment provides a firsthand experience of how the density and composition of gases can influence sound transmission.
It encourages scientific curiosity, observation, and a sense of wonder as students witness the surprising transformation of their voices.
58. Liquid Nitrogen Ice Cream

Liquid nitrogen ice cream is a thrilling and delicious chemistry experiment that students should try. By combining cream, sugar, and flavorings with liquid nitrogen, students can create ice cream with a unique and creamy texture.
59. White Smoke Chemistry Demonstration

The White Smoke Chemistry Demonstration provides an engaging and visually captivating experience for students to explore chemical reactions and gases. By combining hydrochloric acid and ammonia solutions, students can witness the mesmerizing formation of white smoke.
60. Nitrogen Triiodide Chemistry Demonstration

The nitrogen triiodide chemistry demonstration is a remarkable and attention-grabbing experiment that students should try under the guidance of a knowledgeable instructor.
By reacting iodine crystals with concentrated ammonia, students can precipitate nitrogen triiodide (NI3), a highly sensitive compound.
61. Make a Plastic- Milk And Vinegar Reaction Experiment

Through the “Make a Plastic – Milk and Vinegar Reaction” experiment, students can gain a deeper understanding of the chemistry behind plastics, environmental sustainability, and the potential of biodegradable materials.
Learn more: Rookie Parenting
62. Eno and Water Experiment
This experiment not only introduces students to acid-base reactions but also engages their senses as they witness the visible and audible effects of the reaction.
63. The Eternal Kettle Experiment
By filling a kettle with alcohol and igniting it, students can investigate the behavior of the alcohol flame and its sustainability.
64. Coke and Chlorine Bombs
Engaging in this experiment allows students to experience the wonders of chemistry firsthand, making it an ideal choice to ignite their curiosity and passion for scientific exploration.
65. Set your Hand on Fire
This experiment showcases the fascinating nature of combustion and the science behind fire.
By carefully following proper procedures and safety guidelines, students can witness firsthand how the sanitizer’s high alcohol content interacts with an open flame, resulting in a brief but captivating display of controlled combustion.
66. Instant Ice Experiments
The Instant Ice Experiment offers an engaging and captivating opportunity for students to explore the wonders of chemistry and phase changes.
By using simple household ingredients, students can witness the fascinating phenomenon of rapid ice formation in just a matter of seconds.
67. Coke Cans in Acid and Base
Engaging in this experiment allows students to gain a deeper understanding of the chemical properties of substances and the importance of safety protocols in scientific investigations.
68. Color Changing Invisible Ink

The Color Changing Invisible Ink experiment offers an intriguing and fun opportunity for students to explore chemistry and learn about the concept of chemical reactions.
Learn more: Research Parent
Similar Posts:
- 37 Water Science Experiments: Fun & Easy
- Top 40 Fun LEGO Science Experiments
- Top 50 Fun Food Science Experiments
Leave a Comment Cancel reply
Save my name and email in this browser for the next time I comment.

110 Awesome Chemistry Experiments For All Ages
Sharing is caring!

Chemistry experiments are a great way to get kids excited about studying chemistry even at a young age. I mean, what child doesn’t think about creating bubbling potions or sending secret messages?
The study of chemistry has a scary connotation for many people. Chemistry has this stigma of being only for really, really smart students who want a career in the sciences. The truth is that, like all science, chemistry is everywhere.
In fact, chemistry experiments for kids can be bubbly and full of fungi! Check out the video below of our Making Peeps Blow Up a Balloon chemistry activity.
It is in the way water freezes into ice . It is in the way apples turn brown when you leave their flesh exposed to the air. Chemistry is in the way sugar dissolves in water .
How does chemistry apply to our bodies? Check out our version of the egg with vinegar experiment . We added a little twist that makes an excellent connection between chemistry and our dental health. We have a 25+ page printable pack to go with it for just $2.95 .
Showing how chemistry is involved in everyday life can take that scary factor out of studying chemistry for students. When it comes time to study chemistry, they will be more excited about jumping in.

Chemistry Experiments For All Ages
I wanted to create a resource for you to be able to find the perfect chemistry experiments for your students no matter their age or interests. This post contains 100 chemistry experiments for students from preschool age through high school. I have divided them into 3 age ranges.
- Preschool and Primary
- Middle and High School
Here are a few disclaimers to my divisions of the experiments.
I realize that all students are different and are ready for different levels of experiments. For instance, some students in the elementary age group might be ready for more advanced experiments found in the Middle and High School section, while others need something more basic like those experiments found in the Preschool and Primary section.
Some may question why I put certain experiments in certain sections. First, I looked at the level of maturity I felt needed to conduct the experiment and if parental help was necessary. Next, I looked at the level of understanding the child would need to learn from the experiment.
Some experiments could teach something at different levels or could be done with parental help or independently and still be successful. When this was the case, I put the experiment in the lowest recommended age level.
With all that being said, these are just guidelines. Feel free to try experiments in sections that differ from your students’ age range if you think they would work.
For chemistry experiments, lesson ideas, and resources, check out my Homeschool Chemistry Pinterest board.
First, download the STEM Resource Guide
We have put together a FREE resource for parents and teachers that includes STEM activities , links to no-cost or low-cost coding, math, engineering, an robotics resources. You’ll find everything from preschool worksheets to high school apprenticeship information. Plus, there are articles to help you get your kids interested in STEM activities or ready for a career in STEM. Our contributors include The STEMKids , a mechanical engineer, and a biologist.
Preschool Science Experiments
Color Changing Flowers – includes free printable
Make butter! This comes with a free printable lesson that covers a wide range of ages. This is a preschool favorite!
Glow Stick Experiment – this one is especially easy for preschoolers – includes their own little observation sheet and coloring pages
Making Fizzy Moon Rocks (and learning about Moon rocks)
Puffy Paint turned Slime activity (This is also good for older students who are studying polymers.)
Pumpkin Candy Experiment
Dissovling Candy Corn – In this pumpkin and candy-themed printable , your little scientist will enjoying dissolving candy corn (or any candy for that matter) and recording what they observed. Includes three science activities, preschool/kindergarten math resources, and coloring and puzzle pages.
Make Crystal Snowflakes with Borax
Experiment with Yeast and Sugar – Making Peeps Blow Up a Balloon – Includes a free printable pack. Peeps make for interesting chemistry experiments. Whether you use the Peep snowmen or Peep chicks, you can make them blow up a balloon! Includes a free printable pack.
Make Crystals with Borax – This works every time and is exciting to watch throughout a 24-hour period. Obviously, adult supervision is needed when using the Borax, but your littlest scientists can twist their chenille sticks and make their own crazy creations! Plus, stirring the Borax and water will make them feel like real chemists! The activity can be adapted to make snowflake shapes in winter, hearts for Mother’s Day or Valentine’s Day. Flowers for spring or summer.
Baking Soda Fizz Experiment
Another Baking Soda Fizz Experiment
Diet Coke and Mentos Explosion
Dripping Slime Experiment
Lava Lamp Experiment
Rainbow Walking Water
Ice Cream in a Bag
Primary Science Experiments
Make a “Stained Glass” window
6 Experiments with Oranges
Make butter! This comes with a free printable lesson that covers a wide range of ages. This is a family favorite!
Glow Stick Experiment – learn about chemiluminescence, chemical reactions, and kinetic energy.
Dissolving candy experiment with printables

A fun TWIST on the egg with vinegar experiment. This activity helps children see the chemical reactions that go on in our mouth! Free printable.

Do Some Soil Testing – This is important life skills information too!
Color Changing Flowers – learn about capillary action in plants
Make Your Own Snowflakes
Polishing Pennies Experiment

Vitamin C And Apple Experiment
Homemade Butter Experiment
Secret Messages Science Experiment
120 Kitchen Chemistry & Culinary Science Resources – This is a very comprehensive list. If you want to also get some ideas for teaching your children about chemistry while cooking, this is a good place to look too!
Make Plastic From Milk
Fun Bubbles Experiment
Solubility Experiment
Bending Candy Canes
Experimenting With Viscosity And Sensory Bottles

Sudsy Bubble Experiment
Taffy Slime Chemistry
Dissolving Egg Shell Experiment
Make Ice Grow
Skittles Rainbow Science Experiment
Chromatography Butterflies
Erupting Lemon Volcano Chemistry
Make A Lava Lamp
Rock Candy Experiment
Make Heat Changing Color Sensitive Slime

Elementary School Science Experiments
Glow Stick Experiment – learn about chemiluminescence, chemical reactions, and kinetic energy. The printable is definitely geared towards elementary and middle school
Easy Science Experiments with Oranges – The Homeschool Scientist
Making Fizzy Moon Craters turned out to be a fun chemistry study and a lesson in realy Moon rocks!
Testing for vitamin C with iodine. We used a pumpkin, cranberries, oj, lemons, and more! It’s a lot of fun!

Oxidation And Reduction Experiment
Make a “Stained Glass” window – a lesson about states of matter and crystallization
Make butter
Making Peeps Candies Blow Up A Balloon – lesson with printable sheets
Add the dental health printable pack we have to go with the egg in vinegar chemistry activity for $2.95

Make A Polymer Ball
Enzyme Experiment
Red Cabbage Litmus Experiment
Harry Potter Potions Experiment
Peeps Science Experiment
Baking Powder vs. Baking Soda Experiment
Charcoal Water Purifying Experiment

Kitchen Chemistry: Cake Experiment
Polymer Science: Homemade Fruit Gummies
Food Chemistry: Turn Juice Into A Solid
Endothermic Chemical Reactions
Egg Float Science Experiment
Eggshell Geodes Science Experiment
Density Experiment
Forensic Chemistry Experiment
Kitchen Chemistry Experiments
Mentos and Soda Eruption
Make Invisible Ink
Make Quicksand with Engineering Emily and her children
Glow Stick Reactions
Using Lemons To Make Batteries
Make A Potato Battery
Diaper Chemistry
Candle Chemical Reaction
Melting Ice With Salt
Viscosity Experiment
Melting Ice Experiment
Ice Experiments
Chemiluminesence
Non-Newtonian Fluids
Explore An Unknown Material
Poke but Don’t Soak – a material science activity from the American Chemistry Society
The Science Of Jello
Kitchen Chemistry – 2 projects
Make Curds And Whey
Making Hot Ice
The Science Behind Edible Glass

Grow A Crystal Garden
Sugary Drinks And Teeth
Big Hero 6 Chemistry Concoctions
Compare The Electrolytes In Sports Drinks
Measure Glucose In Your Food

Charged Atoms Experiment
Gummy Bears Osmosis Experiment
Milk Polarity Experiment
Simple Digestion Experiment
Disappearing Color Experiment
Middle and High School Science Experiments
Parents of middle and high school students .

What Happens to the pH and temperature of a solvent when you add candy corn??
Testing for Vitamin C with Iodine (We used a pumpkin, cranberries, oj, lemons, and more! It’s a lot of fun!)
Peeps Science: Change In Mass Experiment
Peeps Science Experiment: Blowing Up a Balloon with Peeps
Chemical Reaction Experiment

Oxygen And Fire Experiment
Make Poinsettia pH Paper
Make Elephant Toothpaste
Make A Rainbow Of Colored Flames
Make Green Fire Pinecones
Copper Plating Ornaments
Make Colored Fire

Check out ChemistryTalk.org. This is a charity non-profit (all of their content is free) whose mission is to make chemistry fun and easy. They have tutorials, experiments, videos, a podcast, and many resources to help your teen understand and enjoy chemistry.
Make A Black Fire Snake
Three Station Gas Lab
Solubility Of Gases In Water
Salt Formation From Chemical Reactions
Check out ChemistryTalk.org. This is a charity non-profit (all of their content is free) whose mission is to make chemistry fun and easy. They have tutorials, experiments, videos, a podcast, and many resources to help your teen understand and enjoy chemistry
Make A Silver Egg
Water Content Lab

Water Quality Experiment
Make A Balloon Egg
Separating Sand And Salt
Rate Of Evaporation
Create A Compound Of Two Elements
Melting And Freezing Experiment
Soft Water Experiment
Make Homemade Root Beer
Desalinization Experiment
Need 120 MORE Kitchen Chemistry Experiments and Culinary Science Ideas?

I hold a master’s degree in child development and early education and am working on a post-baccalaureate in biology. I spent 15 years working for a biotechnology company developing IT systems in DNA testing laboratories across the US. I taught K4 in a private school, homeschooled my children, and have taught on the mission field in southern Asia. For 4 years, I served on our state’s FIRST Lego League tournament Board and served as the Judging Director. I own thehomeschoolscientist and also write a regular science column for Homeschooling Today Magazine. You’ll also find my writings on the CTCMath blog. Through this site, I have authored over 50 math and science resources.
- Experiments
- Secret Science of Stuff
- Science ABCs
- You are here:
- American Chemical Society
- Adventures in Chemistry
Have fun with chemistry!
Colors on the mooove.

Watch colors move when you mix detergent with milk and find out why.
Diapers, the Inside Story

Discover the special chemical in diapers that can absorb more than 50 times its own weight.
Dissolving M & M's

The candy coating of M&Ms dissolves in water, find out if it will dissolve in other liquids as well.
Time for Slime

Make your own slime with materials you have at home.
Flame Out

Find out what substances react to make a candle flame burn.
Mentos & Diet Coke

Find out the cool thing you can do with a bottle of soda pop and a packet of Mentos.

A Closer Look at Crystals

Aware of the Air

Chemistry & Comics

Chemistry Color Changers

Chromatography - Chemistry Color Clues

Condensation Station

Evaporation Sensation

Fate of Calcium Carbonate

Gas Sudsation

Great Electron Ripoff

Heat - Energy on the Move

Heat Up and Cool Down

Liquids - Clearly Unique

Lose the Blues with CO 2

Metals - They're Electrifying

Metals and Magnetism

Poke But Don't Soak

Rooting for Sink and Float

Stained Glass Glue

State Debate

Surface Spectaculars

Warm Up to Some Cool Reactions

Water - A Moving Experience
- Resources for Parents and Teachers
- Terms of Use
- Accessibility
Copyright © 2024 American Chemical Society

8 Easy Chemistry Experiments At Home (Get a Great Reaction!)

If you want to have some fun with chemistry at home, there are three main ways to go about it. You can buy a chemistry set, subscribe to a subscription box, or find some instructions and use household items. However you go about it, chemistry is a great way to get kids excited about chemistry and science in general.
Related post: Best STEM Subscription Box for Kids (Ultimate Guide 2024)
Chemistry Sets and Subscription Boxes
Before we dive into easy experiments, you can do with things you’ll probably have at home. I just wanted to talk a little bit about your other options.
Chemistry sets can be an excellent investment. They come with equipment that you can reuse over and over. It’s a lot cheaper than having to replace your drinking glasses and measuring jugs because the kids keep using them for chemistry experiments! They also come with instructions on a range of experiments that you can try. If you’ve done a few of the experiments below and are looking for something more, a chemistry set can be a really good option. There are ones aimed at young kids all the way up to teenagers .
Another great option to consider is subscription boxes. These are great for extending learning and keeping kids entertained and engaged for a more extended period. There are loads of great options to choose from. But, when it comes to chemistry, you really can’t go wrong with MEL Science . They have two subscription levels, so you can get a big box or a small one each month. Because everything is in the box, it really takes all the planning and hunting for ingredients out of the equation.
Experiments Using Household Items
If you don’t have a science kit on hand and are looking for something quick and easy to try at home, then these are the experiments you should try. Most of these use items that you will probably have at home, although a few might require you to get a little creative or grab the odd thing the next time you go to the shops.
Chromatography
Chromatography is a technique used in chemistry. It lets you find out what’s inside chemicals. In this version from Fizzics Education, you’ll see what colors are mixed up inside felt tip pens. It’s a straightforward experiment to carry out. All you need is some paper towels, felt tips, and a glass of water.
This is a simple version of this experiment, but there are some easy ways to make it more interesting or scientific. One way to extend this experiment is to try the same technique but using your favorite sweets’ colorings.
For instance, sweets like M&Ms, Skittles, and Smarties all have food coloring on their outside. You can get a sample of this coloring by sitting the candy in a small amount of water. Then you use the colored water in the same way as the felt tip pens.
To add a bit of rigor and math to the experiment, you need a pencil and a ruler. Instead of drawing a line of felt tip, you draw a line with a pencil. Then put a spot of the felt tip on the pencil line. When you take the paper out, you mark a second pencil line to show how high the water went.
By measuring the distance, each of the colors went and the distance the water went, you can calculate something called the retention factor. The retention factor will be unique for different dyes. To find the retention factor, you take the distance your sample travels and divide it by the length the solvent (water in this case) traveled. You can use this number to see if the same dye is used in different pens.
Pop Rockets
This is one of my favorite chemistry experiments for kids. It does get a little messy, so make sure you have some cloths on hand. Alternatively, you can do it outside to make it a little easier to clean up. Steve Spangler Science has some great instructions to follow.
In their version, they use an old film canister. But these can be a bit hard to get hold of these days since everything is digital. Some good alternatives that work well include empty glue stick containers. It’s also worth keeping your eye out for any food containers with push-on lids, as these can work well. There are always a lot of good options around Halloween, Christmas, and Easter – the snack size containers tend to be pretty good options.
The reason I love this experiment is that it’s a lot of fun. There’s the excitement of the pop and watching the canister fly. But, there are also a lot of opportunities to turn this into a real investigation. You can try changing the volumes of liquid or the type of liquid. You can find the best mix to make the biggest noise, the loudest pop, or the perfect mix to make it pop in precisely 8 seconds.
Make Oobleck Dance!

Oobleck is the name that’s been given to an awesome type of slime that you can make at home. If it sounds like something out of Dr. Suess, that’s because it is. This slime is just a mix of cornstarch and water, so it’s pretty easy to make. These instructions from Housing A Forest are pretty good.
What’s cool about Oobleck is that it’s a Non-Newtonian solid. That means that it behaves a little differently than you might expect. For instance, when you try to stir it quickly, it gets hard and almost solid. If you run your fingers through it slowly, it flows like runny syrup.
Now just playing with this stuff is fun, but if you have a speaker to hand, you can do something even cooler. In the guide from Housing A Forest, they suggest using a subwoofer and a cookie sheet. The speaker’s vibrations make the Oobleck bounce around and switch from a solid to a liquid to the beat of the music.
If you have an old speaker that you don’t mind breaking, you can wrap the speaker in saran wrap and put the Oobleck straight onto that. It works a lot better, but if you don’t cover the speaker correctly, it can break.
Make Rubber Eggs
Eggs are an excellent ingredient for science experiments. This experiment from 3P Learning lets you turn a hardboiled egg into a bouncy rubber one. To do this, all you need to do is soak it in vinegar for a day or so. This will dissolve the calcium carbonate of the eggshell. When it’s done, you’ll be able to rub off the tough outer shell.
Without the shell, you’ll be left with the membrane that lines the shell. This membrane helps hold the egg together. This membrane is strong enough to drop the egg onto a surface from a reasonable height, and it will bounce back without falling apart.
The harder your egg is, the less it will bounce. If you want a mix between bounciness and minimal potential for mess, then you’ll want to aim for a soft boiled egg. But, if you don’t mind the mess, try a raw egg. You remove the shell in the same way. When it comes off, you get a peek inside the raw egg. Because it’s raw, it’s squishy and bounces better. Of course, if you drop it from high enough, it will break. When you do this, you’ll find the stretchy membrane, which is pretty cool to feel.
Lemony Eruption
I’m sure you’ve all done the classic volcano eruption with baking soda and vinegar. This is a twist on that experiment. It takes advantage of the fact that lemons are already full of natural citric acid. Here are some great instructions from Babble Dabble Do. They have some handy tips on how to make the most out of each lemon. The great thing about this version is that your room will smell lovely and lemony for the rest of the day.
If you want to extend this, you try investigating which other fruits this would work with. You could explore a whole citric family of volcanoes.
Concoct Some Invisible Ink
Write Secret Messages With Invisible Ink! by Science Buddies
Making invisible ink is really easy. There is some fun chemistry behind how it works. As a bonus, once your kids get the hang of it, they’ll have loads of fun sending coded messages. It’s a great way to keep them entertained.
This great recipe from Thoughtco can be revealed using two different methods. If you have a safe and controllable heat source, you can hold the paper up to that. Ironing the paper works as well, although that’s best left to adults. Otherwise, you can use purple grape juice to reveal the message. If you paint over the page with grape juice, the message will show up in a different color.
If sending secret messages isn’t appealing to your kids, you could challenge them to create something artistic with this technique. The only limit is their imagination.
If you’ve done any chemistry experiments for kids, then you probably know that an acid + baking soda makes for an awesome fizzy experiment. I’ve seen this used in many different ways, but this version from STEAM powered family is one of the best.
In this experiment/activity, you encase small dinosaur toys in a paste made of baking soda and water. By adding food coloring, you can create multicolored eggs. You can even hide glitter inside for an added surprise. When made, you freeze the eggs for about an hour, so they are set hard.
To hatch the eggs, you give your kids syringes and a cup of vinegar. They can then apply the vinegar wherever they want to discover what’s hiding inside the eggs. Just remember to place the eggs in an easy to wash container with reasonably high sides.
Fireworks Alternative
I love fireworks, but I feel guilty about enjoying them because they are an environmental disaster. So, whenever bonfire night rolls around, I always set this up to have some fun and color in our home without having to damage the environment. It’s not quite as good as fireworks, but it’s pretty cool never-the-less.
All you need is:
- Oil – any sort will do. Cheap vegetable oil is just fine
- Food coloring (The liquid kind, not gel)
- Droppers (medicine syringes work well too)
- A clear, tall jar – a mason jat is perfect
To get the magic going, all you need to do is fill your jar ¾ full with warm water. Then add a good layer of oil on top. About an inch deep is plenty. Then you use your dropper to drip food coloring into the jar.
At first, the food coloring will sit at the interface between the oil and water. Then all of a sudden, it will drop through, leaving a trail of color behind it in the water. It looks impressive if you do lots of drops of different colors and then sit back and watch as they drop through the liquids.

Eventually, your water will turn a muddy, muddle color. But, this is such an easy experiment that you can wash out your jar and try again.
Just a little not to say that if you can’t get hold of a dropper or syringe then you can just drip the food coloring from the bottle. As long as you only put in small amounts at a time it does still work.
If you want to extend the fun, keep the oil and some of the colored water when you pour out the container. You want to have more oil than water this time, so I suggest moving them to a second smaller bottle. Then if you add an Alka-Seltzer tablet, you’ve got a homemade lava lamp. To get the best effect, stand your lava lamp bottle on top of a light.
Frequently Asked Questions
What are the most useful household ingredients for chemistry experiments.
When it comes to chemistry experiments, having the right ingredients makes all the difference. If you like explosions, then you’ll probably want to have a good supply of baking soda and vinegar on hand. Other common ingredients include ice, food coloring, citric acid, cornflour, and borax.
If you’re planning on doing lots of experiments, you might want to have a clear measuring jug and a few clear bowls of glasses that you don’t mind sacrificing.
Is cooking chemistry?
Absolutely! There is loads of chemistry behind making food taste great. If you like a perfectly browned steak, then you’re a fan of the Maillard reaction. If you like sweets and desserts, then you’re benefiting from the careful balance of ingredients and use of temperature needed to create the textures and flavor you love.
There is a whole field of science called food science, which is a specific field of chemistry. A great introduction to this field is to experiment with the ratio of ingredients in a simple recipe. You’ll learn what effect the different ingredients have on the outcome. Alternatively, you could make a sourdough starter.
What is the easiest science project?
All of the experiments on this list are pretty easy to try. The chromatography experiment is probably the one that has the most common equipment and is pretty hard to mess up. The fireworks alternative is also an easy experiment that looks great.
Sandy is an experienced STEM educator, having spent a decade teaching Physics. She also loves to volunteer at local STEM fairs to show kids, especially girls, how awesome it is. She is so passionate about science that one science degree wasn’t enough and she decided to complete a second part-time, while working.
Editor’s Picks

7 Best LEGO Star Wars Sets | Our Top Picks of All Time!

Best LEGO Creator Sets – Take Your Pick From These 7 Gems!

How to Use a Metal Detector: 8 Essential Tips to Get the Most of It

Best Metal Detector for Kids: 5 Top Picks (+ Buying Guide)

Best 2+ Player Cooperative Board Games (Top 6 in 2024)

MEL Chemistry Review: Is Your Child the Next Bill Nye?
17 Chemistry Experiments for Kids to Do at Home
By: Author Jacquie Fisher
Posted on Published: April 12, 2021
Categories Educational Activities , Kids Activities & Crafts , Science Experiments
Take a peek at these awesome Chemistry Experiments for Kids and Teens to do at Home !
Have your kids ever mixed baking soda & vinegar to blow up a balloon or make a volcano explode?!!
Maybe they’re fascinated by glow-in-the-dark experiments and LOVE the idea of using test tubes “like a real scientist”.
Raising a scientist doesn’t have to be hard — take a peek at these FUN chemistry activities & experiments that spin, glow & even use fire!

Chemistry Experiments for Kids to Do at Home
We are very BIG on doing science experiments & activities at home !
Whether we’re enjoying some outdoor science experiments or trying an indoor science activity (like these 20 Experiments You can do in a Jar ), I’ve quickly seen first-hand how science can build confidence, curiosity and the ability to think outside of the box for kids!
While both of our kids attended public school, I’ve learned that there is very limited time devoted to the science curricula at various grade levels and even when they are in specific science classes (such as biology & chemistry), there’s only so much that a teacher can cover during a 42 minute class period.
My kids always come home with questions — and ideas on expanding the activity, frequently asking “Can we try this at home?” or the familiar “I wonder what would happen if …”
So when our affiliate partner Kiwi Co reached out and asked if we’d like to receive one of their *brand new* Chemistry Crates to review for our readers, we jumped at the opportunity!

Tips for Choosing GREAT Science Experiments & Activities to do at Home
I’m very careful about our educational purchases — while I LOVE to encourage interest-led learning at home and have a variety of easy STEM activities on hand, we also have a limited budget.
So for us, if we make an educational purchase, there are three things I ask first:
1. Will we be able to use the items BEYOND the activity provided?
Basically, does the project include durable items that we can add to our science or learning areas.
2. Does the project include items that are difficult for me to obtain?
This is a biggie when it comes to science experiments — you can’t just walk into Michael’s or Home Depot and say “Can you tell me which aisle has the lithium chloride powder?” 🙂
3. Are there detailed instructions along with a ‘what’s behind the science’ explanation that’s clear for both kids & adults?
Let’s be honest here — we all did science a LONG time ago. And some of that science has changed (like the periodic table — which now has more elements than when we were in school).
So like most parents, I want very clear details on how to do the project along with information that’s going to explain why it works and answer all the questions my kids come up with while we’re experimenting.
Not too much to ask for, is it? 😉

This is why we really love the Kiwi Co crate options — whether it’s
- the Tinker Crate (which includes Engineering Projects for kids ages 9 – 16 years ),
- the regular Kiwi Crate (a variety of STEM activities for ages 5 – 8 years ) or
- the NEW Chemistry Crate options reviewed in detail below
— the activities & experiments ALWAYS go above and beyond our expectations!
Multiple science items you can use over & over?
Hard to find items included in the box?
Detailed instructions along with clear, science & STEM explanations?
Check & Check!
Let me give you a peek at the 3 different Chemistry Crate options available for kids & teens!

Chemistry Experiments with Fire
We’re going to begin with the Kiwi Co Fire Lab kit since so many kids & teens as fascinated with flames — and this is a really cool way to capture that interest in a controlled environment 😉
First, let me tell you that we frequently do our science activities outside — it’s just a thing with us. So many of the photos in this post were taken outdoors — HOWEVER, these experiments can be done inside or outside (I didn’t want to confuse anyone with the pictures).

Here’s an example of the detailed “behind the science” I referred to early in the post.
In every experiment and lab crate, you’ll find:
- a 40+ page full-color booklet that includes an introduction to the topic,
- science vocabulary and definitions,
- detailed instructions with pictures for each experiment and
- some variations on the experiment to try too!
PLUS, there’s also directions on how to set up and clean up each experiment — which my kids actually enjoy doing with these projects because there’s cute pictures, jokes and graphics involved (who knew that’s what got kids to clean up??!)

The COOLEST experiment we did from the Fire Lab was the Flame Test which is based on an actual test that’s used in real chemistry laboratories!
Kids will see how various chemical substances look when put under a flame — they actually burn in different colors!
Using the chemicals in the kit, we saw a green flame, red flame and pink flame — even Dad came over to see what the heck we were doing when he heard all the ooh’s and aaah’s (it was like mini-fireworks 🙂
Another thing we really like about the crates is that there are enough materials & chemicals included that you’re able to do the experiments more than once! A BIG bonus when something is popular with your kids.

And just as important as the science, you can also see in the photos that kids will learn how to:
- set up a science area with tools & materials and
- follow proper safety precautions (including gloves, goggles & having water on hand)
The Fire Lab includes :
- 7 flame & fuel experiments
- durable science items that you can use again including a mini-burner & burner bottle, pipettes, test tubes and even extra chemicals
- safety equipment such as a mess mat, goggles, gloves and more (safety items are included in every science box!)
ALL the materials you need for the projects are in the box — the only thing you’ll need to bring to the table is water!

Science Experiments with Chemical Changes & Reactions
The Vortex Lab is part engineering, part chemistry with a little bit of electrical circuits thrown in too!
The focus is on chemical changes, kinetics and chemical reactions. You may have seen our CO2 experiments with baking soda & vinegar — this lab covers what many kids think of as “chemistry” — mixing substances together.
This crate includes:
- 5 experiments (including a bonus at home experiment)
- an engineering project since kids have to build their own mixing machine
- durable lab equipment that you’ll use again including the mixing machines, beaker, 4 test tubes with tops and safety goggles + some cool chemicals too!
Kids will learn about chemical phases, solubility, oxidation and how heat can impact an experiment.
Many you will use again for other experiments & science activities!
My daughter’s favorite part of this lab was the detailed directions that include pictures and step-by-step instructions with great visuals especially for engineering the mixing machine!
She had no problem putting it together and could easily start and stop the experiments without losing her place. The first thing she said to me when she opened the instructions was “why don’t they use these at school labs?!” 🙂

In addition to science experiments, many of the kits also involved some type of additional STEM (tech, engineering or math) component too. Here’s an up close look at the electrical circuits that kids need to create when building the mixing machine.

And the directions are very detailed not only in how to put things together but also how to test the equipment along with including trouble-shooting tips in case it doesn’t work the first time.
Yes! It works!!

Once the mixing machine was up and running, we were able to work though a few of the experiments —
The Motion & Kinetics experiments allow kids to create a Vortex (ie. cyclone or tornado)!

The test tubes are used for the Heat & Kinetics experiments — kids will test how various water temperatures impact solubility and then create a chemical clock too!
You can purchase each of these lab boxes individually or buy all four Chemistry Sets at a HUGE discount (which is awesome!)
Now on to the Glow in the Dark Lab !!

Glow in the Dark Chemistry Experiments for Kids
This is another AMAZING science lab!!
First, you don’t have to take multiple trips to a variety of stores to find a black light and special chemicals — they are ALL included!
And so many kids LOVE the idea of florescence science!
It’s something we touched on during our Layers of the Ocean science activity with the deepest part of the ocean but the idea is SO much easier to explain when you can do a hands-on science experiment and actually SEE it in action!

Using the black light and chemicals included, kids can make their own glow in the dark liquids!
The Glow in the Dark Lab includes :
- 3 different types of glow in the dark experiments
- an engineering activity that teaches kids how to build a spiral stand
- durable science items that can be used for other activities such as a black light, 2 beakers and an Erlenmeyer flask !
- Plus all the chemicals, safety items, materials and booklet with instructions!

Here’s one of the other experiments where we create & then compare florescence liquid and phosphorescence liquid (yes, there’s more than one type of glow in the dark material 😉
The experiments are super in-depth and really help kids to grasp the scientific vocabulary and concepts covered in the labs!

You can get just one of the lab boxes or grab all four of them (at a discount!) in the full Chemistry Crate!
And one more awesome thing about Chemistry crates —

They’re delivered via snail mail 🙂
So one afternoon, your kids will find this awesome box on the front porch and know it’s time to burn, mix and create some amazing science!
More Science Experiments & Activities for Kids
27 Simple Science Experiments to Do in a Jar
Rocks & Minerals: The Vinegar Test
10 Cool Chemistry Experiments
ThoughtCo / Hilary Allison
- Projects & Experiments
- Chemical Laws
- Periodic Table
- Scientific Method
- Biochemistry
- Physical Chemistry
- Medical Chemistry
- Chemistry In Everyday Life
- Famous Chemists
- Activities for Kids
- Abbreviations & Acronyms
- Weather & Climate
- Ph.D., Biomedical Sciences, University of Tennessee at Knoxville
- B.A., Physics and Mathematics, Hastings College
Chemistry is king when it comes to making science cool . There are many interesting and fun projects to try, but these 10 awesome chemistry experiments can make anyone enjoy science.
Copper and Nitric Acid
When you place a piece of copper in nitric acid, the Cu 2+ ions and nitrate ions coordinate to color the solution green and then brownish-green. If you dilute the solution, water displaces nitrate ions around the copper and the solution changes to blue.
Hydrogen Peroxide with Potassium Iodide
Affectionately known as elephant toothpaste , the chemical reaction between the peroxide and potassium iodide shoots out a column of foam. If you add food coloring, you can customize the "toothpaste" for holiday-colored themes.
Any Alkali Metal in Water
Any of the alkali metals will react vigorously in water . How vigorously? Sodium burns bright yellow. Potassium burns violet. Lithium burns red. Cesium explodes. Experiment by moving down the alkali metals group of the periodic table.
Thermite Reaction
The thermite reaction essentially shows what would happen if iron rusted instantly, rather than over time. In other words, it's making metal burn. If the conditions are right, just about any metal will burn. However, the reaction usually is performed by reacting iron oxide with aluminum:
Fe 2 O 3 + 2Al → 2Fe + Al 2 O 3 + heat and light
If you want a truly stunning display, try placing the mixture inside a block of dry ice and then lighting the mixture.
Coloring Fire
SEAN GLADWELL / Getty Images
When ions are heated in a flame, electrons become excited, then drop to a lower energy state, emitting photons. The energy of the photons is characteristic of the chemical and corresponds to specific flame colors . It's the basis for the flame test in analytical chemistry, plus it's fun to experiment with different chemicals to see what colors they produce in a fire.
Make Polymer Bouncy Balls
Who doesn't enjoy playing with bouncy balls ? The chemical reaction used to make the balls makes a terrific experiment because you can alter the properties of the balls by changing the ratio of the ingredients.
Make a Lichtenberg Figure
A Lichtenberg figure or "electrical tree" is a record of the path taken by electrons during an electrostatic discharge. It's basically frozen lightning. There are several ways you can make an electrical tree.
Experiment with 'Hot Ice'
Hot Ice is a name given to sodium acetate, a chemical you can make by reacting vinegar and baking soda. A solution of sodium acetate can be supercooled so that it will crystallize on command. Heat is evolved when the crystals form, so although it resembles water ice, it's hot.
Barking Dog Experiment
The Barking Dog is the name given to a chemiluminescent reaction between the exothermic reaction between nitrous oxide or nitrogen monoxide and carbon disulfide. The reaction proceeds down a tube, emitting blue light and a characteristic "woof" sound.
Another version of the demonstration involves coating the inside of a clear jug with alcohol and igniting the vapor. The flame front proceeds down the bottle , which also barks.
Dehydration of Sugar
When you react sugar with sulfuric acid , the sugar is violently dehydrated. The result is a growing column of carbon black, heat, and the overwhelming odor of burnt caramel.
- Exothermic Reaction Examples - Demonstrations to Try
- 10 Amazing Chemical Reactions
- Sulfuric Acid and Sugar Demonstration
- How to Make Copper Acetate from Copper
- 10 Cool Chemistry Demonstrations for Educators
- Elephant Toothpaste Chemistry Demonstration
- Easy Chemistry Experiments to Do at Home
- Metal Projects That Help You Explore Chemistry
- Chemistry Experiments With Pennies
- Understanding Endothermic and Exothermic Reactions
- Science Projects Photo Gallery
- How to Make Potassium Nitrate
- How to Do the Color Change Chameleon Chemistry Demonstration
- Kid-Friendly Elephant Toothpaste Demo
- Chemistry Vocabulary Terms You Should Know
- Corrosive Definition in Chemistry
Choose Your Test
Sat / act prep online guides and tips, 37 cool science experiments for kids to do at home.
General Education

Are you looking for cool science experiments for kids at home or for class? We've got you covered! We've compiled a list of 37 of the best science experiments for kids that cover areas of science ranging from outer space to dinosaurs to chemical reactions. By doing these easy science experiments, kids will make their own blubber and see how polar bears stay warm, make a rain cloud in a jar to observe how weather changes, create a potato battery that'll really power a lightbulb, and more.
Below are 37 of the best science projects for kids to try. For each one we include a description of the experiment, which area(s) of science it teaches kids about, how difficult it is (easy/medium/hard), how messy it is (low/medium/high), and the materials you need to do the project. Note that experiments labelled "hard" are definitely still doable; they just require more materials or time than most of these other science experiments for kids.
#1: Insect Hotels
- Teaches Kids About: Zoology
- Difficulty Level: Medium
- Messiness Level: Medium
Insect hotels can be as simple (just a few sticks wrapped in a bundle) or as elaborate as you'd like, and they're a great way for kids to get creative making the hotel and then get rewarded by seeing who has moved into the home they built. After creating a hotel with hiding places for bugs, place it outside (near a garden is often a good spot), wait a few days, then check it to see who has occupied the "rooms." You can also use a bug ID book or app to try and identify the visitors.
- Materials Needed
- Shadow box or other box with multiple compartments
- Hot glue gun with glue
- Sticks, bark, small rocks, dried leaves, bits of yarn/wool, etc.

#2: DIY Lava Lamp
- Teaches Kids About: Chemical reactions
- Difficulty Level: Easy
In this quick and fun science experiment, kids will mix water, oil, food coloring, and antacid tablets to create their own (temporary) lava lamp . Oil and water don't mix easily, and the antacid tablets will cause the oil to form little globules that are dyed by the food coloring. Just add the ingredients together and you'll end up with a homemade lava lamp!
- Vegetable oil
- Food coloring
- Antacid tablets
#3: Magnetic Slime
- Teaches Kids About: Magnets
- Messiness Level: High (The slime is black and will slightly dye your fingers when you play with it, but it washes off easily.)
A step up from silly putty and Play-Doh, magnetic slime is fun to play with but also teaches kids about magnets and how they attract and repel each other. Some of the ingredients you aren't likely to have around the house, but they can all be purchased online. After mixing the ingredients together, you can use the neodymium magnet (regular magnets won't be strong enough) to make the magnetic slime move without touching it!
- Liquid starch
- Adhesive glue
- Iron oxide powder
- Neodymium (rare earth) magnet
#4: Baking Soda Volcanoes
- Teaches Kids About: Chemical reactions, earth science
- Difficulty Level: Easy-medium
- Messiness Level: High
Baking soda volcanoes are one of the classic science projects for kids, and they're also one of the most popular. It's hard to top the excitement of a volcano erupting inside your home. This experiment can also be as simple or in-depth as you like. For the eruption, all you need is baking soda and vinegar (dishwashing detergent adds some extra power to the eruption), but you can make the "volcano" as elaborate and lifelike as you wish.
- Baking soda
- Dishwashing detergent
- Large mason jar or soda bottle
- Playdough or aluminum foil to make the "volcano"
- Additional items to place around the volcano (optional)
- Food coloring (optional)
#5: Tornado in a Jar
- Teaches Kids About: Weather
- Messiness Level: Low
This is one of the quick and easy and science experiments for kids to teach them about weather. It only takes about five minutes and a few materials to set up, but once you have it ready you and your kids can create your own miniature tornado whose vortex you can see and the strength of which you can change depending on how quickly you swirl the jar.
- Glitter (optional)
#6: Colored Celery Experiment
- Teaches Kids About: Plants
This celery science experiment is another classic science experiment that parents and teachers like because it's easy to do and gives kids a great visual understanding of how transpiration works and how plants get water and nutrients. Just place celery stalks in cups of colored water, wait at least a day, and you'll see the celery leaves take on the color of the water. This happens because celery stalks (like other plants) contain small capillaries that they use to transport water and nutrients throughout the plant.
- Celery stalks (can also use white flowers or pale-colored cabbage)
#7: Rain Cloud in a Jar
This experiment teaches kids about weather and lets them learn how clouds form by making their own rain cloud . This is definitely a science project that requires adult supervision since it uses boiling water as one of the ingredients, but once you pour the water into a glass jar, the experiment is fast and easy, and you'll be rewarded with a little cloud forming in the jar due to condensation.
- Glass jar with a lid
- Boiling water
- Aerosol hairspray

#8: Edible Rock Candy
- Teaches Kids About: Crystal formation
It takes about a week for the crystals of this rock candy experiment to form, but once they have you'll be able to eat the results! After creating a sugar solution, you'll fill jars with it and dangle strings in them that'll slowly become covered with the crystals. This experiment involves heating and pouring boiling water, so adult supervision is necessary, once that step is complete, even very young kids will be excited to watch crystals slowly form.
- Large saucepan
- Clothespins
- String or small skewers
- Candy flavoring (optional)
#9: Water Xylophone
- Teaches Kids About: Sound waves
With just some basic materials you can create your own musical instrument to teach kids about sound waves. In this water xylophone experiment , you'll fill glass jars with varying levels of water. Once they're all lined up, kids can hit the sides with wooden sticks and see how the itch differs depending on how much water is in the jar (more water=lower pitch, less water=higher pitch). This is because sound waves travel differently depending on how full the jars are with water.
- Wooden sticks/skewers
#10: Blood Model in a Jar
- Teaches Kids About: Human biology
This blood model experiment is a great way to get kids to visual what their blood looks like and how complicated it really is. Each ingredient represents a different component of blood (plasma, platelets, red blood cells, etc.), so you just add a certain amount of each to the jar, swirl it around a bit, and you have a model of what your blood looks like.
- Empty jar or bottle
- Red cinnamon candies
- Marshmallows or dry white lima beans
- White sprinkles
#11: Potato Battery
- Teaches Kids About: Electricity
- Difficulty Level: Hard
Did you know that a simple potato can produce enough energy to keep a light bulb lit for over a month? You can create a simple potato battery to show kids. There are kits that provide all the necessary materials and how to set it up, but if you don't purchase one of these it can be a bit trickier to gather everything you need and assemble it correctly. Once it's set though, you'll have your own farm grown battery!
- Fresh potato
- Galvanized nail
- Copper coin

#12: Homemade Pulley
- Teaches Kids About: Simple machines
This science activity requires some materials you may not already have, but once you've gotten them, the homemade pulley takes only a few minutes to set up, and you can leave the pulley up for your kids to play with all year round. This pulley is best set up outside, but can also be done indoors.
- Clothesline
- 2 clothesline pulleys
#13: Light Refraction
- Teaches Kids About: Light
This light refraction experiment takes only a few minutes to set up and uses basic materials, but it's a great way to show kids how light travels. You'll draw two arrows on a sticky note, stick it to the wall, then fill a clear water bottle with water. As you move the water bottle in front of the arrows, the arrows will appear to change the direction they're pointing. This is because of the refraction that occurs when light passes through materials like water and plastic.
- Sticky note
- Transparent water bottle
#14: Nature Journaling
- Teaches Kids About: Ecology, scientific observation
A nature journal is a great way to encourage kids to be creative and really pay attention to what's going on around them. All you need is a blank journal (you can buy one or make your own) along with something to write with. Then just go outside and encourage your children to write or draw what they notice. This could include descriptions of animals they see, tracings of leaves, a drawing of a beautiful flower, etc. Encourage your kids to ask questions about what they observe (Why do birds need to build nests? Why is this flower so brightly colored?) and explain to them that scientists collect research by doing exactly what they're doing now.
- Blank journal or notebook
- Pens/pencils/crayons/markers
- Tape or glue for adding items to the journal
#15: DIY Solar Oven
- Teaches Kids About: Solar energy
This homemade solar oven definitely requires some adult help to set up, but after it's ready you'll have your own mini oven that uses energy from the sun to make s'mores or melt cheese on pizza. While the food is cooking, you can explain to kids how the oven uses the sun's rays to heat the food.
- Aluminum foil
- Knife or box cutter
- Permanent marker
- Plastic cling wrap
- Black construction paper

#16: Animal Blubber Simulation
- Teaches Kids About: Ecology, zoology
If your kids are curious about how animals like polar bears and seals stay warm in polar climates, you can go beyond just explaining it to them; you can actually have them make some of their own blubber and test it out. After you've filled up a large bowl with ice water and let it sit for a few minutes to get really cold, have your kids dip a bare hand in and see how many seconds they can last before their hand gets too cold. Next, coat one of their fingers in shortening and repeat the experiment. Your child will notice that, with the shortening acting like a protective layer of blubber, they don't feel the cold water nearly as much.
- Bowl of ice water
#17: Static Electricity Butterfly
This experiment is a great way for young kids to learn about static electricity, and it's more fun and visual than just having them rub balloons against their heads. First you'll create a butterfly, using thick paper (such as cardstock) for the body and tissue paper for the wings. Then, blow up the balloon, have the kids rub it against their head for a few seconds, then move the balloon to just above the butterfly's wings. The wings will move towards the balloon due to static electricity, and it'll look like the butterfly is flying.
- Tissue paper
- Thick paper
- Glue stick/glue
#18: Edible Double Helix
- Teaches Kids About: Genetics
If your kids are learning about genetics, you can do this edible double helix craft to show them how DNA is formed, what its different parts are, and what it looks like. The licorice will form the sides or backbone of the DNA and each color of marshmallow will represent one of the four chemical bases. Kids will be able to see that only certain chemical bases pair with each other.
- 2 pieces of licorice
- 12 toothpicks
- Small marshmallows in 4 colors (9 of each color)
- 5 paperclips
#19: Leak-Proof Bag
- Teaches Kids About: Molecules, plastics
This is an easy experiment that'll appeal to kids of a variety of ages. Just take a zip-lock bag, fill it about ⅔ of the way with water, and close the top. Next, poke a few sharp objects (like bamboo skewers or sharp pencils) through one end and out the other. At this point you may want to dangle the bag above your child's head, but no need to worry about spills because the bag won't leak? Why not? It's because the plastic used to make zip-lock bags is made of polymers, or long chains of molecules that'll quickly join back together when they're forced apart.
- Zip-lock bags
- Objects with sharp ends (pencils, bamboo skewers, etc.)

#20: How Do Leaves Breathe?
- Teaches Kids About: Plant science
It takes a few hours to see the results of this leaf experiment , but it couldn't be easier to set up, and kids will love to see a leaf actually "breathing." Just get a large-ish leaf, place it in a bowl (glass works best so you can see everything) filled with water, place a small rock on the leaf to weigh it down, and leave it somewhere sunny. Come back in a few hours and you'll see little bubbles in the water created when the leaf releases the oxygen it created during photosynthesis.
- Large bowl (preferably glass)
- Magnifying glass (optional)
#21: Popsicle Stick Catapults
Kids will love shooting pom poms out of these homemade popsicle stick catapults . After assembling the catapults out of popsicle sticks, rubber bands, and plastic spoons, they're ready to launch pom poms or other lightweight objects. To teach kids about simple machines, you can ask them about how they think the catapults work, what they should do to make the pom poms go a farther/shorter distance, and how the catapult could be made more powerful.
- Popsicle sticks
- Rubber bands
- Plastic spoons
- Paint (optional)
#22: Elephant Toothpaste
You won't want to do this experiment near anything that's difficult to clean (outside may be best), but kids will love seeing this " elephant toothpaste " crazily overflowing the bottle and oozing everywhere. Pour the hydrogen peroxide, food coloring, and dishwashing soap into the bottle, and in the cup mix the yeast packet with some warm water for about 30 seconds. Then, add the yeast mixture to the bottle, stand back, and watch the solution become a massive foamy mixture that pours out of the bottle! The "toothpaste" is formed when the yeast removed the oxygen bubbles from the hydrogen peroxide which created foam. This is an exothermic reaction, and it creates heat as well as foam (you can have kids notice that the bottle became warm as the reaction occurred).
- Clean 16-oz soda bottle
- 6% solution of hydrogen peroxide
- 1 packet of dry yeast
- Dishwashing soap
#23: How Do Penguins Stay Dry?
Penguins, and many other birds, have special oil-producing glands that coat their feathers with a protective layer that causes water to slide right off them, keeping them warm and dry. You can demonstrate this to kids with this penguin craft by having them color a picture of a penguin with crayons, then spraying the picture with water. The wax from the crayons will have created a protective layer like the oil actual birds coat themselves with, and the paper won't absorb the water.
- Penguin image (included in link)
- Spray bottle
- Blue food coloring (optional)

#24: Rock Weathering Experiment
- Teaches Kids About: Geology
This mechanical weathering experiment teaches kids why and how rocks break down or erode. Take two pieces of clay, form them into balls, and wrap them in plastic wrap. Then, leave one out while placing the other in the freezer overnight. The next day, unwrap and compare them. You can repeat freezing the one piece of clay every night for several days to see how much more cracked and weathered it gets than the piece of clay that wasn't frozen. It may even begin to crumble. This weathering also happens to rocks when they are subjected to extreme temperatures, and it's one of the causes of erosion.
- Plastic wrap
#25: Saltwater Density
- Teaches Kids About: Water density
For this saltwater density experiment , you'll fill four clear glasses with water, then add salt to one glass, sugar to one glass, and baking soda to one glass, leaving one glass with just water. Then, float small plastic pieces or grapes in each of the glasses and observe whether they float or not. Saltwater is denser than freshwater, which means some objects may float in saltwater that would sink in freshwater. You can use this experiment to teach kids about the ocean and other bodies of saltwater, such as the Dead Sea, which is so salty people can easily float on top of it.
- Four clear glasses
- Lightweight plastic objects or small grapes
#26: Starburst Rock Cycle
With just a package of Starbursts and a few other materials, you can create models of each of the three rock types: igneous, sedimentary, and metamorphic. Sedimentary "rocks" will be created by pressing thin layers of Starbursts together, metamorphic by heating and pressing Starbursts, and igneous by applying high levels of heat to the Starbursts. Kids will learn how different types of rocks are forms and how the three rock types look different from each other.
- Toaster oven
#27: Inertia Wagon Experiment
- Teaches Kids About: Inertia
This simple experiment teaches kids about inertia (as well as the importance of seatbelts!). Take a small wagon, fill it with a tall stack of books, then have one of your children pull it around then stop abruptly. They won't be able to suddenly stop the wagon without the stack of books falling. You can have the kids predict which direction they think the books will fall and explain that this happens because of inertia, or Newton's first law.
- Stack of books
#28: Dinosaur Tracks
- Teaches Kids About: Paleontology
How are some dinosaur tracks still visible millions of years later? By mixing together several ingredients, you'll get a claylike mixture you can press your hands/feet or dinosaur models into to make dinosaur track imprints . The mixture will harden and the imprints will remain, showing kids how dinosaur (and early human) tracks can stay in rock for such a long period of time.
- Used coffee grounds
- Wooden spoon
- Rolling pin
#29: Sidewalk Constellations
- Teaches Kids About: Astronomy
If you do this sidewalk constellation craft , you'll be able to see the Big Dipper and Orion's Belt in the daylight. On the sidewalk, have kids draw the lines of constellations (using constellation diagrams for guidance) and place stones where the stars are. You can then look at astronomy charts to see where the constellations they drew will be in the sky.
- Sidewalk chalk
- Small stones
- Diagrams of constellations
#30: Lung Model
By building a lung model , you can teach kids about respiration and how their lungs work. After cutting off the bottom of a plastic bottle, you'll stretch a balloon around the opened end and insert another balloon through the mouth of the bottle. You'll then push a straw through the neck of the bottle and secure it with a rubber band and play dough. By blowing into the straw, the balloons will inflate then deflate, similar to how our lungs work.
- Plastic bottle
- Rubber band

#31: Homemade Dinosaur Bones
By mixing just flour, salt, and water, you'll create a basic salt dough that'll harden when baked. You can use this dough to make homemade dinosaur bones and teach kids about paleontology. You can use books or diagrams to learn how different dinosaur bones were shaped, and you can even bury the bones in a sandpit or something similar and then excavate them the way real paleontologists do.
- Images of dinosaur bones
#32: Clay and Toothpick Molecules
There are many variations on homemade molecule science crafts . This one uses clay and toothpicks, although gumdrops or even small pieces of fruit like grapes can be used in place of clay. Roll the clay into balls and use molecule diagrams to attach the clay to toothpicks in the shape of the molecules. Kids can make numerous types of molecules and learn how atoms bond together to form molecules.
- Clay or gumdrops (in four colors)
- Diagrams of molecules
#33: Articulated Hand Model
By creating an articulated hand model , you can teach kids about bones, joints, and how our hands are able to move in many ways and accomplish so many different tasks. After creating a hand out of thin foam, kids will cut straws to represent the different bones in the hand and glue them to the fingers of the hand models. You'll then thread yarn (which represents tendons) through the straws, stabilize the model with a chopstick or other small stick, and end up with a hand model that moves and bends the way actual human hands do.
- Straws (paper work best)
- Twine or yarn
#34: Solar Energy Experiment
- Teaches Kids About: Solar energy, light rays
This solar energy science experiment will teach kids about solar energy and how different colors absorb different amounts of energy. In a sunny spot outside, place six colored pieces of paper next to each other, and place an ice cube in the middle of each paper. Then, observe how quickly each of the ice cubes melt. The ice cube on the black piece of paper will melt fastest since black absorbs the most light (all the light ray colors), while the ice cube on the white paper will melt slowest since white absorbs the least light (it instead reflects light). You can then explain why certain colors look the way they do. (Colors besides black and white absorb all light except for the one ray color they reflect; this is the color they appear to us.)
- 6 squares of differently colored paper/cardstock (must include black paper and white paper)
#35: How to Make Lightning
- Teaches Kids About: Electricity, weather
You don't need a storm to see lightning; you can actually create your own lightning at home . For younger kids this experiment requires adult help and supervision. You'll stick a thumbtack through the bottom of an aluminum tray, then stick the pencil eraser to the pushpin. You'll then rub the piece of wool over the aluminum tray, and then set the tray on the Styrofoam, where it'll create a small spark/tiny bolt of lightning!
- Pencil with eraser
- Aluminum tray or pie tin
- Styrofoam tray
#36: Tie-Dyed Milk
- Teaches Kids About: Surface tension
For this magic milk experiment , partly fill a shallow dish with milk, then add a one drop of each food coloring color to different parts of the milk. The food coloring will mostly stay where you placed it. Next, carefully add one drop of dish soap to the middle of the milk. It'll cause the food coloring to stream through the milk and away from the dish soap. This is because the dish soap breaks up the surface tension of the milk by dissolving the milk's fat molecules.
- Shallow dish
- Milk (high-fat works best)

#37: How Do Stalactites Form?
Have you ever gone into a cave and seen huge stalactites hanging from the top of the cave? Stalactites are formed by dripping water. The water is filled with particles which slowly accumulate and harden over the years, forming stalactites. You can recreate that process with this stalactite experiment . By mixing a baking soda solution, dipping a piece of wool yarn in the jar and running it to another jar, you'll be able to observe baking soda particles forming and hardening along the yarn, similar to how stalactites grow.
- Safety pins
- 2 glass jars
Summary: Cool Science Experiments for Kids
Any one of these simple science experiments for kids can get children learning and excited about science. You can choose a science experiment based on your child's specific interest or what they're currently learning about, or you can do an experiment on an entirely new topic to expand their learning and teach them about a new area of science. From easy science experiments for kids to the more challenging ones, these will all help kids have fun and learn more about science.
What's Next?
Are you also interested in pipe cleaner crafts for kids? We have a guide to some of the best pipe cleaner crafts to try!
Looking for multiple different slime recipes? We tell you how to make slimes without borax and without glue as well as how to craft the ultimate super slime .
Want to learn more about clouds? Learn how to identify every cloud in the sky with our guide to the 10 types of clouds .
Want to know the fastest and easiest ways to convert between Fahrenheit and Celsius? We've got you covered! Check out our guide to the best ways to convert Celsius to Fahrenheit (or vice versa) .

Christine graduated from Michigan State University with degrees in Environmental Biology and Geography and received her Master's from Duke University. In high school she scored in the 99th percentile on the SAT and was named a National Merit Finalist. She has taught English and biology in several countries.
Student and Parent Forum
Our new student and parent forum, at ExpertHub.PrepScholar.com , allow you to interact with your peers and the PrepScholar staff. See how other students and parents are navigating high school, college, and the college admissions process. Ask questions; get answers.

Ask a Question Below
Have any questions about this article or other topics? Ask below and we'll reply!
Improve With Our Famous Guides
- For All Students
The 5 Strategies You Must Be Using to Improve 160+ SAT Points
How to Get a Perfect 1600, by a Perfect Scorer
Series: How to Get 800 on Each SAT Section:
Score 800 on SAT Math
Score 800 on SAT Reading
Score 800 on SAT Writing
Series: How to Get to 600 on Each SAT Section:
Score 600 on SAT Math
Score 600 on SAT Reading
Score 600 on SAT Writing
Free Complete Official SAT Practice Tests
What SAT Target Score Should You Be Aiming For?
15 Strategies to Improve Your SAT Essay
The 5 Strategies You Must Be Using to Improve 4+ ACT Points
How to Get a Perfect 36 ACT, by a Perfect Scorer
Series: How to Get 36 on Each ACT Section:
36 on ACT English
36 on ACT Math
36 on ACT Reading
36 on ACT Science
Series: How to Get to 24 on Each ACT Section:
24 on ACT English
24 on ACT Math
24 on ACT Reading
24 on ACT Science
What ACT target score should you be aiming for?
ACT Vocabulary You Must Know
ACT Writing: 15 Tips to Raise Your Essay Score
How to Get Into Harvard and the Ivy League
How to Get a Perfect 4.0 GPA
How to Write an Amazing College Essay
What Exactly Are Colleges Looking For?
Is the ACT easier than the SAT? A Comprehensive Guide
Should you retake your SAT or ACT?
When should you take the SAT or ACT?
Stay Informed
Get the latest articles and test prep tips!
Looking for Graduate School Test Prep?
Check out our top-rated graduate blogs here:
GRE Online Prep Blog
GMAT Online Prep Blog
TOEFL Online Prep Blog
Holly R. "I am absolutely overjoyed and cannot thank you enough for helping me!”
17 No-Prep Science Experiments for the Classroom or Home
Categories Science Experiments
Science experiments are a lot of fun to do with kids, but it’s always frustrating to realize that many of them call for special ingredients.
It can be a hassle to get these supplies at any time, but particualrly right now!
Rather than skip science altogether, why not try these no-prep science experiments that require basic supplies that you probably already have at home!

If you like these science experiments you’ll also want to try these no-prep STEM activities for kids!
What is a no-prep science experiment?
A no-prep science experiment is an experiment that can be done with very little to no advanced set-up or planning.
These are science experiments you can do if you were to say, “you know what, I want to do a science demonstration today!”
You’ll have everything you need for these most likely at home or in your science classroom already, so there is no need to make a special trip to the store or prep things days in advance.

Most of these activities are science demonstrations, rather than true experiments, because they illustrate scientific concepts rather than explore a hypothesis.
Nevertheless, kids can learn a lot even without much advanced prep!
How can I used these low-prep science experiments in the classroom?
If you’re doing these experiments in the classroom, I suggest breaking the kids into groups for 4-5 for exploratory play.
Pick something that needs less oversight from a teacher, and that is a bit less messy than some science experiments.
Allow the kids to explore the experiment and process after you explain the concept, then have them record their data on a science experiment worksheet!

How can I do these no-prep experiments at home?

If you’re doing science experiments at home , I suggest doing these experiments in the kitchen, or even outside.
Kids can make things messy fast, so doing the experimetns in a mess-safe environment will keep your sanity.
Find out a bit about the science behind the activity before starting so that you can share the experiment highlights as your kids work through the experiments.
What do I need for no-prep science activities?
You’ll find these supplies helpful for completing these low-prep experiments. These are affiliate links.

17 Exciting and Fun No-Prep Science Experiments for Kids

Now that you’re all set to do no-prep science experiments, here are some of our favorites!
Try one today, or plan a whole week of science for a fun science camp theme!
Did you know that cold water is denser than warm water? See it in action in the temperature water density experiment.
All you need is an egg and a candle to do the silver egg science experiment!
Learm how trees make oxygen using a jar, water, and a leaf!
All you need to make a fizzing rainbow is baking soda, vinegar, and food coloring or watercolors!
Try the non- newtonian fluid experiment and learn about Non-Newtonian fluids.
Walking water is a funny name for this surface tension and capilary action science experiment. All you need is food coloring, paper towels, and water!
Kids have to try the baking soda and vinegar reaction at least once a year. All you need is… baking soda and vinegar. But dish soap helps!
Use whatever you have on hand to make a liquid density tower !

If you have whole milk, you can do this milk surface tension experiment . If you don’t have milk, just use pepper and water!
Pencils and plastic baggies are all you need to do the leak-proof bag experiment.
Make your very own tornado in a jar with some water and a jar.
If you have ice and a jar, you can create a real cloud in a jar !
With whipped cream or shaving cream and food colloring you can make a raincloud in a jar and learn about the water cycle.
You don’t need anything for this dissecting a flower activity, other than a flower!
With some pennies, salt and vinegar, spend the afternoon turning pennies green and learning abotu chemical reactions!
Have a balloon and some tape? You can do the laminar flow experiment.
All you need for the pencil refraction experiment is a pencil and a clear jar or glass.
Where to Buy Supplies for Science Experiments
We like to get our supplies at the grocery story, and we find a lot of cool stuff on Amazon, too! Below is a list of some of our favorite science experiment kits and STEM resources for kids.
My Favorite STEM Products for the Preschool Classroom
These STEM products are perfect for the preschool STEM classroom!

Homer Technology App for Kids 4-6

Mel Science Classroom STEM Kits

Classroom Balance Buckets

Primary Sorting Classroom Bundle

Transparent Color Cubes

Clixo Rainbow Classroom Pack

Pet Home STEM Challenge

Stacking Mirror Blocks

Magnification Blocks

Gravity Physics Tubes

Specimen Viewers Classroom Set

Share this project with a friend!


Homemade Chemistry – Household Chemical Reaction Experiments for Kids
Krystal DeVille
Updated on: July 30, 2023

You don’t always need a laboratory to carry out science experiments.
In fact, how about educating your kids with some household chemical reaction experiments? Here’s a list of some interesting hands-on activities that talk about different chemical reactions.
Table of Contents
9 Simple Chemistry Experiments for Your Kids to Try at Home
1. bubble power.

What You’ll Need:
- A plastic bottle
- 150 ml of hot water
The Process:
Take the plastic bottle and add three tsp of dry yeast and two tsp of sugar into it.
Now, start pouring hot water into the bottle slowly.
Cover the bottle with a balloon and wait for around half an hour.
What did you see? The balloon expands, and the liquid starts to foam. As the yeast mixes with sugar and releases carbon dioxide gas, you’ll see many bubbles rising to the surface, causing foamy liquid and balloon inflation. This is called the fermentation process.
2. Soot Experiment
Light the candle and hold the knife in the center of the flame for a few seconds.
Did you see the blade turning black? Keeping the blade in the flame leads to incomplete combustion of paraffin that is present in the candle. This produces carbon particles that eventually cover the blade.
3. Dry Ice Smoke Experiment
- Dry ice (solid carbon dioxide)
- A large container or bowl
- Preparation : First, make sure to handle dry ice with care. It’s extremely cold (-78.5 °C or -109.3 °F), so use gloves or tongs to handle it. Adult supervision is a must here.
- Add Warm Water : Fill a large container or bowl with warm water.
- Add Dry Ice : Using gloves or tongs, place a piece of dry ice into the warm water.
- Observe the Fog : You’ll see a thick fog start to form. This is actually a cloud of tiny water droplets condensing from the water vapor, as the dry ice sublimates directly from a solid to a gas (carbon dioxide).
- Optional Enhancement : You can add a few drops of dish soap to create bubbles filled with fog, or add food coloring for a visual effect.
Safety Considerations:
- Always handle dry ice with care, using gloves or tongs.
- Adult supervision is needed, especially when handling the dry ice.
- Dry ice should never be enclosed in a sealed container, as it can build up pressure and explode.
- Make sure the area is well-ventilated, as the carbon dioxide gas could displace oxygen in a confined space.
4. Vinegar Power

Take a glass and place an eggshell into it. Fill half of the glass with vinegar.
Wait for 12 hours and observe the change.
As vinegar is acidic, it breaks down various substances (like calcium carbonate) present in the eggshell. This causes the eggshell to dissolve in the vinegar.
I go more in-depth about this and have a dedicated article step-by-step here, How to Make An Eggshell Disappear Science Experiment .
5. Color Experiment

- Copper coin (a penny will work fine even though they are mostly zinc)
- Ammonia solution
The Process :
For this chemical reaction experiment, take a dark-coated copper coin. Pour ammonia solution over it. You’ll see the solution turning blue. When copper comes into contact with ammonia under the influence of oxygen, it forms a complex compound that results in a color change.
6. Fire Experiment
- Potassium permanganate crystals
Use potassium permanganate crystals to make a small hill-like structure.
Create a hollow in it and pour glycerin (add only a little quantity).
In case there’s no fire, add one or a maximum of two drops of water.
You’ll see the mixture catching fire as there’s a chemical reaction between potassium permanganate and glycerin.
7. Skittles Experiment

- Skittles (or any other such coated sweets)
- A plate or container (preferably white)
Take a white container or plate and arrange your skillets (or any other coated sweets) over it. Try to arrange them with alternate colors.
Now, pour the warm water into the container slowly. Push the skittles back into their place if they happen to move due to water.
Observe what happens next.
Skittles are coated with sugar and food coloring. So, as soon as you pour water over them, the sugar and color will start to dissolve and spread along through the water, giving you a colorful effect.
8. Invisible Ink Experiment
- Cotton swab
Take a glass, squeeze some lemon juice and mix it with a few drops of water.
Now, dip a cotton swab into the mixture and write something on the paper with it.
Allow the paper to dry. Once dry, hold it over the burning candle. Did you see the text? Is it magic?
The answer is – as lemon juice contains acid, it darkens at high temperatures. So, when you bring the paper closer to the burning candle, you see the text appearing.
9. Mint Candy Fountain

- Mint flavored candies
- A 2-liter bottle of soft drink
- A tube or a piece of paper
Caution: Carry out this household chemical reaction in an outdoor area, preferably your backyard.
Open the soft drink bottle and place it on the flat surface, so it does not tip over. It’s recommended to place the bottle in an area that is not surrounded by anything.
Now, take the paper, roll it up in the cylinder-shape. Make sure that the width is enough for the candies to slide through.
Seal the bottom of the roll with your hand and add the candies to the paper tube.
Hold the paper tube above the soft drink bottle and slide your finger in a way that the candies drop straight in. Drop all the candies in the bottle at the same time and move away from the bottle as fast as possible.
The carbon dioxide gas in the bottle does not form bubbles until you open the bottle. But the gas will escape with force while spilling some soft drink out if you open the bottle immediately after shaking it. So, adding anything to the soft drink will promote bubble formation while forcing it to escape.
Now, as you drop the mint candies in the drink, it offers a lot of surface area for the bubbles to form in huge numbers. So, as it begins to dissolve, it pushes the entire content, resulting in an incredible soft drink blast.
My kids really enjoyed trying other things to see if they can get a bigger reaction, sand surprising works great.
I put together a big list of Messy STEM Science Experiments for Kids.

Final Thoughts
Aren’t these household chemical reaction experiments worth a try? They’ll not only keep your kids engaged but will also help them learn some amazing chemistry lessons in the comfort of your home. If you’re looking for some interesting chemistry experiment kit for your kid, you may want to check out – Colorful Chemistry .
For many of these, all you need is a variety of household cleaning products you probably already have stocked at home. When doing any experiment, make sure the proper precautions are also taken to avoid any possible toxic fumes or combustion reactions.
Have you tried any of these experiments before? What was the result? Did your kids enjoy it? Do share your experience with us in the comments.
Leave a Comment Cancel reply
Save my name, email, and website in this browser for the next time I comment.
most recent

Activities and Games , Toy Gift Guides
Best stem subscription boxes for kids: hands-on reviews.

Engineering , Math , Science , Technology
Charlotte mason vs maria montessori: comparing educational philosophies.

Activities and Games , Engineering , Math , Science , Technology
The role of informal learning environments in stem education.

Activities and Games
Magnetic tiles vs traditional blocks: a comparative analysis.

Why Can’t I Sleep? How Insomnia Is Plaguing the World

8 DIY Natural Moisturizers That Will Leave Your Skin Feeling Amazing

47 Influential Black History Month Quotes To Inspire and Empower
STEM Education Guide
[email protected] STEM Education Guide 9125 SVL BOX Victorville, CA 92395
Your Compass for STEM Discovery
© 2024 STEM Education Guide
Latest information about COVID-19

At-home chemistry kits allow students to create lab experiences remotely
Stanford chemistry team delivers hands-on learning to remote students.
When it became clear last spring that in-person classes and labs would no longer be possible due to COVID-19, Jennifer Schwartz Poehlmann, senior lecturer in the Department of Chemistry, started brainstorming. She wanted to explore how to maintain the integrity and rigorous hands-on learning that were part of the introductory undergraduate chemistry sequence she had been teaching in the School of Humanities and Sciences for the last 10 years.
“I believe students have to have hands-on chemistry if they're going to understand it,” Poehlmann said. “When we went into remote mode, students didn't have that opportunity to interact with, observe, and learn from these phenomena firsthand.”

For many students, this sequence is the gateway to future chemistry classes, whether they become chemistry majors, engineers, pre-medical students, or pursue other majors.
In an effort to bring some kind of hands-on experience to summer-quarter remote learners, Poehlmann and lab manager Amanda Nelson spent much of March scouting out available lab kits on the market. But they determined that the pre-packaged kits were not only unaffordable for college students, they did not match their full learning objectives and would have required the chemistry team to change the curriculum.
Laboratory courses regularly include fees to cover materials, and Poehlmann and Nelson hoped to provide a lab kit without substantially increasing costs for students.
“Stanford already has a preeminent laboratory design that has been developed over the last decade by our professors and lecturers as an integral part of the course to make some of the most abstract chemical concepts tangible,” Nelson said. “In short, third-party, hands-on products didn’t match our curriculum and were more expensive.”
So they decided to create their own kits.
Designing the Kits
Creating and mailing a kit that would be affordable and appropriate for at-home experiments turned out to be a huge undertaking. First, Nelson had to identify and locate lab supplies, including plastic beakers and a test tube set that wouldn’t break in the mail.
“Then, there was the Mt. Everest of challenges: safety,” said Nelson. Working closely with Stanford’s office of Environmental Health and Safety (EH&S), Poehlmann and Nelson redesigned the experiments to be educationally engaging but included materials that were safe and stable enough to accommodate a variety of home environments.
Because students might have younger people in their households, the team also planned for the chemicals to be in small quantities, packaged in child-proof containers. They also needed to ensure that the chemicals used in the household “labs” could be safely disposed.
Finally, their proposal was approved. “In the final weeks of spring quarter, we prepared, packed, and shipped 25 kits in a matter of days,” Nelson said.
A Successful Experiment
Students enrolled in the General Chemistry 31A–B sequence this summer have been able to do experiments at home using non-hazardous salts such as calcium chloride and baking soda, Milk of Magnesia, and cabbage powder from their kits. The cabbage powder is a colorful addition, as it changes color based on the reaction occurring.
“It's made from boiled cabbage, and you can concentrate it,” Poehlmann explained. “So anytime a reaction occurs—whether it’s slightly acidic or basic, or even if it's neutral, the cabbage powder indicator changes color. It gives a beautiful visual that helps to illuminate the chemistry that students are observing.”
The entire class, including the laboratory sections, takes place over Zoom, so students are running their experiments at the same time as their peers, with their instructor and teaching assistants virtually present. With a small group participating this summer, the class is taught mid-day Pacific Time, which has worked for the participants.
The teaching assistants, who have been cleared to be in laboratories on campus, demonstrate the more complex or hazardous parts of experiments that might require additional safety precautions such as a laboratory hood for ventilation or special waste disposal.
For instance, to explore periodic trends in metals reactivity, the home kit includes small pieces of calcium and magnesium. But the lab, as originally designed, includes testing lithium, sodium, and potassium as well. These are so highly reactive in pure metal form that they can catch fire when they interact with water, therefore those materials could not be sent to students. Instead students conduct the first two experiments with calcium and magnesium at home and then observe the TA’s remotely as they carry out the reactions with the more reactive metals in the lab.
The students also have their own scale, stir plates, pH and conductivity meters, graduated cylinders for making precise measurements, and balloons, which are used in several different experiments, including one that demonstrates the three-dimensional structures of molecules.
The hard work of bringing the kits to fruition has been rewarded by the feedback of students. “It's been nice to have a more practical, hands-on experience with chemistry in our own homes,” said rising sophomore Amaris Lewis, who is at home in New Orleans, LA. “As I'm doing things like preparing or heating solutions, it helps to be doing these step-by-step processes myself, and understanding why experiments are done in such a specific way really helps concepts from lecture come to life.” Perhaps the biggest advantage of having undertaken the huge effort of sending the kits to students this summer is the leg up it gives the teaching group in preparing for fall quarter.
During the school year, students in both General Chemistry 31A–B and those in 31M, Chemical Principles: From Molecules to Solids , will benefit from the home kits. And sections will be taught at various times throughout the day to help accommodate students who are in other time zones.
“The course enrollment in the fall is generally 300–400 students,” Poehlmann explained. “One reason we piloted it this summer was with the knowledge that we would almost certainly be teaching students remotely in the fall. A lot of them are going to be freshmen, and we wanted to make sure they had a really great first experience as they're coming into chemistry and the university in general.”
- Natural Sciences

2024 cohort of Stanford Science Fellows named
- Interdisciplinary

In the Shadow of Liberty by Ana Raquel Minian, History

Rachel Jean-Baptiste awarded 2024 David H. Pinkney Prize

Joel Cabrita receives National Institute for the Humanities and Social Sciences book award
© Stanford University, Stanford, California 94305
Chemistry Hall
Chemistry hall – from cutting-edge research highlights to educational resources.

Awesome and Easy DIY Science Experiments to Do at Home
January 18, 2020 By C. Hall Leave a Comment
For many, the idea of science is lost on them. They may not think it’s possible to do anything fun at home or may worry that their kids aren’t going to be impressed. However, there are many science experiments to do at home with your kids.
Although we usually focus on just chemistry experiments , sometimes in specific experiments to run with your kids you can find many things, but electronics, physics, and chemistry are three of the most popular types available. Also, if you are an adult and a science enthusiasts, there are also pro experiment kits available for you .
The good news is that you can find cool experiments to do at home with household items. That means you don’t have to spend a lot of money and can raid the kitchen for the things you need.
Diet Soda and Mentos Volcano
This one’s a classic.
If you’re looking for cool science experiments, then this is the right one for you. Just remember that it can be quite messy, so you should do it outside or in the bathroom where it is easier to clean. However, it is non-toxic, so it’s safe for kids.
What You Need for this Science Experiment
- Test tube/sheet of paper
- Diet soda in a 2-liter bottle
- Roll of Mentos candy
- Mop (to clean up)
The first step is to gather all of your supplies. It is possible to substitute other candy for the Mentos, but they do work better. Regular soda can also be used, but the eruption is likely to be much stickier.
Stack the candies. To do that, you should use a sheet of paper or test tube to form a single column of candy. Put the index card over the sheet of paper at the end so that the candy doesn’t fall out before you’re ready for it.
Open the bottle of diet soda. Remember that the eruption is going to happen fast. Make sure things are set up and that you can back away after releasing the candy.
Once you’re ready, put the roll of candies over the bottle and remove the index card to release them. Let the eruption begin!

Why It Works
Whether it’s for a school project or you’re looking for science experiments for high school kids, this project is excellent. It works because of a physical process instead of a chemical reaction.
Soda has a lot of carbon dioxide dissolved, giving it the fizz. When Mentos are added, the bumps on the candy’s surface allow more carbon dioxide to stick (as we covered in one of our 100 chemistry facts ).
More and more of these molecules are going to accumulate, creating bubbles. The candy is heavy and sinks, so it interacts with the carbon dioxide down to the bottom while the bubbles expand as they start to rise. The accumulation of bubbles while the candy starts dissolving, results in the formation of foam.
With all that pressure, a geyser erupts, and the foam is funnelled through the narrow opening.
Building a Hovercraft Vehicle
If you want amazing science experiments with everyday materials, then consider making a hovercraft. This focuses on physics because the device glides over a flat surface without falling from gravity. It works by moving cushions of air, which are created by fans at the back of the vehicle. There is a skirt beneath it, which traps air and causes it to rise. An engine and fan propel it forward. Instead of a fan here, it uses a balloon.
You’re going to need:
- A CD (Compact Disc)
- Pop-top cap from a dish soap or water bottle
- Hot glue gun
Glue the bottle cap over the CD’s center hole and let it dry. All the edges of the CD’s inner hole should be sealed. Next, push the pop-top closed. Now, blow up the balloon, holding it to prevent air from escaping. Stretch the balloon’s mouth over the cap without losing any air. Adjust your balloon so that it stands centered and straight.

Set your newly made hovercraft on a table and open up your pop-top. Nudge the device a little and let it go.
Building an Electric Motor
Most people think of motors in cars, but they’re in your home. For example, if you have a washing machine, refrigerator, or use a fan, they all have motors. You can make a simple motor for an electronics science experiment, and you only need a couple of magnets ( neodymium magnets , usually employed for magic tricks, are pretty cheap) and a few other things.
You’re going to need a few things that you might have to purchase. They include:
- Magnet wire (about 50 inches)
- Neodymium magnets (3)
- Jumbo paper clips 1.5-2 inches long
- Dowel, ½ inch in diameter (or the cap from a felt-tip marker)
- Cardboard (2×3 inches)
- C-cell battery (2)
- Masking or electrical tap
How to Build Your Own Electric Motor at Home
At one end of your magnet wire, measure 1.6 inches and start winding it about 10.5 times around your cylinder. Cut it with scissors, leaving 1.6 inches free. You must do this evenly and neatly. If it’s not, the weight isn’t going to be distributed evenly, and the experiment isn’t going to work correctly.
Slide your magnet loops off of the cylinder. The coil could look square or circular at this point. Make sure the loops stay bunched together. Thread the free ends of the wire through the coil loops at the 9 and 3 o’clock positions. Make sure the wire ends are straight. This is the axle on which the electromagnet is going to spin.
If necessary, remove the insulating enamel coating from the ends of your wire to create an electrical contact between the support and axle. You can use the sandpaper to do this. Don’t press too hard because the wire might break. Make sure that on the right axle, you only strip half of the coating off the top. On the left one, remove all of the coating.
Bend your two paperclips to create the structure shown below:

Tape one paperclip to the positive end of your C battery. Make sure the bigger loop goes around the bump and secure it with tape. Secure your other paperclip to the negative end in the same way. Tape this one in place.
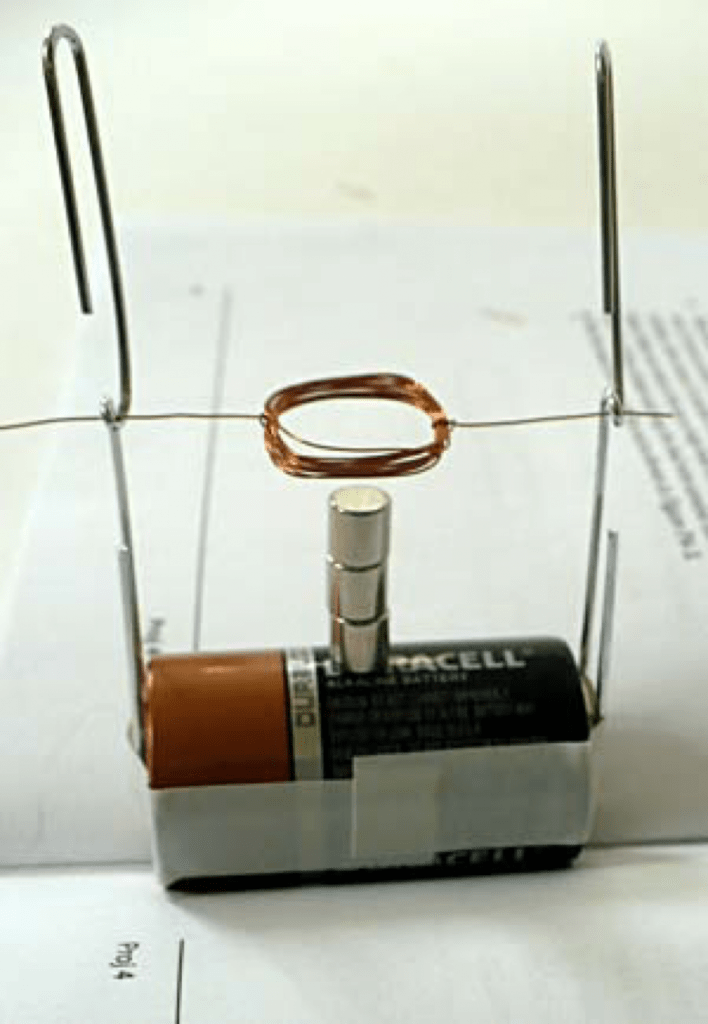
Open a book and balance the battery in the folds, so the axle supports face upward. Put three small neodymium magnets on the battery on top of each other in the middle. Insert the axle ends into the loop of the support. Let the motor run!
A video is worth a thousand words, so here you go:
It can be quite fun to try out science experiments for kids at school. We provided three different options, including electronics, chemistry, and physics.
Some are easier than others, but they can all be used to teach your children about science while they have fun.
If you want to move one step further, gear up and get one of the best science kits for teens out there. Stay tuned for reviews of kits for kids and adults. For sure this is a great way to engage in educational activities: always be on the look for fun DIY easy science experiments to do at home!
And finally, by all means, do reach out in the comments if you have any ideas or suggestions !
Related Posts:

Leave a Reply Cancel reply
Your email address will not be published. Required fields are marked *
This site uses Akismet to reduce spam. Learn how your comment data is processed .
AFFILIATE DISCLAIMER
Privacy overview.
- Video Explanations
- Printable Worksheets
- ArgoPrep for Families
- ArgoPrep for Educators
- Promoting Learner Variability
- Purchase Workbooks
- SHSAT Program
- What is SHSAT?
- Reading Comprehension
- SHSAT Test Dates
- SHSAT Test FAQ
- SHSAT Practice Test
ENTER BELOW FOR ARGOPREP'S FREE WEEKLY GIVEAWAYS. EVERY WEEK!
FREE 100$ in books to a family!
10 Exciting and Educational At-Home Science Experiments
Use the scientific method, create instant ice, dissolve an egg shell, grow a carbon sugar snake, make your own chalk out of this breakfast ingredient, turn milk into plastic, become a professional coin cleaner, make moon craters, create salt crystals, grow your own rock candy, argoprep can help make science experiments fun.
Science experiments at home is one of the easiest ways to demonstrate complex topics to kids. Plus, they’re fun and engaging for kids of all ages.
We have compiled some of the best at-home science experiments that you can use to enrich your at-home learning experience!
All of these experiments are fun to do, but before beginning, remember to go through the scientific method to ensure that the experiment is educational (as well as fun!).
Have your child create a hypothesis and make predictions before beginning. Then, have them extend their learning, but testing their hypothesis further with additional questions after they complete the experiment.
Happy learning!
10 Science Experiments to Try Today

Did you know that purified water (or water without any particles in it) takes longer in the freezer to become solid? That’s part of what makes this science experiment at home so much fun to do.
Beginning with a bottle of purified water put the unopened bottle into the freezer for a little less than three hours. When you pull the bottle out of the freezer, you’ll notice it’s well-chilled but not solid.
Next, place ice onto a plate. Using your ultra-chilled purified water, slowly pour the water directly onto the ice cubes.
What happens next will appear to be true magic as the ice begins to grow right before your eyes!
Science Experiment Explained
So is the ice growing, or is Elsa hiding somewhere in the background magically creating it? Neither! Since purified water is void of all impurities, it won’t freeze as quickly. However, when added to the ice cube, the ice serves as the nuclei for the water. This allows the water to freeze instantly!

For this experiment, you will need an egg, vinegar, and a jar.
Fill the jar with vinegar and gently add the raw egg. Make sure there is enough vinegar to cover the egg completely.
It will take two days for the entire experiment to work. After about 12 hours, you will notice a white foam at the top of your jar– that’s the eggshell!
After two days, gently remove the egg from the vinegar and rinse.
Now you have an egg without a shell! You can safely bound the egg (within 1-2 inches of its landing spot).
For added excitement, place the naked egg into a cup of water and see how much more it will grow! Since the egg is predominantly water, there is more room for it to grow.
Vinegar is an acid, which allows for it to dissolve the calcium carbonate shell. Since the egg is protected by two fragile membranes, the egg will still be contained once the shell dissolves.

Hey parents! This experiment requires lighter fluid and, you guessed it, fire. It’s probably a great experiment to do outside with close supervision.
In a bowl, combine 4 teaspoons with 1 teaspoon of baking soda. In a disposable tin, fill with sand and make a small mound in the center.
Pour lighter fluid on the mound and make sure the sand is well saturated.
Spoon the sugar and baking soda mixture onto the mound.
Carefully light the sand near the sugar mixture. As the mixture mixes with the fire, the snake will begin to grow! It’s a slow process, so be patient! It can take up to 20 minutes for the full effect to take place.
Numerous reactions are happening in this experiment to work. First, the sugar burning mixed with the oxygen creates carbon dioxide gas and water vapor. This reaction causes the sugar and baking soda to continue to push upwards to the fresh air.
This solid carbon now gives the snake some shape and also gives the snake its black color.
Lastly, the baking soda also decomposes in the heat, producing solid sodium carbonate and carbon dioxide gas, and water vapor. Altogether, these three reactions produce both the solid components of the snake (carbon and sodium carbonate) and hot gases (CO2 and water vapor) that expand and inflate the snake up and out of the sand bowl.”
Finally, the sand serves as the heating plate for the entire reaction. It allows the heat to be evenly distributed,, allowing for the steady burn that allows your snake to grow.

Have a lot of egg shells laying around? This activity is fun to create and even more fun to play with. Starting with 10 clean and dry eggshells, crush the shells into a fine powder (this could easily be done with a food processor).
Add two teaspoons of flour to your eggshells and slowly add hot water until you create a still paste.
Add food coloring to the paste and form into a shape (with either ice cube trays or by rolling the paste into a paper towel).
Let the stick of paste dry completely and you will have a fully functional stick of chalk!

For this experiment, you will need a measuring cup, 1 cup of milk, a mug and microwavable container, paper towels, and a spoon.
Heat your milk in a microwavable container (about 5 minutes on 50% power). The milk should be hot chocolate temperature.
Once warm enough, add 4 tablespoons of vinegar into the mug. Begin stirring until small curbs begin to form.
Layer paper towers until thick on a surface that can get wet (like a plate).
Spoon the curds from the milk and place onto the paper towels, pressing the towels on top of the curds to get the extra moisture out.
Being kneading and molding the curds into any shape, you have successfully created Casein Plastic. The plastic will dry and fully harden within 48 hours.
All plastics are built with repeated molecules called polymers. The protein in milk, called Casein, undergoes a reaction when added to acid. This reaction changes the Casein and reorganizes the molecules into the curdles and eventually creates the polymer Casein Plastic.

Gather dirty copper coins (at least 6) and add one to mixtures of the following solutions, 1/4c each:
- Apple Juice
- Vinegar and Salt
Properly label each mixture and allow the coin to sit in the mixture for 10 minutes. After 10 minutes, remove the coins and wash off.
Observe the coins: which one is cleanest? Which one is the shiniest? Was the result what you expected?
When copper interacts with oxygen, it starts to tarnish (or get dirty looking). To clean the copper, you must put it into acid to break down the oxidation. The vinegar is effective as breaking down the oxidation but so is the ketchup (since there is acid in vinegar and tomatoes). The clear winner will be the vinegar and salt combination, since the mixture creates hydrochloric acid– a more acidic vinegar!

In a small cake pan, add about an inch of flour. Then lightly add sprinkles, next sift cocoa power over the top of the flour and sprinkles, covering the surface completely.
Using a rock, create craters in the surface by dropping the rock from various heights above the pan.
To extend the experiment try dropping differently sized rocks and from different heights to observe how the craters size changes.
The three layers of the flour, sprinkles, and cocoa create the layers of the moon’s surface. This activity will help illustrate how space rocks that impact the moon affect the surface through the creation of craters.

For this science experiment, keep any turkey or chicken bones from aside after a meal. Make sure the bones are clean of any meat, and test the bone to ensure that it doesn’t bend easily.
Next, add the bone to a jar filled with vinegar and cover it. Leave the bone in the vinegar for three days. Remove the bone, rinse, and try bending it — does it bend more easily now?
You have now created a rubber bone!
As we already have covered, vinegar is an acidic liquid that dissolves calcium. Since bones are predominantly made of calcium, when it’s submerged in vinegar, the calcium dissolves.
Now you know why you’re always told to drink milk to get strong bones! The more calcium you consume, the stronger you will be!

Collect small rocks and wash them. Then dissolve 1/4 cup salt into 1/2 cup of boiling water. Stir the salt until it is nearly dissolved, then pour over the rocks (in a small pan) and let dry.
This experiment, much like the rock candy experiment, uses the over saturation of salt in water to create the crystals. As the water dissolves, the salt will be left behind on the rocks, creating a unique experiment.

This experiment is a great way to teach kids about the crystallization process. To get started, all you need is water, sugar, a clothespin, a pot, and some wooden skewers (you can also grab some food dye to make the crystals even more beautiful).
Bring two cups of water to a boil in the pot on the stove. Next, stir in 4 cups of sugar, stirring until the sugar dissolves (if you want to add flavor, now is the time to do it! I recommend vanilla or root beer extract).
Allow the mixture to cool for 15 – 20 minutes. While you’re waiting, saturate your skewers in water and roll them in granulated sugar. Set the stick aside to allow for the sugar to dry completely to the sticks.
Once the sugar solution has cooled completely, pour the solution into jars and insert the sugar-covered skewers into the jars. You must make sure that the stick is not touching the jar.
Secure the top of the stick with the clothespin and cover the glass’s top with a paper towel.
Set the jars aside in a cool and quiet place where they will grow for the next two weeks. The crystals can break if there is too many loud noises or movement. When you are happy with your crystals (in about 10-14 days), remove the stick from the mixture to dry and enjoy!
Science Experiments Explained
The magic of rock candy happens in the cooling of the solution. Since it’s supersaturated with sugar (remember the ratio is 4:1), as the temperature decreases, the sugar comes out of the solution and forms the crystals.
Science is one of the most fun subjects in school and it’s easy to see why. With experiments like these, kids can often forget they’re even learning! Are you looking for more ways to include science in your child’s life? ArgoPrep has created award-winning science workbooks to enrich science education at any age. Filled with fun and interactive practice, your child will see improvements in their understanding in as little as 20 minutes per day!
Shipping calculated at checkout.
- - Unlimited access to all K8 printable worksheets and answer sheets.
- - Premium access to K-8 Math and ELA Video Lectures, Drills and Practice questions.
- - Progress tracking for your child.
- - One premium access to all family members!
- Go to US Navigation
- Go to Science at Home Navigation
- Go to Page Content
- Go to Search
- Go to Contact Information
- Go to Site Map
- United States
Science at Home
- EXPERIMENTS
3M is committed to helping students and teachers learn STEM in fun and creative ways.

3M’s Science at Home makes learning fun with engaging and educational DIY science experiments for children ages 6-12.
These simple, at-home experiments conducted by 3M scientists use common household items and are designed to reinforce core scientific principles. School systems, educators, parents, and caregivers are encouraged to use this educational content in classrooms and at home.
Science Experiments for Kids at Home
Watch more science experiments designed, and tailored, for kids at home using commonly available items from around your place of living. Each experiment includes information on how to include them in your curriculum.

Do different light sources produce different light waves? In this activity, you will make a spectroscope, which is a device used for looking at the different colors that make up light.

Why does it only rain sometimes, and not whenever there are clouds in the sky? This experiment will model what is happening when clouds finally start to rain.

In this experiment, you will explore light refractions in water and the way light is made up of various colors using a jar or glass, water and a light source.

Follow along with 3M’s Chief Science Advocate, Jayshree Seth, as she teaches students how chemistry can help put some air where it’s most needed!
- SEE ALL EXPERIMENTS
Scientist Spotlight:
Learn about what inspired these real-life scientists to observe the world around them and the advice they have for aspiring scientists.

Giving Back
3M has a long history of supporting STEM and quality education programming. We have specific goals to advance equitable outcomes in STEM and Skilled Trades for underrepresented and under-resourced students.
Learn more about 3M’s educational giving and partner organizations here .
Science at Home is made possible through collaboration with Discovery Education, the Bakken Museum and Scientific American.

Further reading:

14-year-old from California named America’s Top Young Scientist

Search begins for 3M and Discovery Education’s 2023 America’s Top Young Scientist

Women and girls in science: More diversity in STEM leads to better solutions

Young Scientist Challenge alumni win science grants
- Investor Relations
- Partners & Suppliers
- Sustainability / ESG
- Equity and Community
- Ethics & Compliance
- News Center
- Press Releases
- SDS, RDS, More Regulatory & Compliance Information
- Transport Information Search
- CPSIA Certification Search
- Lithium Battery UN 38.3 Test Summary Search
- Transparency in Supply Chains and Modern Slavery Disclosures
- US Ingredient Communication
- Help Center
- Where to Buy

Mind-Blowing Science Experiments to Do with Your Kids at Home
T eaching kids science at home can be incredibly useful for their educational development. It can also be a really great way to give kids a break from their screen time while allowing them to discover something new.
So, today, we are going to be discussing various science experiments that can be easily conducted at home.
Additionally, we will provide you with the details on all the necessary tools and resources to ensure a safe and enjoyable learning experience.
So let's get to it!
Photo Credit: Polina Tankilevich from corelens via Canva.com
*Post contains affiliate links. Full disclosure can be viewed here .
STEM Science Experiments
All of the following STEM experiments can be done using the STEM science kits found here .
Racecar with a Spring Engine
MEL Science Kits offers an exciting opportunity for kids to build their own racecar powered by a spring engine. This experiment not only teaches fundamental concepts of physics but also encourages creativity and problem-solving skills.
Hydraulic Lift
Another fascinating experiment with MEL Science Kits involves the construction of a hydraulic lift . By understanding the principles of hydraulics, children can explore the concepts of pressure and force while constructing this hands-on project. You can check out the hydraulic lift we built HERE !
Infinity Portal
The MEL Science project called the “Infinity Porta l, ” allows children to explore the wonderful world of mirror reflections. By creating their own infinite reflection tunnel, kids can discover and learn about the physical laws behind this fascinating phenomenon.
MEL Science offers a kit that enables children to assemble their own music box while exploring the principles of sound waves. This experiment is a perfect combination of science and creativity, fostering a deeper understanding of acoustics. Pro Tip: You can also use this experiment as part of a music lesson.
Earthquake-Resistant Buildings
Through the Earthquakes MEL Science Kit , kids can learn how to construct buildings capable of withstanding the force of an earthquake. This experiment provides a hands-on approach to comprehend engineering concepts and helps develop problem-solving and critical thinking skills.
Space Science Experiments
All of the following Space science experiments can be done using the Space science kits found here .
Rocket Launch
Encourage your child’s curiosity about space with the Rocket MEL Science Kit , which allows kids to launch their very own space rocket. This experiment introduces the basics of rocket propulsion and sparks an interest in aerospace exploration.
Water Recovery Systems
The Water Recovery Systems MEL Science Kit provides an opportunity for kids to learn about the challenges of water purification in space. By conducting various experiments, children can explore innovative techniques for cleaning water in a challenging environment.
Model of Jupiter
With the Gas Giants Science Kit from MEL Science, children can build a realistic model of Jupiter. This experiment not only teaches kids about the largest planet in our solar system but also introduces them to concepts like planetary composition and scale modeling.
Physics Science Experiments
All of the following Physics science experiments can be done using the Physics science kits found here .
Luminescence
Kids can make their own liquid nightlight with the Luminescence MEL Science Kit . This kit provides all the necessary materials and instructions for creating a unique and glowing nightlight using special luminescent substances.
Electric Motor
Another exciting experiment is building an electric motor with the “Electric Motor” set by MEL Science. Kids can learn about electromagnetic principles and construct a working motor using the provided components.
Glasses Vision Physics
For those interested in vision physics, the “Glasses” Vision Physics Set by MEL Science enables kids to build their own 3D goggles. This experiment explores how our eyes perceive depth and helps children understand the science behind 3D visuals.
Magnetic Levitation
This Magnetic Levitation Set offers an incredible experiment where kids can make a rod levitate using magnetic forces. This hands-on activity introduces concepts of magnetism and levitation in a captivating way.
Create Your Own Mic and Speaker
With the “Mic and Speaker” experiment , children can learn about sound waves and create their own speaker and microphone. This experiment allows kids to understand the basics of sound and how it can be amplified using simple components.
Chemistry Science Experiments
All of the following Chemistry science experiments can be done using the Chemistry science kits found here .
Set Hydrogen Foam on Fire
Using the But Will it Burn MEL Science Kit , kids can set hydrogen foam on fire and learn about combustion. This experiment demonstrates the flammability of hydrogen and the principles of a chemical reaction.
Set Fire Using Pure Oxygen
For older kids, this Oxygen Science Kit provides an experiment where they can set a fire using pure oxygen. This activity focuses on oxidizers and reducers and emphasizes the importance of oxygen in combustion.
Build Your Own Battery
The Zinc-carbon Battery Kit allows kids to build their own working battery. Through this experiment, children gain an understanding of the chemical reactions that occur within a battery and how electrical energy is produced.
Medicine Science Experiments
All of the following Medical science experiments can be done using the Medicine science kits found here .
Filling a Tooth
The Dentistry: Caries MEL Science Kit provides an opportunity for kids to practice removing the damaged part of a tooth using a dental burr and make dental fillings. This experiment introduces concepts of dentistry and allows children to learn about dental procedures in a safe and educational manner.
Make Your Own ECG
With the ECG MEL Science Kit, kids can learn how to take their own electrocardiogram (ECG). This experiment familiarizes children with the medical device used to measure heart activity and helps them understand the basics of the human cardiovascular system.
Practice Basic Surgical Skills
The Surgery MEL Science Kit offers an exciting opportunity for kids to learn basic surgical skills. They can make incisions in artificial skin and practice applying stitches, providing a hands-on understanding of surgical procedures and promoting dexterity.
Where to Find The Tools and Lesson Plans for These Experiments
All the necessary tools and lesson plans for these experiments can be found in the MEL Science Kits. To start your MEL Science subscription and gain access to a wide range of exciting experiments, visit their website and follow the instructions to subscribe.
Materials Chemistry Frontiers
Local protons enhance photocatalytic co2 reduction by porphyrinic zirconium-organic frameworks.
The immobilization of molecular catalysts based on porphyrin fragments within metal-organic frameworks (MOFs) offers a promising approach for achieving sustainable and stable photocatalytic activity. In this study, we present the synthesis of a phenolic hydroxy-modified iron-porphyrinic zirconium-based MOF, Zr6O4(OH)4(FeTCBPP-OH)3, named MOF-OH (FeTCBPP-OH = iron 5,10,15,20-tetrakis[4-(4'-carboxyphenyl)-2,6-dihydroxylphenyl]porphyrin), through post-synthetic modification of a precursor MOF called MOF-OCH3 (Zr6O4(OH)4(FeTCBPP-OCH3)3, FeTCBPP-OCH3 = iron 5,10,15,20-tetrakis[4-(4'-carboxyphenyl)-2,6-dimethoxyphenyl]porphyrin). Initially, we attempted the direct assembly of Zr4+ centers and FeTCBPP-OH ligands; however, this approach was unsuccessful to obtain MOF-OH. This perhaps resulted from the high number of hydroxyl groups on the polyphenolic porphyrinic fragments, which exhibited a stronger binding affinity towards zirconium centers. Consequently, we achieved MOF-OH by selectively modifying the partial methoxy positions of the FeTCBPP-OCH3 fragments in MOF-OCH3 through demethylation. To evaluate the photocatalytic performance of MOF-OH, we conducted CO2 reduction experiments without the use of additional photosensitizers. Remarkably, after 72 hours, the yield of CO reached a high value of 26.8 mmol g−1. Notably, the CO production of MOF-OH was significantly higher than that of MOF-OCH3, possibly due to the presence of phenolic hydroxyl substituents, which led to higher local proton concentrations. Furthermore, MOF-OH exhibited excellent stability, as demonstrated by the consistent CO production observed during four consecutive runs of CO2 reduction. To gain insights into the photocatalytic CO2 reduction process, we conducted a comprehensive series of characterizations and density functional theory calculations, which provided a deeper understanding of the mechanism involved.
Supplementary files
- Supplementary information PDF (1668K)
Article information
Download citation, permissions.
X. Zhao, C. Zhu, J. Qin, H. Rao, D. Du, M. Zhang, P. She, L. Li and Z. Su, Mater. Chem. Front. , 2024, Accepted Manuscript , DOI: 10.1039/D4QM00187G
To request permission to reproduce material from this article, please go to the Copyright Clearance Center request page .
If you are an author contributing to an RSC publication, you do not need to request permission provided correct acknowledgement is given.
If you are the author of this article, you do not need to request permission to reproduce figures and diagrams provided correct acknowledgement is given. If you want to reproduce the whole article in a third-party publication (excluding your thesis/dissertation for which permission is not required) please go to the Copyright Clearance Center request page .
Read more about how to correctly acknowledge RSC content .
Social activity
Search articles by author.
This article has not yet been cited.
Advertisements
IMAGES
VIDEO
COMMENTS
Extinguish flames with carbon dioxide. This is a fiery twist on acid-base experiments. Light a candle and talk about what fire needs in order to survive. Then, create an acid-base reaction and "pour" the carbon dioxide to extinguish the flame. The CO2 gas acts like a liquid, suffocating the fire.
25. Turn Juice Into Solid. Turning juice into a solid through gelification is an engaging and educational chemistry experiment that students should try. By exploring the transformation of a liquid into a solid, students can gain insights into the fascinating world of chemical reactions and molecular interactions.
Fun science experiments to explore everything from kitchen chemistry to DIY mini drones. Easy to set up and perfect for home or school. Browse the collection and see what you want to try first! An experienced chemistry professor used to say that it took about one explosion per week to maintain college students' attention in chemistry lectures.
Anne Helmenstine. Making a borax snowflake is a crystal-growing project that is safe and easy enough for kids. You can make shapes other than snowflakes, and you can color the crystals. The snowflakes sparkle really nicely. If you use these as Christmas decorations and store them, the borax is a natural insecticide and will help keep your long ...
Continue reading. The Homeschool Scientist. 8. Experiment with Yeast and Sugar - Making Peeps Blow Up a Balloon - Includes a free printable pack. Peeps make for interesting chemistry experiments. Whether you use the Peep snowmen or Peep chicks, you can make them blow up a balloon! Includes a free printable pack.
Water - A Moving Experience. Kids and parents can explore chemistry with games, videos, hands-on activities, and other fun interactive content.
Then add a good layer of oil on top. About an inch deep is plenty. Then you use your dropper to drip food coloring into the jar. At first, the food coloring will sit at the interface between the oil and water. Then all of a sudden, it will drop through, leaving a trail of color behind it in the water.
More Science Experiments & Activities for Kids. 27 Simple Science Experiments to Do in a Jar. Rocks & Minerals: The Vinegar Test. Inspire kids & teens will these FUN chemistry experiments that can be done at home! Favorites include glow-in-the-dark experiments, chemistry activities using fire and vortex experiments!
Henry Mühlfpordt. Hot Ice is a name given to sodium acetate, a chemical you can make by reacting vinegar and baking soda. A solution of sodium acetate can be supercooled so that it will crystallize on command. Heat is evolved when the crystals form, so although it resembles water ice, it's hot. 09.
This experiment is showing a physical change - not a chemical change, making it a unique experiment in this list! 6. Make Fake "Snot" (No Tissues Required!) This is a science experiment for kids looking to make something "gross!". It would make a great creepy activity around Halloween.
Difficulty Level: Easy. Messiness Level: Medium. In this quick and fun science experiment, kids will mix water, oil, food coloring, and antacid tablets to create their own (temporary) lava lamp. Oil and water don't mix easily, and the antacid tablets will cause the oil to form little globules that are dyed by the food coloring.
Coolest Science Experiments for Kids at Home. 1. Make rock candy. Learn about the crystallization process by learning how to make rock candy in a glass. 2. Make a lava lamp. Make a lava lamp by pouring vegetable oil into water and then adding an Alka-Seltzer tablet to make the blob of oil move. 3.
Try the non- newtonian fluid experiment and learn about Non-Newtonian fluids. Walking water is a funny name for this surface tension and capilary action science experiment. All you need is food coloring, paper towels, and water! Kids have to try the baking soda and vinegar reaction at least once a year. All you need is… baking soda and vinegar.
Create a hollow in it and pour glycerin (add only a little quantity). In case there's no fire, add one or a maximum of two drops of water. You'll see the mixture catching fire as there's a chemical reaction between potassium permanganate and glycerin. 7. Skittles Experiment.
Dive into 100 easy science experiments for kids to do at home, featuring activities like Traveling Rainbows, making slime, exploring colors with baking soda and vinegar, and revealing secret messages with invisible ink. Perfect for curious minds eager to learn through fun, hands-on science.
Students enrolled in the General Chemistry 31A-B sequence this summer have been able to do experiments at home using non-hazardous salts such as calcium chloride and baking soda, Milk of Magnesia, and cabbage powder from their kits. The cabbage powder is a colorful addition, as it changes color based on the reaction occurring.
Vinegar: It is actually an aqueous solution of acetic acid. White is probably purer. NaHCO 3 (sodium bicarbonate), or baking soda, is a very mild base. It reacts with acetic acid on vinegar, and a typical chemistry experiment for kids is making a volcano with baking soda and vinegar. The list could go on forever.
Stretch the balloon's mouth over the cap without losing any air. Adjust your balloon so that it stands centered and straight. Make your own hovercraft vehicle, and easy DIY science experiment to do at home. Set your newly made hovercraft on a table and open up your pop-top. Nudge the device a little and let it go.
In a bowl, combine 4 teaspoons with 1 teaspoon of baking soda. In a disposable tin, fill with sand and make a small mound in the center. Pour lighter fluid on the mound and make sure the sand is well saturated. Spoon the sugar and baking soda mixture onto the mound. Carefully light the sand near the sugar mixture.
3M's Science at Home makes learning fun with engaging and educational DIY science experiments for children ages 6-12. These simple, at-home experiments conducted by 3M scientists use common household items and are designed to reinforce core scientific principles. School systems, educators, parents, and caregivers are encouraged to use this ...
Explore LearningMedia Resources by Subject. Chemistry isn't just done in a lab. Here are some easy chemistry experiments you can do at-home. Get an adult to help you, and try these experiments in your own kitchen!
Mind-Blowing Science Experiments to Do with Your Kids at Home Major League Mommy. Teaching kids science at home can be incredibly useful for their educational development. It can also be a really ...
The rise of digital technologies since the second half of the 20th century has transformed every aspect of our lives and has had an ongoing effect even on one of the most conservative fields, education, including chemistry education. During the Covid-19 pandemic, chemistry teachers around the world were forced to t
Chemistry Science Experiments. (163 results) Fun science experiments to explore everything from kitchen chemistry to DIY mini drones. Easy to set up and perfect for home or school. Browse the collection and see what you want to try first!
a School of Materials Science and Engineering, Shandong University of Technology, No. 266 West Xincun Road, ... The experiments showed that the rejection of Na 2 SO 4 by the NF membrane was 96.5% and greater than 94.0% for various dyes. In the test using dye/salt mixed solution, this membrane exhibited a good separation selectivity (CR/NaCl ...
The immobilization of molecular catalysts based on porphyrin fragments within metal-organic frameworks (MOFs) offers a promising approach for achieving sustainable and stable photocatalytic activity. In this study, we present the synthesis of a phenolic hydroxy-modified iron-porphyrinic zirconium-based MOF,