Critical PowerPoint Shortcuts – Claim Your FREE Training Module and Get Your Time Back!

How to Make a PowerPoint Presentation (Step-by-Step)
- PowerPoint Tutorials
- Presentation Design
- January 22, 2024
In this beginner’s guide, you will learn step-by-step how to make a PowerPoint presentation from scratch.
While PowerPoint is designed to be intuitive and accessible, it can be overwhelming if you’ve never gotten any training on it before. As you progress through this guide, you’ll will learn how to move from blank slides to PowerPoint slides that look like these.

Table of Contents
Additionally, as you create your presentation, you’ll also learn tricks for working more efficiently in PowerPoint, including how to:
- Change the slide order
- Reset your layout
- Change the slide dimensions
- Use PowerPoint Designer
- Format text
- Format objects
- Play a presentation (slide show)
With this knowledge under your belt, you’ll be ready to start creating PowerPoint presentations. Moreover, you’ll have taken your skills from beginner to proficient in no time at all. I will also include links to more advanced PowerPoint topics.
Ready to start learning how to make a PowerPoint presentation?
Take your PPT skills to the next level
Start with a blank presentation.
Note: Before you open PowerPoint and start creating your presentation, make sure you’ve collected your thoughts. If you’re going to make your slides compelling, you need to spend some time brainstorming.
For help with this, see our article with tips for nailing your business presentation here .
The first thing you’ll need to do is to open PowerPoint. When you do, you are shown the Start Menu , with the Home tab open.
This is where you can choose either a blank theme (1) or a pre-built theme (2). You can also choose to open an existing presentation (3).
For now, go ahead and click on the Blank Presentation (1) thumbnail.

Doing so launches a brand new and blank presentation for you to work with. Before you start adding content to your presentation, let’s first familiarize ourselves with the PowerPoint interface.
The PowerPoint interface

Here is how the program is laid out:
- The Application Header
- The Ribbon (including the Ribbon tabs)
- The Quick Access Toolbar (either above or below the Ribbon)
- The Slides Pane (slide thumbnails)
The Slide Area
The notes pane.
- The Status Bar (including the View Buttons)
Each one of these areas has options for viewing certain parts of the PowerPoint environment and formatting your presentation.
Below are the important things to know about certain elements of the PowerPoint interface.
The PowerPoint Ribbon

The Ribbon is contextual. That means that it will adapt to what you’re doing in the program.
For example, the Font, Paragraph and Drawing options are greyed out until you select something that has text in it, as in the example below (A).

Furthermore, if you start manipulating certain objects, the Ribbon will display additional tabs, as seen above (B), with more commands and features to help you work with those objects. The following objects have their own additional tabs in the Ribbon which are hidden until you select them:
- Online Pictures
- Screenshots
- Screen Recording
The Slides Pane

This is where you can preview and rearrange all the slides in your presentation.
Right-clicking on a slide in the pane gives you additional options on the slide level that you won’t find on the Ribbon, such as Duplicate Slide , Delete Slide , and Hide Slide .

In addition, you can add sections to your presentation by right-clicking anywhere in this Pane and selecting Add Section . Sections are extremely helpful in large presentations, as they allow you to organize your slides into chunks that you can then rearrange, print or display differently from other slides.

The Slide Area (A) is where you will build out your slides. Anything within the bounds of this area will be visible when you present or print your presentation.
Anything outside of this area (B) will be hidden from view. This means that you can place things here, such as instructions for each slide, without worrying about them being shown to your audience.

The Notes Pane is the space beneath the Slide Area where you can type in the speaker notes for each slide. It’s designed as a fast way to add and edit your slides’ talking points.
To expand your knowledge and learn more about adding, printing, and exporting your PowerPoint speaker notes, read our guide here .
Your speaker notes are visible when you print your slides using the Notes Pages option and when you use the Presenter View . To expand your knowledge and learn the ins and outs of using the Presenter View , read our guide here .

You can resize the Notes Pane by clicking on its edge and dragging it up or down (A). You can also minimize or reopen it by clicking on the Notes button in the Status Bar (B).
Note: Not all text formatting displays in the Notes Pane, even though it will show up when printing your speaker notes. To learn more about printing PowerPoint with notes, read our guide here .
Now that you have a basic grasp of the PowerPoint interface at your disposal, it’s time to make your presentation.
Adding Content to Your PowerPoint Presentation
Notice that in the Slide Area , there are two rectangles with dotted outlines. These are called Placeholders and they’re set on the template in the Slide Master View .
To expand your knowledge and learn how to create a PowerPoint template of your own (which is no small task), read our guide here .

As the prompt text suggests, you can click into each placeholder and start typing text. These types of placeholder prompts are customizable too. That means that if you are using a company template, it might say something different, but the functionality is the same.

Note: For the purposes of this example, I will create a presentation based on the content in the Starbucks 2018 Global Social Impact Report, which is available to the public on their website.
If you type in more text than there is room for, PowerPoint will automatically reduce its font size. You can stop this behavior by clicking on the Autofit Options icon to the left of the placeholder and selecting Stop Fitting Text to this Placeholder .
Next, you can make formatting adjustments to your text by selecting the commands in the Font area and the Paragraph area of the Home tab of the Ribbon.

The Reset Command: If you make any changes to your title and decide you want to go back to how it was originally, you can use the Reset button up in the Home tab .

Insert More Slides into Your Presentation
Now that you have your title slide filled in, it’s time to add more slides. To do that, simply go up to the Home tab and click on New Slide . This inserts a new slide in your presentation right after the one you were on.

You can alternatively hit Ctrl+M on your keyboard to insert a new blank slide in PowerPoint. To learn more about this shortcut, see my guide on using Ctrl+M in PowerPoint .
Instead of clicking the New Slide command, you can also open the New Slide dropdown to see all the slide layouts in your PowerPoint template. Depending on who created your template, your layouts in this dropdown can be radically different.

If you insert a layout and later want to change it to a different layout, you can use the Layout dropdown instead of the New Slide dropdown.
After inserting a few different slide layouts, your presentation might look like the following picture. Don’t worry that it looks blank, next we will start adding content to your presentation.

If you want to follow along exactly with me, your five slides should be as follows:
- Title Slide
- Title and Content
- Section Header
- Two Content
- Picture with Caption
Adding Content to Your Slides
Now let’s go into each slide and start adding our content. You’ll notice some new types of placeholders.

On slide 2 we have a Content Placeholder , which allows you to add any kind of content. That includes:
- A SmartArt graphic,
- A 3D object,
- A picture from the web,
- Or an icon.
To insert text, simply type it in or hit Ctrl+C to Copy and Ctrl+V to Paste from elsewhere. To insert any of the other objects, click on the appropriate icon and follow the steps to insert it.
For my example, I’ll simply type in some text as you can see in the picture below.

Slides 3 and 4 only have text placeholders, so I’ll go ahead and add in my text into each one.

On slide 5 we have a Picture Placeholder . That means that the only elements that can go into it are:
- A picture from the web

To insert a picture into the picture placeholder, simply:
- Click on the Picture icon
- Find a picture on your computer and select it
- Click on Insert
Alternatively, if you already have a picture open somewhere else, you can select the placeholder and paste in (shortcut: Ctrl+V ) the picture. You can also drag the picture in from a file explorer window.

If you do not like the background of the picture you inserted onto your slide, you can remove the background here in PowerPoint. To see how to do this, read my guide here .
Placeholders aren’t the only way to add content to your slides. At any point, you can use the Insert tab to add elements to your slides.
You can use either the Title Only or the Blank slide layout to create slides for content that’s different. For example, a three-layout content slide, or a single picture divider slide, as shown below.

In the first example above, I’ve inserted 6 text boxes, 3 icons, and 3 circles to create this layout. In the second example, I’ve inserted a full-sized picture and then 2 shapes and 2 text boxes.
The Reset Command: Because these slides are built with shapes and text boxes (and not placeholders), hitting the Reset button up in the Home tab won’t do anything.
That is a good thing if you don’t want your layouts to adjust. However, it does mean that it falls on you to make sure everything is aligned and positioned correctly.
For more on how to add and manipulate the different objects in PowerPoint, check out our step-by-step articles here:
- Using graphics in PowerPoint
- Inserting icons onto slides
- Adding pictures to your PowerPoint
- How to embed a video in PowerPoint
- How to add music to your presentation
Using Designer to generate more layouts ideas
If you have Office 365, your version of PowerPoint comes with a new feature called Designer (or Design Ideas). This is a feature that generates slide layout ideas for you. The coolest thing about this feature is that it uses the content you already have.
To use Designer , simply navigate to the Design tab in your Ribbon, and click on Design Ideas .

NOTE: If the PowerPoint Designer is not working for you (it is grey out), see my troubleshooting guide for Designer .
Change the Overall Design (optional)
When you make a PowerPoint presentation, you’ll want to think about the overall design. Now that you have some content in your presentation, you can use the Design tab to change the look and feel of your slides.
For additional help thinking through the design of your presentation, read my guide here .
A. Picking your PowerPoint slide size
If you have PowerPoint 2013 or later, when you create a blank document in PowerPoint, you automatically start with a widescreen layout with a 16:9 ratio. These dimensions are suitable for most presentations as they match the screens of most computers and projectors.
However, you do have the option to change the dimensions.
For example, your presentation might not be presented, but instead converted into a PDF or printed and distributed. In that case, you can easily switch to the standard dimensions with a 4:3 ratio by selecting from the dropdown (A).
You can also choose a custom slide size or change the slide orientation from landscape to portrait in the Custom Slide Size dialog box (B).

To learn all about the different PowerPoint slide sizes, and some of the issues you will face when changing the slide size of a non-blank presentation, read my guide here .
B. Selecting a PowerPoint theme
The next thing you can do is change the theme of your presentation to a pre-built one. For a detailed explanation of what a PowerPoint theme is, and how to best use it, read my article here .
In the beginning of this tutorial, we started with a blank presentation, which uses the default Office theme as you can see in the picture below.

That gives you the most flexibility because it has a blank background and quite simple layouts that work for most presentations. However, it also means that it’s your responsibility to enhance the design.
If you’re comfortable with this, you can stay with the default theme or create your own custom theme ( read my guide here ). But if you would rather not have to think about design, then you can choose a pre-designed theme.
Microsoft provides 46 other pre-built themes, which include slide layouts, color variants and palettes, and fonts. Each one varies quite significantly, so make sure you look through them carefully.
To select a different theme, go to the Design tab in the Ribbon, and click on the dropdown arrow in the Themes section .

For this tutorial, let’s select the Frame theme and then choose the third Variant in the theme. Doing so changes the layout, colors, and fonts of your presentation.

Note: The theme dropdown area is also where you can import or save custom themes. To see my favorite places to find professional PowerPoint templates and themes (and recommendations for why I like them), read my guide here .
C. How to change a slide background in PowerPoint
The next thing to decide is how you want your background to look for the entire presentation. In the Variants area, you can see four background options.

For this example, we want our presentation to have a dark background, so let’s select Style 3. When you do so, you’ll notice that:
- The background color automatically changes across all slides
- The color of the text on most of the slides automatically changes to white so that it’s visible on the dark background
- The colors of the objects on slides #6 and #7 also adjust, in a way we may not want (we’ll likely have to make some manual adjustments to these slides)

Note: If you want to change the slide background for just that one slide, don’t left-click the style. Instead, right-click it and select Apply to Selected Slides .
After you change the background for your entire presentation, you can easily adjust the background for an individual slide.

Inside the Format Background pane, you can see you have the following options:
- Gradient fill
- Picture or texture fill
- Pattern fill
- Hide background
You can explore these options to find the PowerPoint background that best fits your presentation.
D. How to change your color palette in PowerPoint
Another thing you may want to adjust in your presentation, is the color scheme. In the picture below you can see the Theme Colors we are currently using for this presentation.

Each PowerPoint theme comes with its own color palette. By default, the Office theme includes the Office color palette. This affects the colors you are presented with when you format any element within your presentation (text, shapes, SmartArt, etc.).

The good news is that the colors here are easy to change. To switch color palettes, simply:
- Go to the Design tab in the Ribbon
- In the Variants area, click on the dropdown arrow and select Colors
- Select the color palette (or theme colors) you want
You can choose among the pre-built color palettes from Office, or you can customize them to create your own.
As you build your presentation, make sure you use the colors from your theme to format objects. That way, changing the color palette adjusts all the colors in your presentation automatically.
E. How to change your fonts in PowerPoint
Just as we changed the color palette, you can do the same for the fonts.

Each PowerPoint theme comes with its own font combination. By default, the Office theme includes the Office font pairing. This affects the fonts that are automatically assigned to all text in your presentation.

The good news is that the font pairings are easy to change. To switch your Theme Fonts, simply:
- Go to the Design tab in the Ribbon
- Click on the dropdown arrow in the Variants area
- Select Fonts
- Select the font pairing you want
You can choose among the pre-built fonts from Office, or you can customize them to create your own.
If you are working with PowerPoint presentations on both Mac and PC computers, make sure you choose a safe PowerPoint font. To see a list of the safest PowerPoint fonts, read our guide here .
If you receive a PowerPoint presentation and the wrong fonts were used, you can use the Replace Fonts dialog box to change the fonts across your entire presentation. For details, read our guide here .
Adding Animations & Transitions (optional)
The final step to make a PowerPoint presentation compelling, is to consider using animations and transitions. These are by no means necessary to a good presentation, but they may be helpful in your situation.
A. Adding PowerPoint animations
PowerPoint has an incredibly robust animations engine designed to power your creativity. That being said, it’s also easy to get started with basic animations.
Animations are movements that you can apply to individual objects on your slide.

To add a PowerPoint animation to an element of your slide, simply:
- Select the element
- Go to the Animations tab in the Ribbon
- Click on the dropdown arrow to view your options
- Select the animation you want
You can add animations to multiple objects at one time by selecting them all first and then applying the animation.
B. How to preview a PowerPoint animation

There are three ways to preview a PowerPoint animation:
- Click on the Preview button in the Animations tab
- Click on the little star next to the slide
- Play the slide in Slide Show Mode
To learn other ways to run your slide show, see our guide on presenting a PowerPoint slide show with shortcuts .
To adjust the settings of your animations, explore the options in the Effect Options , Advanced Animation and the Timing areas of the Animation tab .

Note: To see how to make objects appear and disappear in your slides by clicking a button, read our guide here .
C. How to manage your animations in PowerPoint

The best way to manage lots of animations on your slide is with the Animation Pane . To open it, simply:
- Navigate to the Animations tab
- Select the Animation Pane
Inside the Animation Pane, you’ll see all of the different animations that have been applied to objects on your slide, with their numbers marked as pictured above.
Note: To see examples of PowerPoint animations that can use in PowerPoint, see our list of PowerPoint animation tutorials here .
D. How to add transitions to your PowerPoint presentation
PowerPoint has an incredibly robust transition engine so that you can dictate how your slides change from one to the other. It is also extremely easy to add transitions to your slides.
In PowerPoint, transitions are the movements (or effects) you see as you move between two slides.

To add a transition to a PowerPoint slide, simply:
- Select the slide
- Go to the Transitions tab in the Ribbon
- In the Transitions to This Slide area, click on the dropdown arrow to view your options
- Select the transition you want
To adjust the settings of the transition, explore the options in the Timing area of the Transitions tab.
You can also add the same transition to multiple slides. To do that, select them in the Slides Pane and apply the transition.
E. How to preview a transition in PowerPoint

There are three ways to preview your PowerPoint transitions (just like your animations):
- Click on the Preview button in the Transitions tab
- Click on the little star beneath the slide number in the thumbnail view
Note: In 2016, PowerPoint added a cool new transition, called Morph. It operates a bit differently from other transitions. For a detailed tutorial on how to use the cool Morph transition, see our step-by-step article here .
Save Your PowerPoint Presentation
After you’ve built your presentation and made all the adjustments to your slides, you’ll want to save your presentation. YOu can do this several different ways.

To save a PowerPoint presentation using your Ribbon, simply:
- Navigate to the File tab
- Select Save As on the left
- Choose where you want to save your presentation
- Name your presentation and/or adjust your file type settings
- Click Save
You can alternatively use the Ctrl+S keyboard shortcut to save your presentation. I recommend using this shortcut frequently as you build your presentation to make sure you don’t lose any of your work.

This is the standard way to save a presentation. However, there may be a situation where you want to save your presentation as a different file type.
To learn how to save your presentation as a PDF, see our guide on converting PowerPoint to a PDF .
How to save your PowerPoint presentation as a template
Once you’ve created a presentation that you like, you may want to turn it into a template. The easiest – but not technically correct – way, is to simply create a copy of your current presentation and then change the content.
But be careful! A PowerPoint template is a special type of document and it has its own parameters and behaviors.
If you’re interested in learning about how to create your own PowerPoint template from scratch, see our guide on how to create a PowerPoint template .
Printing Your PowerPoint Presentation
After finishing your PowerPoint presentation, you may want to print it out on paper. Printing your slides is relatively easy.

To open the Print dialog box, you can either:
- Hit Ctrl+P on your keyboard
- Or go to the Ribbon and click on File and then Print

Inside the Print dialog box, you can choose from the various printing settings:
- Printer: Select a printer to use (or print to PDF or OneNote)
- Slides: Choose which slides you want to print
- Layout: Determine how many slides you want per page (this is where you can print the notes, outline, and handouts)
- Collated or uncollated (learn what collated printing means here )
- Color: Choose to print in color, grayscale or black & white
There are many more options for printing your PowerPoint presentations. Here are links to more in-depth articles:
- How to print multiple slides per page
- How to print your speaker notes in PowerPoint
- How to save PowerPoint as a picture presentation
So that’s how to create a PowerPoint presentation if you are brand new to it. We’ve also included a ton of links to helpful resources to boost your PowerPoint skills further.
When you are creating your presentation, it is critical to first focus on the content (what you are trying to say) before getting lost inserting and playing with elements. The clearer you are on what you want to present, the easier it will be to build it out in PowerPoint.
If you enjoyed this article, you can learn more about our PowerPoint training courses and other presentation resources by visiting us here .
🔒 Unlock the PowerPoint Shortcuts Trusted by Industry Leaders KKR, American Express, HSBC, and More!
Join over 114,880 professionals from diverse fields including consulting, investment banking, advertising, marketing, sales, and business development who have supercharged their PowerPoint game with our proven methods.
✅ Customize compelling presentations effortlessly.
✅ Master time-saving techniques for faster deck creation.
✅ Boost your career prospects with top-notch PowerPoint skills.
Get FREE access to the Critical PowerPoint Shortcuts module of our premium training course by entering your name and email below.
DISCLAIMER: PC Users Only!
We respect your privacy and will keep your info safe and confidential.
About The Author

Popular Tutorials
- How to Strikethrough Text (l̶i̶k̶e̶ ̶t̶h̶i̶s̶) in Word, Excel & PowerPoint
- How to Make Animated Fireworks in PowerPoint (Step-by-Step)
- Strikethrough Shortcut (l̶i̶k̶e̶ ̶t̶h̶i̶s̶) for Word, Excel & PowerPoint
- How to Create a Flash Card Memory Game in PowerPoint (Like Jeopardy)
- Keyboard Shortcuts Not Working: Solved
PowerPoint Tutorial Categories
- Strategies & Opinions
- Shortcuts & Hacks
- Pictures, Icons, Videos, Etc.
- New Features
- Miscellaneous
- Charts & Data Viz
We help busy professionals save hours and gain peace of mind, with corporate workshops, self-paced courses and tutorials for PowerPoint and Word.
Work With Us
- Corporate Training
- Presentation & Template Design
- Courses & Downloads
- PowerPoint Articles
- Word Articles
- Productivity Resources
Find a Tutorial
- Free Training
- For Businesses
We help busy office workers save hours and gain peace of mind, with tips, training and tutorials for Microsoft PowerPoint and Word.
Master Critical PowerPoint Shortcuts – Secure Your FREE Training Module and Save Valuable Time!
⌛ Master time-saving expert techniques.
🔥 Create powerful presentations.
🚀 Propel your career to new heights.
We value your privacy – we keep your info safe.
Discover PowerPoint Hacks Loved by Industry Giants - KKR, AmEx, HSBC!
Over 114,880 professionals in finance, marketing and sales have revolutionized their PPT skills with our proven methods.
Gain FREE access to a full module of our premium PowerPoint training program – Get started today!
We hate spam too and promise to keep your information safe.
You are currently viewing a placeholder content from Facebook . To access the actual content, click the button below. Please note that doing so will share data with third-party providers.
- PRO Courses Guides New Tech Help Pro Expert Videos About wikiHow Pro Upgrade Sign In
- EDIT Edit this Article
- EXPLORE Tech Help Pro About Us Random Article Quizzes Request a New Article Community Dashboard This Or That Game Popular Categories Arts and Entertainment Artwork Books Movies Computers and Electronics Computers Phone Skills Technology Hacks Health Men's Health Mental Health Women's Health Relationships Dating Love Relationship Issues Hobbies and Crafts Crafts Drawing Games Education & Communication Communication Skills Personal Development Studying Personal Care and Style Fashion Hair Care Personal Hygiene Youth Personal Care School Stuff Dating All Categories Arts and Entertainment Finance and Business Home and Garden Relationship Quizzes Cars & Other Vehicles Food and Entertaining Personal Care and Style Sports and Fitness Computers and Electronics Health Pets and Animals Travel Education & Communication Hobbies and Crafts Philosophy and Religion Work World Family Life Holidays and Traditions Relationships Youth
- Browse Articles
- Learn Something New
- Quizzes Hot
- This Or That Game New
- Train Your Brain
- Explore More
- Support wikiHow
- About wikiHow
- Log in / Sign up
- Computers and Electronics
- Presentation Software
- PowerPoint Presentations
6 Simple Parts for Beginners to Create a PowerPoint Presentation
Last Updated: December 19, 2022 Fact Checked
Creating a New PowerPoint
Creating the title slide, adding a new slide, adding content to slides, adding transitions, testing and saving your presentation.
This article was co-authored by wikiHow staff writer, Darlene Antonelli, MA . Darlene Antonelli is a Technology Writer and Editor for wikiHow. Darlene has experience teaching college courses, writing technology-related articles, and working hands-on in the technology field. She earned an MA in Writing from Rowan University in 2012 and wrote her thesis on online communities and the personalities curated in such communities. This article has been fact-checked, ensuring the accuracy of any cited facts and confirming the authority of its sources. This article has been viewed 4,319,581 times. Learn more...
Do you want to have your data in a slide show? If you have Microsoft 365, you can use PowerPoint! PowerPoint is a program that's part of the Microsoft Office suite (which you have to pay for) and is available for both Windows and Mac computers. This wikiHow teaches you how to create your own Microsoft PowerPoint presentation on a computer.
Things You Should Know
- Templates make it easy to create vibrant presentations no matter your skill level.
- When adding photos, you can adjust their sizes by clicking and dragging in or out from their corners.
- You can add animated transitions between slides or to individual elements like bullet points and blocks of text.

- If you don't have a Microsoft Office 365 subscription, you can use the website instead of the desktop app. Go to https://powerpoint.office.com/ to use the website version.
- You can also use the mobile app to make presentations, though it's easier to do this on a computer, which has a larger screen, a mouse, and a keyboard.

- If you don't want to use a template, just click the Blank option in the upper-left side of the page and skip to the next part.

- Skip this step if your selected template has no themes available.

- If you're creating a PowerPoint presentation for which an elaborate title slide has been requested, ignore this step.

- You can change the font and size of text used from the Home tab that's in the orange ribbon at the top of the window.

- You can also just leave this box blank if you like.

- You can also click and drag in or out one of a text box's corners to shrink or enlarge the text box.

- On a Mac, you'll click the Home tab instead. [1] X Research source

- Clicking the white slide-shaped box above this option will result in a new text slide being inserted.

- Title Slide
- Title and Content
- Section Header
- Two Content
- Content with Caption
- Picture with Caption

- Naturally, the title slide should be the first slide in your presentation, meaning that it should be the top slide in the left-hand column.

- Skip this step and the next two steps if your selected slide uses a template that doesn't have text boxes in it.

- Text boxes in PowerPoint will automatically format the bulk of your text for you (e.g., adding bullet points) based on the context of the content itself.
- You can add notes that the Presentation will not include (but you'll still be able to see them on your screen) by clicking Notes at the bottom of the slide.

- You can change the font of the selected text by clicking the current font's name and then clicking your preferred font.
- If you want to change the size of the text, click the numbered drop-down box and then click a larger or smaller number based on whether you want to enlarge or shrink the text.
- You can also change the color, bolding, italicization, underlining, and so on from here.

- Photos in particular can be enlarged or shrunk by clicking and dragging out or in one of their corners.

- Remember to keep slides uncluttered and relatively free of distractions. It's best to keep the amount of text per slide to around 33 words or less. [2] X Research source

- Slide content will animate in the order in which you assign transitions. For example, if you animate a photo on the slide and then animate the title, the photo will appear before the title.
- Make your slideshow progress automatically by setting the speed of every transition to align with your speech as well as setting each slide to Advance . [3] X Trustworthy Source Microsoft Support Technical support and product information from Microsoft. Go to source

- If you need to exit the presentation, press Esc .

- Windows - Click File , click Save , double-click This PC , select a save location, enter a name for your presentation, and click Save .
- Mac - Click File , click Save As... , enter the presentation's name in the "Save As" field, select a save location by clicking the "Where" box and clicking a folder, and click Save .
Community Q&A
- If you save your PowerPoint presentation in .pps format instead of the default .ppt format, double-clicking your PowerPoint presentation file will prompt the presentation to open directly into the slideshow view. Thanks Helpful 5 Not Helpful 0
- If you don't have Microsoft Office, you can still use Apple's Keynote program or Google Slides to create a PowerPoint presentation. Thanks Helpful 0 Not Helpful 0

- Your PowerPoint presentation (or some features in it) may not open in significantly older versions of PowerPoint. Thanks Helpful 1 Not Helpful 1
- Great PowerPoint presentations avoid placing too much text on one slide. Thanks Helpful 0 Not Helpful 0
You Might Also Like

- ↑ https://onedrive.live.com/view.aspx?resid=DBDCE00C929AA5D8!252&ithint=file%2cpptx&app=PowerPoint&authkey=!AH4O9NxcbehqzIg
- ↑ https://www.virtualsalt.com/powerpoint.htm
- ↑ https://support.microsoft.com/en-us/office/set-the-timing-and-speed-of-a-transition-c3c3c66f-4cca-4821-b8b9-7de0f3f6ead1#:~:text=To%20make%20the%20slide%20advance,effect%20on%20the%20slide%20finishes .
About This Article

- Send fan mail to authors
Reader Success Stories
Artis Holland
Sep 22, 2016
Is this article up to date?

Oct 18, 2016
Jul 23, 2016
Margery Niyi
Sep 25, 2017
Jul 21, 2016

Featured Articles

Trending Articles

Watch Articles

- Terms of Use
- Privacy Policy
- Do Not Sell or Share My Info
- Not Selling Info
Keep up with tech in just 5 minutes a week!
- What is PowerPoint? Video
- Create a presentation Video
- Choose the right view for the task Video
- Add and format text Video

Create a presentation

Create a presentation from scratch, or from a theme. All themes have a palate of colors and fonts designed to work together.
Create a blank presentation
Open PowerPoint.
Select one of the Blank Presentation and start typing.
Note: Microsoft 365 subscribers will find Design Ideas based on the words you type. You can browse and select a new look.
Create a presentation from a theme
Select File > New .
Double-click a theme in the gallery to create a presentation in that theme. Or search for more templates.
Apply or change a slide layout
Apply a template to your presentation
Create and save a PowerPoint template
Get Microsoft presentation templates

Need more help?
Want more options.
Explore subscription benefits, browse training courses, learn how to secure your device, and more.

Microsoft 365 subscription benefits

Microsoft 365 training

Microsoft security

Accessibility center
Communities help you ask and answer questions, give feedback, and hear from experts with rich knowledge.

Ask the Microsoft Community

Microsoft Tech Community

Windows Insiders
Microsoft 365 Insiders
Was this information helpful?
Thank you for your feedback.
How-To Geek
8 tips to make the best powerpoint presentations.
Want to make your PowerPoint presentations really shine? Here's how to impress and engage your audience.
Quick Links
Table of contents, start with a goal, less is more, consider your typeface, make bullet points count, limit the use of transitions, skip text where possible, think in color, take a look from the top down, bonus: start with templates.
Slideshows are an intuitive way to share complex ideas with an audience, although they're dull and frustrating when poorly executed. Here are some tips to make your Microsoft PowerPoint presentations sing while avoiding common pitfalls.
It all starts with identifying what we're trying to achieve with the presentation. Is it informative, a showcase of data in an easy-to-understand medium? Or is it more of a pitch, something meant to persuade and convince an audience and lead them to a particular outcome?
It's here where the majority of these presentations go wrong with the inability to identify the talking points that best support our goal. Always start with a goal in mind: to entertain, to inform, or to share data in a way that's easy to understand. Use facts, figures, and images to support your conclusion while keeping structure in mind (Where are we now and where are we going?).
I've found that it's helpful to start with the ending. Once I know how to end a presentation, I know how best to get to that point. I start by identifying the takeaway---that one nugget that I want to implant before thanking everyone for their time---and I work in reverse to figure out how best to get there.
Your mileage, of course, may vary. But it's always going to be a good idea to put in the time in the beginning stages so that you aren't reworking large portions of the presentation later. And that starts with a defined goal.
A slideshow isn't supposed to include everything. It's an introduction to a topic, one that we can elaborate on with speech. Anything unnecessary is a distraction. It makes the presentation less visually appealing and less interesting, and it makes you look bad as a presenter.
This goes for text as well as images. There's nothing worse, in fact, than a series of slides where the presenter just reads them as they appear. Your audience is capable of reading, and chances are they'll be done with the slide, and browsing Reddit, long before you finish. Avoid putting the literal text on the screen, and your audience will thank you.
Related: How to Burn Your PowerPoint to DVD
Right off the bat, we're just going to come out and say that Papyrus and Comic Sans should be banned from all PowerPoint presentations, permanently. Beyond that, it's worth considering the typeface you're using and what it's saying about you, the presenter, and the presentation itself.
Consider choosing readability over aesthetics, and avoid fancy fonts that could prove to be more of a distraction than anything else. A good presentation needs two fonts: a serif and sans-serif. Use one for the headlines and one for body text, lists, and the like. Keep it simple. Veranda, Helvetica, Arial, and even Times New Roman are safe choices. Stick with the classics and it's hard to botch this one too badly.
There reaches a point where bullet points become less of a visual aid and more of a visual examination.
Bullet points should support the speaker, not overwhelm his audience. The best slides have little or no text at all, in fact. As a presenter, it's our job to talk through complex issues, but that doesn't mean that we need to highlight every talking point.
Instead, think about how you can break up large lists into three or four bullet points. Carefully consider whether you need to use more bullet points, or if you can combine multiple topics into a single point instead. And if you can't, remember that there's no one limiting the number of slides you can have in a presentation. It's always possible to break a list of 12 points down into three pages of four points each.
Animation, when used correctly, is a good idea. It breaks up slow-moving parts of a presentation and adds action to elements that require it. But it should be used judiciously.
Adding a transition that wipes left to right between every slide or that animates each bullet point in a list, for example, starts to grow taxing on those forced to endure the presentation. Viewers get bored quickly, and animations that are meant to highlight specific elements quickly become taxing.
That's not to say that you can't use animations and transitions, just that you need to pick your spots. Aim for no more than a handful of these transitions for each presentation. And use them in spots where they'll add to the demonstration, not detract from it.
Sometimes images tell a better story than text can. And as a presenter, your goal is to describe points in detail without making users do a lot of reading. In these cases, a well-designed visual, like a chart, might better convey the information you're trying to share.
The right image adds visual appeal and serves to break up longer, text-heavy sections of the presentation---but only if you're using the right images. A single high-quality image can make all the difference between a success and a dud when you're driving a specific point home.
When considering text, don't think solely in terms of bullet points and paragraphs. Tables, for example, are often unnecessary. Ask yourself whether you could present the same data in a bar or line chart instead.
Color is interesting. It evokes certain feelings and adds visual appeal to your presentation as a whole. Studies show that color also improves interest, comprehension, and retention. It should be a careful consideration, not an afterthought.
You don't have to be a graphic designer to use color well in a presentation. What I do is look for palettes I like, and then find ways to use them in the presentation. There are a number of tools for this, like Adobe Color , Coolors , and ColorHunt , just to name a few. After finding a palette you enjoy, consider how it works with the presentation you're about to give. Pastels, for example, evoke feelings of freedom and light, so they probably aren't the best choice when you're presenting quarterly earnings that missed the mark.
It's also worth mentioning that you don't need to use every color in the palette. Often, you can get by with just two or three, though you should really think through how they all work together and how readable they'll be when layered. A simple rule of thumb here is that contrast is your friend. Dark colors work well on light backgrounds, and light colors work best on dark backgrounds.
Spend some time in the Slide Sorter before you finish your presentation. By clicking the four squares at the bottom left of the presentation, you can take a look at multiple slides at once and consider how each works together. Alternatively, you can click "View" on the ribbon and select "Slide Sorter."
Are you presenting too much text at once? Move an image in. Could a series of slides benefit from a chart or summary before you move on to another point?
It's here that we have the opportunity to view the presentation from beyond the single-slide viewpoint and think in terms of how each slide fits, or if it fits at all. From this view, you can rearrange slides, add additional ones, or delete them entirely if you find that they don't advance the presentation.
The difference between a good presentation and a bad one is really all about preparation and execution. Those that respect the process and plan carefully---not only the presentation as a whole, but each slide within it---are the ones who will succeed.
This brings me to my last (half) point: When in doubt, just buy a template and use it. You can find these all over the web, though Creative Market and GraphicRiver are probably the two most popular marketplaces for this kind of thing. Not all of us are blessed with the skills needed to design and deliver an effective presentation. And while a pre-made PowerPoint template isn't going to make you a better presenter, it will ease the anxiety of creating a visually appealing slide deck.
17 PowerPoint Presentation Tips to Make More Creative Slideshows [+ Templates]
Published: August 16, 2023
Creating a great PowerPoint presentation is a skill that any professional can benefit from. The problem? It’s really easy to get it wrong. From poor color choices to confusing slides, a bad PowerPoint slideshow can distract from the fantastic content you’re sharing with stakeholders on your team.

That’s why it’s so important to learn how to create a PowerPoint presentation from the ground up, starting with your slides. Even if you’re familiar with PowerPoint, a refresher will help you make a more attractive, professional slideshow. Let’s get started.
How to Make a PowerPoint Presentation
- Presentation Tips
PowerPoint Design
I like to think of Microsoft PowerPoint as a test of basic professional skills. To create a passing presentation, I need to demonstrate design skills, technical literacy, and a sense of personal style.
If the presentation has a problem (like an unintended font, a broken link, or unreadable text), then I’ve probably failed the test. Even if my spoken presentation is well rehearsed, a bad visual experience can ruin it for the audience.
Expertise means nothing without a good PowerPoint presentation to back it up. For starters, grab your collection of free PowerPoint templates below.
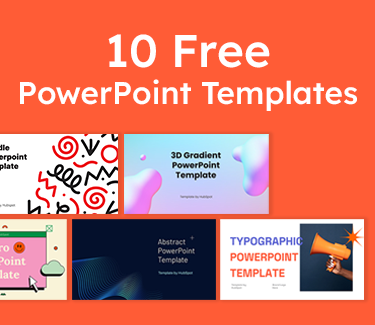
10 Free PowerPoint Templates
Download ten free PowerPoint templates for a better presentation.
- Creative templates.
- Data-driven templates.
- Professional templates.
You're all set!
Click this link to access this resource at any time.
Tell us a little about yourself below to gain access today.
No matter your topic, successful PowerPoints depend on three main factors: your command of PowerPoint's design tools, your attention to presentation processes, and your devotion to consistent style. Here are some simple tips to help you start mastering each of those factors, and don't forget to check out the additional resources at the bottom of this post.
A presentation is made up of multiple slides, let's delve deeper into PowerPoint's capabilities.
Getting Started
1. open powerpoint and click ‘new.’.
If a page with templates doesn‘t automatically open, go to the top left pane of your screen and click New. If you’ve already created a presentation, select Open then double-click the icon to open the existing file.


That said, you can still use fun and eccentric fonts — in moderation. Offsetting a fun font or large letters with something more professional can create an engaging presentation.
Above all, be sure you're consistent so your presentation looks the same throughout each slide. That way, your audience doesn't become distracted by too many disparate fonts. Check out this example from HubSpot’s company profile templates:
Interested in this presentation template? Download it for free here.
5. Make sure all of your objects are properly aligned.
Having properly aligned objects on your slide is the key to making it look polished and professional. You can manually try to line up your images ... but we all know how that typically works out. You're trying to make sure all of your objects hang out in the middle of your slide, but when you drag them there, it still doesn't look quite right. Get rid of your guessing game and let PowerPoint work its magic with this trick.
Here’s how to align multiple objects:
- Select all objects by holding down Shift and clicking on all of them.
- Select Arrange in the top options bar, then choose Align or Distribute .
- Choose the type of alignment you'd like.
Here’s how to align objects to the slide:
- Select Align to Slide .
- Select Arrange in the top options bar again, then choose Align or Distribute .
6. Use "Format Object" to better control your objects' designs.
Format menus allow you to do fine adjustments that otherwise seem impossible. To do this, right-click on an object and select the Format Object option. Here, you can fine-tune shadows, adjust shape measurements, create reflections, and much more. The menu that will pop up looks like this:

Although the main options can be found on PowerPoint’s format toolbars, look for complete control in the format window menu. Other examples of options available include:
- Adjusting text inside a shape.
- Creating a natural perspective shadow behind an object.
- Recoloring photos manually and with automatic options.
7. Take advantage of PowerPoint's shapes.
Many users don’t realize how flexible PowerPoint’s shape tools have become. In combination with the expanded format options released by Microsoft, the potential for good design with shapes is readily available. PowerPoint provides the user with a bunch of great shape options beyond the traditional rectangle, oval, and rounded rectangle patterns.
Today’s shapes include a highly functional Smart Shapes function, which enables you to create diagrams and flow charts in no time. These tools are especially valuable when you consider that PowerPoint is a visual medium. Paragraphing and bullet lists are boring — you can use shapes to help express your message more clearly.
8. Create custom shapes.
When you create a shape, right click and press Edit Points . By editing points, you can create custom shapes that fit your specific need. For instance, you can reshape arrows to fit the dimensions you like.
Another option is to combine two shapes together. To do so, select the two shapes you’d like to work with, then click Shape Format in the top ribbon. Tap Merge Shapes .
You’ll see a variety of options.
- Combine creates a custom shape that has overlapping portions of the two previous shapes cut out.
- Union makes one completely merged shape.
- Intersect builds a shape of only the overlapping sections of the two previous shapes.
- Subtract cuts out the overlapping portion of one shape from the other.
- Fragment will split your shape into different parts depending on where they overlap.
By using these tools rather than trying to edit points precisely, you can create accurately measured custom shapes.
9. Crop images into custom shapes.
Besides creating custom shapes in your presentation, you can also use PowerPoint to crop existing images into new shapes. Here's how you do that:
- Click on the image and select Picture Format in the options bar.
- Choose Crop , then Crop to Shape , and then choose your desired shape. Ta-da! Custom-shaped photos.
10. Present websites within PowerPoint.
Tradition says that if you want to show a website in a PowerPoint, you should just create a link to the page and prompt a browser to open. For PC users, there’s a better option.
Third party software that integrates fully into PowerPoint’s developer tab can be used to embed a website directly into your PowerPoint using a normal HTML iframe. One of the best tools is LiveWeb , a third-party software that you can install on your PowerPoint program.
By using LiveWeb, you don’t have to interrupt your PowerPoint, and your presentation will remain fluid and natural. Whether you embed a whole webpage or just a YouTube video, this can be a high-quality third party improvement. To install the add-on, simple head to the LiveWeb website and follow the instructions.
Unfortunately, Mac users don’t have a similar option. A good second choice is to take screenshots of the website, link in through a browser, or embed media (such as a YouTube video) by downloading it directly to your computer.
11. Try Using GIFs.
GIFs are looped animated images used to communicate a mood, idea, information, and much more. Users add GIFs to PowerPoints to be funny or quickly demo a process. It's easy to add GIFs to your slides. To do so, simply follow these steps:
- Download and save the GIF you want.
- Go to the slide you want the GIF on.
- Go to the Home tab, and click either Insert or Picture .
- From the Picture drop-down menu, choose Picture from File .
- Navigate to where you saved your GIF and select it. Then, choose Insert .
- It will play automatically the moment you insert it.
PowerPoint Process
12. keep it simple..
PowerPoint is an excellent tool to support your presentation with visual information, graphics, and supplemental points. This means that your PowerPoint should not be your entire presentation. Your slides — no matter how creative and beautiful — shouldn't be the star of the show. Keep your text and images clear and concise, using them only to supplement your message and authority.
If your slides have dense and cluttered information, it will both distract your audience and make it much more likely that you will lose their attention. Nothing in your slides should be superfluous! Keep your presentation persuasive by keeping it clean. There are a few ways to do this:
- Limit bullet points and text.
- Avoid paragraphs and long quotes.
- Maintain "white space" or "negative space".
- Keep percentages, graphs, and data super basic.
13. Embed your font files.
One constant problem presenters have with PowerPoint is that fonts seem to change when presenters move from one computer to another. In reality, the fonts are not changing — the presentation computer just doesn’t have the same font files installed . If you’re using a PC and presenting on a PC, then there is a smooth workaround for this issue.
Here’s the trick: When you save your PowerPoint file (only on a PC), you should click File , then Options, then open up the Save tab. Then, select the Embed fonts in the file check box under Preserve fidelity when sharing this presentation . Now, your presentation will keep the font file and your fonts will not change when you move computers.
The macOS PowerPoint version has a similar function. To embed your fonts on a Mac, do the following:
- Open up your presentation.
- On the top bar, click PowerPoint , then click Preferences .
- Under Output and Sharing , click Save .
- Under Font Embedding , click Embed fonts in the file.
14. Save your slides as a PDF file for backup purposes.
If you’re still scared of your presentation showing up differently when it’s time to present, you should create a PDF version just in case. This is a good option if you’ll be presenting on a different computer. If you also run into an issue where the presenting computer doesn’t have PowerPoint installed, you can also use the system viewer to open up the PDF. No laptop will ever give you trouble with this file type.
The only caveat is that your GIFs, animations, and transitions won’t transfer over. But since the PDF will only work as a backup, not as your primary copy, this should be okay.
To save your presentation as a PDF file, take the following steps:
- Go to File , then click Save as …
- In the pop-up window, click File Format.
- A drop-down menu will appear. Select PDF .
- Click Export .
You can also go to File , then Export , then select PDF from the file format menu.
15. Embed multimedia.
PowerPoint allows you to either link to video/audio files externally or to embed the media directly in your presentation. You should embed these files if you can, but if you use a Mac, you cannot actually embed the video (see note below). For PCs, two great reasons for embedding are:
- Embedding allows you to play media directly in your presentation. It will look much more professional than switching between windows.
- Embedding also means that the file stays within the PowerPoint presentation, so it should play normally without extra work (except on a Mac).
Note: macOS users of PowerPoint should be extra careful about using multimedia files.
If you use PowerPoint for Mac, then you will always need to bring the video and/or audio file with you in the same folder as the PowerPoint presentation. It’s best to only insert video or audio files once the presentation and the containing folder have been saved on a portable drive in their permanent folder. Also, if the presentation will be played on a Windows computer, then Mac users need to make sure their multimedia files are in WMV format. This tip gets a bit complicated, so if you want to use PowerPoint effectively, consider using the same operating system for designing and presenting, no matter what.
16. Bring your own hardware.
Between operating systems, PowerPoint is still a bit jumpy. Even between differing PPT versions, things can change. One way to fix these problems is to make sure that you have the right hardware — so just bring along your own laptop when you're presenting.
If you’re super concerned about the different systems you might have to use, then upload your PowerPoint presentation into Google Slides as a backup option. Google Slides is a cloud-based presentation software that will show up the same way on all operating systems. The only thing you need is an internet connection and a browser.
To import your PowerPoint presentation into Google Slides, take the following steps:
- Navigate to slides.google.com . Make sure you’re signed in to a Google account, preferably your own.
- Under Start a new presentation , click the empty box with a plus sign. This will open up a blank presentation.
- Go to File , then Import slides .
- A dialog box will come up. Tap Upload , then click Select a file from your device .
- Select your presentation and click Open .
- Select the slides you’d like to import. If you want to import all of them, click All in the upper right-hand corner of the dialog box.
- Click Import slides.

When I tested this out, Google Slides imported everything perfectly, including a shape whose points I had manipulated. This is a good backup option to have if you’ll be presenting across different operating systems.
17. Use Presenter View.
In most presentation situations, there will be both a presenter’s screen and the main projected display for your presentation. PowerPoint has a great tool called Presenter View, which can be found in the Slide Show tab of PowerPoint. Included in the Presenter View is an area for notes, a timer/clock, and a presentation display.

For many presenters, this tool can help unify their spoken presentation and their visual aid. You never want to make the PowerPoint seem like a stack of notes that you’re reading off of. Use the Presenter View option to help create a more natural presentation.
Pro Tip: At the start of the presentation, you should also hit CTRL + H to make the cursor disappear. Hitting the "A" key will bring it back if you need it!
Your Next Great PowerPoint Presentation Starts Here
With style, design, and presentation processes under your belt, you can do a lot more with PowerPoint than just presentations for your clients. PowerPoint and similar slide applications are flexible tools that should not be forgotten. With a great template, you can be on your way to creating presentations that wow your audience.
Editor's note: This post was originally published in September 2013 and has been updated for comprehensiveness.
![Blog - Beautiful PowerPoint Presentation Template [List-Based]](https://no-cache.hubspot.com/cta/default/53/013286c0-2cc2-45f8-a6db-c71dad0835b8.png "doing a powerpoint presentation")
Don't forget to share this post!
Related articles.
![How to Write an Ecommerce Business Plan [Examples & Template]](https://blog.hubspot.com/hubfs/ecommerce%20business%20plan.png "doing a powerpoint presentation")
How to Write an Ecommerce Business Plan [Examples & Template]
![How to Create an Infographic in Under an Hour — the 2024 Guide [+ Free Templates]](https://blog.hubspot.com/hubfs/Make-infographic-hero%20%28598%20%C3%97%20398%20px%29.jpg "doing a powerpoint presentation")
How to Create an Infographic in Under an Hour — the 2024 Guide [+ Free Templates]
![20 Great Examples of PowerPoint Presentation Design [+ Templates]](https://blog.hubspot.com/hubfs/powerpoint-presentation-examples.webp "doing a powerpoint presentation")
20 Great Examples of PowerPoint Presentation Design [+ Templates]

Get Buyers to Do What You Want: The Power of Temptation Bundling in Sales

How to Create an Engaging 5-Minute Presentation
![How to Start a Presentation [+ Examples]](https://blog.hubspot.com/hubfs/how-to-start-presenting.webp "doing a powerpoint presentation")
How to Start a Presentation [+ Examples]

120 Presentation Topic Ideas Help You Hook Your Audience
![How to Create the Best PowerPoint Presentations [Examples & Templates]](https://blog.hubspot.com/hubfs/Powerpoint%20presentation.jpg "doing a powerpoint presentation")
How to Create the Best PowerPoint Presentations [Examples & Templates]

The Presenter's Guide to Nailing Your Next PowerPoint
![How to Create a Stunning Presentation Cover Page [+ Examples]](https://blog.hubspot.com/hubfs/presentation-cover-page_3.webp "doing a powerpoint presentation")
How to Create a Stunning Presentation Cover Page [+ Examples]
Marketing software that helps you drive revenue, save time and resources, and measure and optimize your investments — all on one easy-to-use platform
Home Blog Presentation Ideas 23 PowerPoint Presentation Tips for Creating Engaging and Interactive Presentations
23 PowerPoint Presentation Tips for Creating Engaging and Interactive Presentations

PowerPoint presentations are not usually known for being engaging or interactive. That’s often because most people treat their slides as if they are notes to read off and not a tool to help empower their message.
Your presentation slides are there to help bring to life the story you are telling. They are there to provide visuals and empower your speech.
So how do you go about avoiding a presentation “snoozefest” and instead ensure you have an engaging and interactive presentation? By making sure that you use your slides to help YOU tell your story, instead of using them as note cards to read off of.
The key thing to remember is that your presentation is there to compliment your speech, not be its focus.
In this article, we will review several presentation tips and tricks on how to become a storytelling powerhouse by building a powerful and engaging PowerPoint presentation.
Start with writing your speech outline, not with putting together slides
Use more images and less text, use high-quality images, keep the focus on you and your presentation, not the powerpoint, your presentation should be legible from anywhere in the room, use a consistent presentation design, one topic per slide, avoid information overwhelm by using the “rule of three”.
- Display one bullet at a time
Avoid unnecessary animations
- Only add content that supports your main points
Do not use PowerPoint as a teleprompter
- Never Give Out Copies of the Presentation
Re-focus the attention on you by fading into blackness
Change the tone of your voice when presenting, host an expert discussion panel, ask questions, embed videos, use live polling to get instant feedback and engage the audience.
- He kept his slides uncluttered and always strived for simplicity
- He was known to use large font size, the bigger, the better.
- He found made the complex sound simple.
He was known to practice, practice, and keep on practicing.
Summary – how to make your presentation engaging & interactive, fundamental rules to build powerful & engaging presentation slides.
Before we go into tips and tricks on how to add flair to your presentations and create effective presentations, it’s essential to get the fundamentals of your presentation right.
Your PowerPoint presentation is there to compliment your message, and the story you are telling. Before you can even put together slides, you need to identify the goal of your speech, and the key takeaways you want your audience to remember.
YOU and your speech are the focus of this presentation, not the slides – use your PowerPoint to complement your story.
Keep in mind that your slides are there to add to your speech, not distract from it. Using too much text in your slides can be distracting and confusing to your audience. Instead, use a relevant picture with minimal text, “A picture is worth a thousand words.”

This slide is not unusual, but is not a visual aid, it is more like an “eye chart”.
Aim for something simpler, easy to remember and concise, like the slides below.
Keep in mind your audience when designing your presentation, their background and aesthetics sense. You will want to avoid the default clip art and cheesy graphics on your slides.

While presenting make sure to control the presentation and the room by walking around, drawing attention to you and what you are saying. You should occasionally stand still when referencing a slide, but never turn your back to your audience to read your slide.
You and your speech are the presentations; the slides are just there to aid you.
Most season presenters don’t use anything less than twenty-eight point font size, and even Steve Jobs was known to use nothing smaller than forty-point text fonts.
If you can’t comfortably fit all the text on your slide using 28 font size than you’re trying to say and cram too much into the slide, remember tip #1.4 – Use relevant images instead and accompany it with bullets.
Best Practice PowerPoint Presentation Tips
The job of your presentation is to help convey information as efficiently and clearly as possible. By keeping the theme and design consistent, you’re allowing the information and pictures to stand out.
However, by varying the design from slide to slide, you will be causing confusion and distraction from the focus, which is you and the information to be conveyed on the slide.

Technology can also help us in creating a consistent presentation design just by picking a topic and selecting a sample template style. This is possible thanks to the SlideModel’s AI slideshow maker .
Each slide should try to represent one topic or talking point. The goal is to keep the attention focused on your speech, and by using one slide per talking point, you make it easy for you to prepare, as well as easy for your audience to follow along with your speech.
Sometimes when creating our presentation, we can often get in our heads and try to over-explain. A simple way to avoid this is to follow the “ Rule of Three ,” a concept coined by the ancient Greek philosopher Aristotle.
The idea is to stick to only 3 main ideas that will help deliver your point. Each of the ideas can be further broken into 3 parts to explain further. The best modern example of this “Rule of Three” can be derived from the great Apple presentations given by Steve Jobs – they were always structured around the “Rule of Three.”

Display one sentence at a time
If you are planning to include text in your slides, try to avoid bullet lists, and use one slide per sentence. Be short and concise. This best practice focuses on the idea that simple messages are easy to retain in memory. Also, each slide can follow your storytelling path, introducing the audience to each concept while you speak, instead of listing everything beforehand.
Presentation Blunders To Avoid
In reality, there is no need for animations or transitions in your slides.
It’s great to know how to turn your text into fires or how to create a transition with sparkle effects, but the reality is the focus should be on the message. Using basic or no transitions lets the content of your presentation stand out, rather than the graphics.
If you plan to use animations, make sure to use modern and professional animations that helps the audience follow the story you are telling, for example when explaining time series or changing events over time.
Only add engaging content that supports your main points
You might have a great chart, picture or even phrase you want to add, but when creating every slide, it’s crucial to ask yourself the following question.
“Does this slide help support my main point?”
If the answer is no, then remove it. Remember, less is more.
A common crutch for rookie presenters is to use slides as their teleprompter.
First of all, you shouldn’t have that much text on your slides. If you have to read off something, prepare some index cards that fit in your hand but at all costs do not turn your back on your audience and read off of your PowerPoint. The moment you do that, you make the presentation the focus, and lose the audience as the presenter.
Avoid Giving Out Copies of the Presentation
At least not before you deliver a killer presentation; providing copies of your presentation gives your audience a possible distraction where they can flip through the copy and ignore what you are saying.
It’s also easy for them to take your slides out of context without understanding the meaning behind each slide. It’s OK to give a copy of the presentation, but generally it is better to give the copies AFTER you have delivered your speech. If you decide to share a copy of your presentation, the best way to do it is by generating a QR code for it and placing it at the end of your presentation. Those who want a copy can simply scan and download it onto their phones.

Tips To Making Your Presentation More Engaging
The point of your presentation is to help deliver a message.
When expanding on a particularly important topic that requires a lengthy explanation it’s best to fade the slide into black. This removes any distraction from the screen and re-focuses it on you, the present speaker. Some presentation devices have a built-in black screen button, but if they don’t, you can always prepare for this by adding a black side to your presentation at the right moment.
“It’s not what you say, it’s how you say it.”
Part of making your presentation engaging is to use all the tools at your disposal to get your point across. Changing the inflection and tone of your voice as you present helps make the content and the points more memorable and engaging.
One easy and powerful way to make your presentation interactive is experts to discuss a particular topic during your presentation. This helps create a more engaging presentation and gives you the ability to facilitate and lead a discussion around your topic.
It’s best to prepare some questions for your panel but to also field questions from the audience in a question and answer format.
How To Make Your Presentation More Interactive
What happens if I ask you to think about a pink elephant? You probably briefly think about a pink elephant, right?
Asking questions when presenting helps engage the audience, and arouse interest and curiosity. It also has the added benefit of making people pay closer attention, in case they get called on.
So don’t be afraid to ask questions, even if rhetorical; asking a question engages a different part of our brain. It causes us to reflect rather than merely take in the information one way. So ask many of them.
Asking questions can also be an excellent way to build suspense for the next slide.

(Steve Jobs was known to ask questions during his presentations, in this slide he built suspense by asking the audience “Is there space for a device between a cell phone and a laptop?” before revealing the iPad) Source: MacWorld SF 2018
Remember the point of your presentation is to get a message across and although you are the presenter, it is completely fine to use video in your PowerPoint to enhance your presentation. A relevant video can give you some breathing time to prepare the next slides while equally informing the audience on a particular point.
CAUTION: Be sure to test the video beforehand, and that your audience can hear it in the room.
A trending engagement tool among presenters is to use a live polling tool to allow the audience to participate and collect immediate feedback.
Using a live polling tool is a fun and interactive way to engage your audience in real-time and allow them to participate in part of your presentation.

Google Slides has a built-in Q&A feature that allows presenters to make the slide deck more interactive by providing answers to the audience’s questions. By using the Q&A feature in Google Slides, presenters can start a live Q&A session and people can ask questions directly from their devices including mobile and smartphones.
Key Takeaways from one of the best presenters, Steve Jobs
He kept his slides uncluttered and always strove for simplicity.
In this slide, you can easily see he is talking about the battery life, and it uses a simple image and a few words. Learning from Jobs, you can also make a great presentation too. Focus on the core benefit of your product and incorporate great visuals.

Source: Macworld 2008
SlideModel.com can help to reproduce high-impact slides like these, keeping your audience engagement.

He was known to use large font sizes, the bigger, the better
A big font makes it hard to miss the message on the slide, and allows the audience to focus on the presenter while clearing the understanding what the point of the slide is.
He found made the complex sound simple
When explaining a list of features, he used a simple image and lines or simple tables to provide visual cues to his talking points.

(This particular slide is referencing the iMac features)
What made Steve Jobs the master of presentation, was the ritual of practicing with his team, and this is simple yet often overlooked by many presenters. It’s easy to get caught in the trap of thinking you don’t need to practice because you know the material so well.
While all these tips will help you create a truly powerful presentation , it can only achieve if applied correctly.
It’s important to remember when trying to deliver an amazing experience, you should be thoroughly prepared. This way, you can elevate your content presentation, convey your message effectively and captivate your audience.
This includes having your research cited, your presentation rehearsed. Don’t just rehearse your slides, also take time to practice your delivery, and your tone. The more you rehearse, the more relaxed you will be when delivering. The more confident you will feel.
While we can’t help you with the practice of your next presentation, we can help you by making sure you look good, and that you have a great design and cohesiveness.

You focus on the message and content; we’ll focus on making you look good.
Have a tip you would like to include? Be sure to mention it in the comments!

Like this article? Please share
Audience, Engaging, Feedback, Interactive, Poll, Rule of Three, Steve Jobs Filed under Presentation Ideas
Related Articles

Filed under Presentation Ideas • November 29th, 2023
The Power of Audience Engagement: Strategies and Examples
As presenters, captivating the interest of our viewers is the most important thing. Join us to learn all that’s required to boost audience engagement.

Filed under Business • April 30th, 2020
A Manager’s Guide to Interpersonal Communication
People are promoted to management positions for a variety of reasons. For many, they rise to the top because of their knowledge, technical skills, and decision-making capabilities. As a manager, your effectiveness also strongly depends on your ability to communicate well with your team members and other stakeholders. Here is a quick guide on Interpersonal Communication for Managers.

Filed under Business • June 27th, 2019
Using 360 Degree Feedback in Your Organization
Many organizations use 360 degree feedback to provide assessment for employees via multiple sources to analyze the knowledge, skill and behavior of employees. It is also known as multi-rater feedback, multi-source feedback, 360 Degree Review and multi-source assessment, since it is used frequently for assessing the performance of an employee and to determine his/her future […]
2 Responses to “23 PowerPoint Presentation Tips for Creating Engaging and Interactive Presentations”
Very great advices!
Greetings ! A compact composed communication for the host to have an impact -VOICE
Thank You ?
Leave a Reply

- Get started with computers
- Learn Microsoft Office
- Apply for a job
- Improve my work skills
- Design nice-looking docs
- Getting Started
- Smartphones & Tablets
- Typing Tutorial
- Online Learning
- Basic Internet Skills
- Online Safety
- Social Media
- Zoom Basics
- Google Docs
- Google Sheets
- Career Planning
- Resume Writing
- Cover Letters
- Job Search and Networking
- Business Communication
- Entrepreneurship 101
- Careers without College
- Job Hunt for Today
- 3D Printing
- Freelancing 101
- Personal Finance
- Sharing Economy
- Decision-Making
- Graphic Design
- Photography
- Image Editing
- Learning WordPress
- Language Learning
- Critical Thinking
- For Educators
- Translations
- Staff Picks
- English expand_more expand_less
PowerPoint Tips - Simple Rules for Better PowerPoint Presentations
Powerpoint tips -, simple rules for better powerpoint presentations, powerpoint tips simple rules for better powerpoint presentations.

PowerPoint Tips: Simple Rules for Better PowerPoint Presentations
Lesson 17: simple rules for better powerpoint presentations.
/en/powerpoint-tips/embed-excel-charts-in-a-slide/content/
Simple rules for better PowerPoint presentations
Have you ever given a PowerPoint presentation and noticed that something about it just seemed a little … off? If you’re unfamiliar with basic PowerPoint design principles, it can be difficult to create a slide show that presents your information in the best light.
Poorly designed presentations can leave an audience feeling confused, bored, and even irritated. Review these tips to make your next presentation more engaging.
Don't read your presentation straight from the slides
If your audience can both read and hear, it’s a waste of time for you to simply read your slides aloud. Your audience will zone out and stop listening to what you’re saying, which means they won’t hear any extra information you include.
Instead of typing out your entire presentation, include only main ideas, keywords, and talking points in your slide show text. Engage your audience by sharing the details out loud.
Follow the 5/5/5 rule
To keep your audience from feeling overwhelmed, you should keep the text on each slide short and to the point. Some experts suggest using the 5/5/5 rule : no more than five words per line of text, five lines of text per slide, or five text-heavy slides in a row.

Don't forget your audience
Who will be watching your presentation? The same goofy effects and funny clip art that would entertain a classroom full of middle-school students might make you look unprofessional in front of business colleagues and clients.
Humor can lighten up a presentation, but if you use it inappropriately your audience might think you don’t know what you’re doing. Know your audience, and tailor your presentation to their tastes and expectations.
Choose readable colors and fonts
Your text should be easy to read and pleasant to look at. Large, simple fonts and theme colors are always your best bet. The best fonts and colors can vary depending on your presentation setting. Presenting in a large room? Make your text larger than usual so people in the back can read it. Presenting with the lights on? Dark text on a light background is your best bet for visibility.

Don't overload your presentation with animations
As anyone who’s sat through a presentation while every letter of every paragraph zoomed across the screen can tell you, being inundated with complicated animations and exciting slide transitions can become irritating.
Before including effects like this in your presentation, ask yourself: Would this moment in the presentation be equally strong without an added effect? Does it unnecessarily delay information? If the answer to either question is yes—or even maybe—leave out the effect.
Use animations sparingly to enhance your presentation
Don’t take the last tip to mean you should avoid animations and other effects entirely. When used sparingly, subtle effects and animations can add to your presentation. For example, having bullet points appear as you address them rather than before can help keep your audience’s attention.
Keep these tips in mind the next time you create a presentation—your audience will thank you. For more detailed information on creating a PowerPoint presentation, visit our Office tutorials .
/en/powerpoint-tips/three-tips-for-beautiful-powerpoint-presentations/content/

Cloud Storage

Custom Business Email

Video and voice conferencing

Shared Calendars

Word Processing

Spreadsheets
Presentation Builder

Survey builder

Google Workspace
An integrated suit of secure, cloud-native collaboration and productivity apps powered by Google AI.
Tell impactful stories, with Google Slides
Create, present, and collaborate on online presentations in real-time and from any device.
- For my personal use
- For work or my business

Jeffery Clark
T h i s c h a r t h e l p s b r i d g i n g t h e s t o r y !

E s t i m a t e d b u d g e t

Make beautiful presentations, together
Stay in sync in your slides, with easy sharing and real-time editing. Use comments and assign action items to build your ideas together.

Present slideshows with confidence
With easy-to-use presenter view, speaker notes, and live captions, Slides makes presenting your ideas a breeze. You can even present to Google Meet video calls directly from Slides.

Seamlessly connect to your other Google apps
Slides is thoughtfully connected to other Google apps you love, saving you time. Embed charts from Google Sheets or reply to comments directly from Gmail. You can even search the web and Google Drive for relevant content and images directly from Slides.

Extend collaboration and intelligence to PowerPoint files
Easily edit Microsoft PowerPoint presentations online without converting them, and layer on Slides’ enhanced collaborative and assistive features like comments, action items, and Smart Compose.

Work on fresh content
With Slides, everyone’s working on the latest version of a presentation. And with edits automatically saved in version history, it’s easy to track or undo changes.

Make slides faster, with built-in intelligence
Assistive features like Smart Compose and autocorrect help you build slides faster with fewer errors.

Stay productive, even offline
You can access, create, and edit Slides even without an internet connection, helping you stay productive from anywhere.
Security, compliance, and privacy

Secure by default
We use industry-leading security measures to keep your data safe, including advanced malware protections. Slides is also cloud-native, eliminating the need for local files and minimizing risk to your devices.
Encryption in transit and at rest
All files uploaded to Google Drive or created in Slides are encrypted in transit and at rest.
Compliance to support regulatory requirements
Our products, including Slides, regularly undergo independent verification of their security, privacy, and compliance controls .
Private by design
Slides adheres to the same robust privacy commitments and data protections as the rest of Google Cloud’s enterprise services .

You control your data.
We never use your slides content for ad purposes., we never sell your personal information to third parties., find the plan that’s right for you, google slides is a part of google workspace.
Every plan includes

Collaborate from anywhere, on any device
Access, create, and edit your presentations wherever you are — from any mobile device, tablet, or computer — even when offline.

Get a head start with templates
Choose from a variety of presentations, reports, and other professionally-designed templates to kick things off quickly..

Photo Album

Book Report

Visit the Slides Template Gallery for more.
Ready to get started?
April 4, 2024
11 Best Websites for Making a Presentation (And How to Choose One For Your Needs)
Here are 11 of the best websites and programs to create free presentations online
Co-founder, CEO
The best websites for making presentations equip you with all the tools needed to build a professional, attractive, and informative slide deck quickly and efficiently. But with dozens of slide makers claiming to be the best, it’s hard to choose an app that suits your needs best.
We’ve done the legwork for you and scoured the web for the best presentation websites. We based our evaluation on factors such as functionality, ease of use, AI sophistication, collaboration tools, and value for money. Below is the result — a comprehensive overview of the 11 best web-based slide creation apps based on our findings.
Short on time? Summary of the best sites for making a presentation
1. plus ai — best all-round presentation maker.

Key Features
- Adds easy-to-use AI to Google Slides
- Affords customization options for slide templates, colors, and logos
- Allows slide deck generation via different methods
- Facilitates collaboration within teams on Google Workspace
- Features a setting-rich but straightforward user interface
- $10/month for Basic and $20 for Pro versions when billed annually ($15 and $30, respectively, with monthly billing)
Plus AI is a powerful and user-friendly presentation maker that’s suitable for any purpose, whether you’re a professional, student, or amateur user.
Plus AI gives you a robust selection of AI slide creation methods. You can generate presentations straight from text, work on them slide-by-slide, design them from scratch, or use existing templates. Regardless of the method, the tool’s AI technology does all the heavy lifting design-wise and the interface is a breeze to navigate, so you can sit back and focus on the content.
Meanwhile, the customization options allow you to tailor the slides to your desired aesthetic, content type, and audience, and you can create your presentation in 80 languages. The resulting slide decks are elegant, professional, and appropriate for any use case.
Plus AI is an affordable presentation maker, with pricing that starts at $10 per month with annual billing, or $15 when billed monthly. Each of the plans includes an AI extension for Google Docs; this feature helps you compose and edit text. If you’d rather not spend money without taking the tool for a test drive, Plus AI offers you a 7-day free trial.
Here are the key pros and cons of Plus AI — they should help you decide if this presentation maker is right for you:
- Generates professional and visually appealing presentations in minutes — no design skills needed
- AI function allows you to edit and format slides without manual effort
- Lots of ways to customize the presentation
- Vast selection of templates and example presentations
- Text-to-slide and from-scratch creation
- Allows team collaboration in Google Workspace
- Integrates with Google Slides and Microsoft PowerPoint
- Budget-friendly plans and a 7-day free trial
- Plus creates presentations in Google Slides or PowerPoint format, which may be harder for newer users to edit
2. Canva — Best free presentation site

- Offers mobile presentation templates
- Web- or mobile-based Canva app supports collaboration
- Remote Control feature lets you run the presentation from your smartphone
- Canva live feature allows viewers to join QA sessions during a presentation
- Presenter mode lets you see your speaking notes and upcoming slides while you present
- AI assists in slide creation and can present on your behalf
- Individual Free Plan: $0 per month
- Individual Pro Plan: $14.99 per month
- Teams Plan: $29.99 per month
Canva is a web-based template editor with graphics creation tools and a powerful presentation builder in its free plan. Canva offers you an array of slide templates designed for virtually any purpose, along with a suite of customization tools to tailor the presentation to your topic and setting.
Canva has made a noticeable effort to optimize presentations for the smartphone. The app’s most striking feature is its selection of mobile presentation templates, which don’t lag their desktop-based peers in either aesthetics or utility. But whether or not your presentation is designed for a mobile screen, Canva lets you run it right from your smartphone, with a presenter view that shows your notes and upcoming slides. The audience can likewise engage with your presentation from their mobile devices during Q&A sessions.
Depending on your use case, you may be able to get away with Canva’s comprehensive free plan. The free Canva has presentation creation and editing tools and gives you access to a huge selection of professional templates. However, it’s the $14/month Pro plan that lets you unlock all the premium tools and graphic assets. And if you need Canva to collaborate with teams, you’re looking at $29.99 per month for the first 5 users.
To help you decide whether Canva is worth trying out, we’ve made this quick summary of the app’s pros and cons:
- Solid free plan with basic features and a large selection of graphic assets
- Optimized for mobile presentations
- Elegant templates for any use case
- Intermediate design skills required
- No direct integration with Google Workspace or Microsoft 365 (possible through third-party apps)
3. Prezi — Best slide tool for creative users

- Web-based tool for creating presentations, videos, and infographics
- Asset library includes templates, ready-to-use story blocks, and stock images from Unsplash and GIFs from
- Integrates with Webex, Zoom, Microsoft Teams, and other video conferencing apps to show presentations and the presenter on the same screen
- Lets you convert PowerPoint presentations to Prezi
Pricing (all plans are billed annually)
- For students/educators: $3-8 per month
- For individuals: $7-19 per month
- For businesses: $15-29 per month
Prezi is a web-based tool for creating presentations, videos, and infographics that are suitable for business and educational settings. The tool offers a wealth of image and icon assets, as well as templates to get you started on your slide deck. The templates do not constrain your creativity with linear slides the way PowerPoint does — you can create your presentations on an open canvas. Prezi even lets you import and customize PowerPoint presentations in its app. And, with the help of Prezi’s new AI tool, you can create and edit entire presentations quickly.
One of Prezi’s most defining features is its integration with popular video conferencing apps, such as Webex, Zoom, Teams, and Meet. Crucially, Prezi lets your slides appear on the same screen as your own video feed while you’re presenting.
Prezi offers three pricing tiers. Students and educators get the least expensive options, with plans that range between $3 and $8 per month. For individual users, plans cost $7-19 per month, while business users pay between $15 and $29 per month. All of Prezi’s plans are billed annually, but you can try the tool for 14 days without committing to a subscription.
If you’re not sure whether this presentation tool is right for you, consider Prezi’s pros and cons below:
- Design freedom and for creating unique and attractive slides
- Graphic assets are readily available
- Integrates with video conferencing apps
- AI assistant generates and edits presentations
- Inexpensive plans for students and educators
- Video and infographic creation part of each plan
- 14-day free trial
- Design skills required to create quality presentations
- Lack of integration with Google Slides and Microsoft PowerPoint
- No monthly billing options
4. Visme — Best for graphics and special effects

- Tools for creating special effects and animating graphics
- Ability to import and edit Microsoft PowerPoint presentations
- AI designer helps create a presentation draft
- Integration with Google Drive, DropBox, Mailchimp, Slack, and other apps
- Presentation analytics tools
- Basic package: $0/month
- Starter package (individual): $12.25/month
- Pro package (individual or team): $24.75-$79+/month
Visme is a web-based app for producing various types of visual content, including presentations. The app’s most distinct feature is its suite of special effects you can use to make the slides’ content and graphics more engaging. The app also lets you animate the images and insert video and audio features into the slides.
Visme integrates with a whole host of other platforms and apps. These integration options are largely designed to let you import content seamlessly into Visme. For example, you have the option of importing your PowerPoint files into Visme, enhancing them there, and exporting them back in the .ppt format if you like. That said, Visme does not work as an extension in popular slide makers, like Google Slides or PowerPoint.
You have three main pricing options with Visme. The Basic plan is free, but you’re limited in access to collaboration tools, assets, interactive, and AI features. The more comprehensive Starter plan costs $12.25 per month (billed annually), and equips you with Visme’s more premium tools. Finally, the Pro team plan sets you back $79/month for a team of 5 and lets you use Visme’s entire suite of interactivity and collaboration functions.
Here are a few vital pros and cons if you need help deciding whether Visme is right for you:
- Vast selection of special effects
- Ability to animate graphics on the slides
- Simple file movement between different web-based apps
- Free plan available
- Free plans extremely limiting
- No direct integration with Google or Microsoft slide tools
5. Powtoon — Best for slides with animation

- Templates with configurable graphics and animation
- Customizable fonts, colors, and logos
- Access to stock images, videos, and soundtracks
- Lite plan: $50/month ($15/month when billed annually)
- Professional plan: $190/month ($40/month when billed annually)
- Agency: $117/month (annual billing only)
Powtoon is a visual web-based content creation platform with tools for making videos, animations, and presentations. The app’s presentation function lets you build slides using professional templates, in which you’re free to customize the fonts, colors, logos, and graphics. You can even animate the graphics and build custom avatars to present on your behalf — it’s one of Powtoon’s unique selling features.
Powtoon’s suite of slide tools includes a database of royalty-free stock images, video footage, and music. You can use all of these assets in your slides, or upload your own as you see fit. However, how much of these shiny tools you can use in your slide decks depends on the chosen plan.
There are three pricing plans available, and the discrepancy between monthly and annual payments is striking. Most presentation sites charge a few dollars more if you opt for monthly instead of annual billing, but Powtoon’s monthly prices easily triple and quadruple. For example, the Lite plan costs $15/month with annual billing, but $50 if you wish to pay every month instead. You get very basic features with this plan, especially as far as animation and interactivity are concerned. Likewise, the Professional plan jumps from $40 to $190 if you choose monthly payments. You get a bit more for your buck, but some rudimentary features are still absent (like font uploads). Meanwhile, the Agency plan costs a whopping $1400 annually (no monthly option), and this plan gets you all of the app’s bells and whistles.
Not sure if investing in a product like Powtoon is worth it? Consider its pros and cons below:
- Comprehensive animation and video creation features
- Graphic and audio assets available with subscription
- Fonts and logos can be uploaded
- Most customization, animation, and AI features only come with the expensive Agency package
- Monthly payment options are not reasonable
6. Haiku Deck — Best site for image editing options

- Minimalistic interface
- Graphic design tools for improving slide aesthetics
- Pre-loaded templates and image assets
- Cloud-based file sharing for team collaboration
- AI presentation builder (Haiku Deck Zuru)
- Pro plan: $9.99 per month billed annually, or $19.99 monthly
- Premium plan: $29.99 per month, billed annually
Haiku Deck is a web, desktop, and mobile-based presentation builder with a significant focus on design aesthetics. The app’s design tools allow you to refine the graphics in the preloaded templates and images you’re using in the slides. You can source the images right from Haiku’s repository, which boasts over 40 million assets.
To help you create your slide decks, Haiku offers its AI assistant. The AI feature can create new presentations from your outline, or enhance your existing drafts. Since the AI learns from other Haiku users, its algorithms are now trained to outfit slides with contextually relevant imagery and graphics.
Haiku Deck’s pricing has two tiers: Pro and Premium. The Pro plan costs $9.99/month when billed annually and affords full access to the slide creation tools. Meanwhile, the Premium plan will set you back $29.99/month (again, billed annually), and equips you with features such as analytics, live web tracking, and priority support.
Here’s a summary of Haiku Deck’s most prominent pros and cons:
- Visually appealing slides
- Large database of graphic assets
- Advanced tools for editing images
- Capable AI-powered slide builder
- No free plan
- No integration with Google Slides or Microsoft PowerPoint
7. Zoho Show — Best presentation site for budget-minded users

- Clean interface with tools changing depending on the task
- Library for templates, slides, and fonts to facilitate team collaboration
- Over 100 templates
- Imports/exports PowerPoint files
- Presentations can be controlled from smartphone or smart watch
- For individuals: Free
- Professional Plan: $2.50/month and up (billed annually)
- With Zoho Workplace Standard: $3.00/month (billed annually)
Zoho is a web-based suite of business tools, and Zoho Show is its slide creation app. Zoho Show is a straightforward, inexpensive, yet fully functional slide maker that offers most of the same features you’ll get from pricier presentation sites. You can build your decks using over 100 preloaded templates, work on PowerPoint presentations before exporting them to their original file format, and run your slideshow from a smart device. Show’s most unique feature is its clean, contextual interface that only displays tools that are relevant to your current task (whether that’s handy or limiting depends on your preferences).
Zoho Show’s pricing has three tiers. First, there’s the Free plan. This package lets you build basic presentations, but you miss out on key collaboration features and have limited access to graphic assets. Next, you get the more comprehensive Professional Plan, which costs $2.50; you must sign up for Zoho WorkDrive and have a team of 3 people to get this plan. Finally, you can get the entire Zoho Workplace suite for $3/month — this option unlocks the full functionality of the Show app and lets you use other Zoho tools, such as their Office Suite, Mail, and Workdrive.
Have a look at Zoho Show’s pros and cons below to see if this presentation website is right for you:
- Interface automatically shows tools relevant to the task
- Ability to add custom fonts and embed files into slides
- Templates, graphic assets, and collaboration tools included
- Supports PowerPoint file formats
- Subscription to Zoho Workdrive or Workplace required to access paid plan — unnecessary if all you need is a presentation tool
- Some plans require a minimum of 3 users
- Free individual plan limits use of graphic assets, templates, and collaboration tools
- No direct integration with Google Slides
8. Pitch — Best presentation site for use in business and sales

- Lets you build presentations with AI, from a template, or from scratch
- Supports custom fonts and colors
- Provides team collaboration tools
- Allows you to embed presentations on the web
- Offers engagement analytics tools
- Pro plan: $25/month
- Business: $100/month
Pitch is a web-based presentation maker designed primarily for business use. The app helps streamline slide deck creation with its AI tool, which generates a first draft based on your prompts and leaves your team with the task of refining the slides to your liking. The slides have shareable links, so your entire team can collaborate on the slide deck. You can even invite consultants from outside your workplace to edit the presentations.
Once your slide deck is complete, Pitch allows you to embed it on the web in your CMS — much like you’d do with a YouTube video. And to give you a feel for how audiences engage with your presentation, Pitch equips you with engagement and analytics performance tools.
There are three pricing options with Pitch. The free plan comes with all the presentation creation functions, but you get no tracking and limited collaboration tools. The Pro plan costs $25/month (or $22 per month when billed annually), and gives you more freedom to use Pitch in a team environment. Finally, the Business plan costs $100/month (or $85/month with yearly billing) and gives you access to the full suite of features.
Can’t decide if Pitch is the best presentation website for your team? Have a look at its most vital pros and cons:
- AI slide creation feature
- Performance analytics tools
- Integration with various productivity and collaboration apps
- Media asset library
- Engagement tracking only available in paid plans
- No integration with Google Slides or Microsoft 365
9. Beautiful.ai — Best site for no-frills AI-generated presentations

- AI-powered presentation maker
- Slide creation from user’s prompts
- Automated slide formatting
- File sharing within the team (requires Team Plan)
- Graphic assets database
- Pro: $144 per year
- Team: $40/month per user with annual billing ($50 with monthly billing)
- Enterprise: Pricing available on request
Beautiful.ai is an AI-powered presentation builder that leverages full automation to make slide creation quick and easy. All you need to do is enter a prompt for your slide deck, and beautiful.ai will generate your first draft. These AI-generated drafts are quite simplistic in terms of both content and graphics, but they serve as a good starting point. Moreover, beautiful.ai’s presentations are formatted consistently, which should save you time as you edit each slide.
You get three pricing options with beautiful.ai — Pro, Team, and Enterprise. The Pro package is meant for individual use, and costs $144 per year (there’s no way to pay monthly). The plan equips you with the AI slide maker but limits your use of assets and team collaboration features. The Pro plan costs $50/month for each user, or $480 annual for each license you purchase. This plan affords access to more customization and teamwork functions and lets you use graphic assets. Finally, the Enterprise plan includes all the features of the Pro plan, but with more dedicated training and support for your team. You’d have to reach out to beautiful.ai’s sales team to get a quote for the Enterprise plan.
Beautiful.ai helps create slides quickly and with little skill. However, if you’re not sure this app is right for you, consider its most vital pros and cons below.
- Quick way to create and format slides
- Inexpensive plan for personal use
- Elegant slide templates
- No integration with Google Slides or Microsoft 365
- Slide content is very basic
- Limited customization and branding options
10. Google Slides — Best for Google Workspace Users With Basic Presentation Needs

- Basic presentation creation tool
- Limited selection of templates, fonts, and colors
- Supports import/export of PowerPoint files
- Allows collaboration within the Google Workspace
- Free with a Google account
Slides is the web-based presentation tool you get with your Google account. This rudimentary app features a limited library of templates, fonts, and colors, along with a basic suite of tools for formatting the text and graphics in your slides. You can insert your own image, video, and audio files into the slides, but there is no access to a library of royalty-free assets.
Despite its functional constraints, Google Slides is a useful app because it lets teams using Google Workspace collaborate easily on presentations. To get the most of Slides, though, you need to boost its functionality with a suitable extension. Google Gemini now works as an extension within the app, but for the $30 it costs you, the output is disappointing. All Gemini knows does is generate simple, low-quality images; it won’t help you produce, format, or edit presentations.
In contrast, an app like Plus AI leverages artificial intelligence algorithms to give Google Slides powers it lacks on its own. By using the Plus AI extension, you can create entire Slides presentations from a single prompt, automate slide editing and formatting, and access a rich library of templates and ready-made slide decks. Meanwhile, Plus AI’s customization features help you brand your presentations with custom fonts, colors, and your company logo.
Not sure if Google’s slide creation tool is right for you? Have a look at its pros and cons below.
- Allows collaboration in the Google Workspace
- Compatible with PowerPoint files
- Supports AI-powered slide-creation extensions, such as Plus AI
- Free to use with a Google account
- Limited capabilities without third-party apps
- No library with image, video, or audio assets
11. Microsoft PowerPoint — Best For Highly Skilled Presentation Designers

- Vast library of slide themes, variants, and layouts
- Database of stock images and videos
- Massive array of slide editing, formatting, and customization tools
- Supports collaboration in the Microsoft 365 ecosystem
- As a standalone product: $159.99 (one-time fee)
- With Microsoft 365 apps, for home use: $6.99-$9.99/month
- With Microsoft 365 apps, for business use: $6.00-22.00/user/month
PowerPoint is one of the world’s oldest presentation builders that’s been part of Microsoft’s arsenal since the early 1990s. To this day, PowerPoint has been the most commonly used presentation app. But there’s a reason we’ve ranked it last on our list. Buoyed by its popularity, PowerPoint hasn’t evolved much over time; you won’t get anything beyond the most basic and uninspired presentations out of it unless you’re an advanced user with lots of time on your hands.
The app’s user interface immediately overwhelms you with options and settings. Some of these seem similar in how they function, and you won’t know which tool to use until you’ve experimented with them all. Apart from the cluttered interface, PowerPoint disappoints with its simplistic selection of templates and designs.
You can use Microsoft’s Copilot to forgo the tedious task of creating your own PowerPoint presentation, but beware: like Gemini, Copilot is still limited in its slide-making abilities. You can get it to create a slide deck from a single prompt, but the output will feature basic and repetitive along with lifeless images.
PowerPoint’s pricing is a bit convoluted at a glance — you get different options whether you want the standalone product ($159.99) or the entire Microsoft 365 suite. If you choose the latter, the Home options range in price between $6.99 and $9.99 per month, while the Business plans cost between $6.00 and $22.00 per month per user.
We don’t believe that PowerPoint is worth your time considering the vast selection of more powerful and user-friendly presentation apps on the market. However, you can review the app’s pros and cons below and decide for yourself.
- Massive selection of design and customization tools
- Integrates with Microsoft Copilot
- Lets team members using Microsoft 365 work on the same presentation simultaneously
- Overwhelming user interface
- Very basic templates and designs
- Creating professional presentations is a challenge for novice users
- AI assistant cannot produce elegant, content-rich slide decks
How we ranked the best presentation sites
To make your selection process simple and effective, we ranked the best presentation websites based on these vital criteria:
- Functionality
- Level of AI sophistication
- Ease of use
- Collaboration options
Integration with popular slide creation tools
Value for money, functionality .
The best presentation sites are loaded with handy functions that enable you to make visually appealing, info-rich, and engaging presentations with little effort and minimal editing. These include customization tools, templates, image assets, and graphics refinement features.
Level of AI sophistication
AI technology is at the forefront of slide makers’ drive to create the best product for their clients. AI-powered presentation sites save you from spending long hours on writing content, digging up graphics, and then formatting every slide — AI handles these tasks for you. But not all AI slide creators are made equal. Some leave you with rudimentary decks that feature repetitive content and unrelated imagery. Others give you a solid starting point for an informative and captivating presentation.
Ease of use
The best presentation sites greet you with an intuitive and uncluttered interface that takes you minutes (if not seconds) to master. But usability goes beyond navigating the UI. That’s why we also assess the simplicity with which you can actually produce presentations. Simply put, how easy is it to create and edit slides? Do you need advanced design skills to manipulate the graphics and give the slide deck your desired aesthetic ? The best slide makers take these questions into account, so that their product makes presentations a breeze. You worry about the content, and let the app do the rest.
Collaboration options
High-quality presentation apps allow team members to create, edit, and give feedback on presentations remotely. That’s because today’s business needs, along with hybrid work arrangements, mean that more and more teams are forced to collaborate electronically. Features such as cloud-based file sharing and integration with communication platforms help different members of your team work on the presentation from wherever they are.
Google Slides and Microsoft PowerPoint are the most commonly used presentation programs in the world. These two giants are the natural, go-to option for slide creation in the corporate, educational, and institutional world. Any presentation app that’s worth its salt should integrate with at least one of these tools. At the very least, a quality independent slide app should be able to import and export files that can be used in Google Slides or PowerPoint.
The best presentation apps are usually not free, but the money you pay for them should be worth the features and benefits you get in return. That’s why we’ve evaluated each of the slide makers above based on the balance between their price point and their offerings.
How to choose the best presentation website for your needs?
You can’t really go wrong by opting for any of the 10 presentation sites above; however, to get a tool that’s tailored to your use-case, you’ll have to do a bit more research and analysis. The four steps below should help you zero in on the optimal presentation maker for your needs.
- Consider the purpose of the presentation. Some slide tools cater to sales teams (think Pitch), others to graphic-minded users (Haiku Deck comes to mind), while others, like Plus AI, are excellent all-rounders.
- Decide on the level of customization you need. How concerned are you with personalizing and branding your slide decks? If a generic, templated presentation is all you need for a school project, investing in a feature-rich, customizable tool may be overkill. But if you need your slide decks to feature custom colors, fonts, and convey your brand identity, opt for a tool (and pricing package) that has this functionality.
- Decide if you want AI help. Unless you’re a skilled designer with a passion for creating and formatting slides, AI can be incredibly useful. Consider this: would you rather spend hours on refining your slides and ensuring consistency, or have the AI tool produce a uniformly formatted first draft? Check out the best AI presentation makers here.
- Factor in your budget. Most presentation sites have similar pricing, with monthly plans ranging between $0 and $40. However, some charge more — much more. Of course, the higher price points generally translate into richer offerings that may include other apps for visual content creation. Consider whether you need these extras or if a capable slide creation tool will suffice.

Latest posts
Latest post.

How do AI content detectors work — and can you trust them?
We tested 10 of the most popular AI content detector tools, their accuracy, whether they can be trusted — and how to bypass detection.
How to use ChatGPT to create PowerPoint presentations
Step-by-step guide to using AI tools to create presentations. Looking for ChatGPT for PowerPoint? Here's a guide to using AI in PowerPoint and Google Slides
.webp)
A guide to all of Google’s AI products
A comprehensive guide to Google's AI ecosystem, categorizing all of Google's AI products and analyzing the ways that Google AI products have evolved over time.

Tome vs. Gamma: In-depth comparison, pricing, and recommendations
In-depth comparison of Tome and Gamma with recommendations for which tool is right for you
More resources
100+ Ideas for informative speech topics
Easy, fun, and educational ideas and inspiration for your next informative speech. Check out these starter topics and example presentations
How To Wrap Text In Google Slides: A Quick Guide
A step-by-step guide on how to wrap text in Google Slides and how to save time on formatting with Plus AI
Canva Magic Design for Presentations and alternative AI presentation tools
In-depth review of Canva's AI presentation product as well as alternative AI presentation makers to consider
Top searches
Trending searches

12 templates

68 templates

el salvador
32 templates

41 templates

48 templates

33 templates
Create your presentation
Writing tone, number of slides.

AI presentation maker
When lack of inspiration or time constraints are something you’re worried about, it’s a good idea to seek help. Slidesgo comes to the rescue with its latest functionality—the AI presentation maker! With a few clicks, you’ll have wonderful slideshows that suit your own needs . And it’s totally free!

Generate presentations in minutes
We humans make the world move, but we need to sleep, rest and so on. What if there were someone available 24/7 for you? It’s time to get out of your comfort zone and ask the AI presentation maker to give you a hand. The possibilities are endless : you choose the topic, the tone and the style, and the AI will do the rest. Now we’re talking!
Customize your AI-generated presentation online
Alright, your robotic pal has generated a presentation for you. But, for the time being, AIs can’t read minds, so it’s likely that you’ll want to modify the slides. Please do! We didn’t forget about those time constraints you’re facing, so thanks to the editing tools provided by one of our sister projects —shoutouts to Wepik — you can make changes on the fly without resorting to other programs or software. Add text, choose your own colors, rearrange elements, it’s up to you! Oh, and since we are a big family, you’ll be able to access many resources from big names, that is, Freepik and Flaticon . That means having a lot of images and icons at your disposal!

How does it work?
Think of your topic.
First things first, you’ll be talking about something in particular, right? A business meeting, a new medical breakthrough, the weather, your favorite songs, a basketball game, a pink elephant you saw last Sunday—you name it. Just type it out and let the AI know what the topic is.
Choose your preferred style and tone
They say that variety is the spice of life. That’s why we let you choose between different design styles, including doodle, simple, abstract, geometric, and elegant . What about the tone? Several of them: fun, creative, casual, professional, and formal. Each one will give you something unique, so which way of impressing your audience will it be this time? Mix and match!
Make any desired changes
You’ve got freshly generated slides. Oh, you wish they were in a different color? That text box would look better if it were placed on the right side? Run the online editor and use the tools to have the slides exactly your way.
Download the final result for free
Yes, just as envisioned those slides deserve to be on your storage device at once! You can export the presentation in .pdf format and download it for free . Can’t wait to show it to your best friend because you think they will love it? Generate a shareable link!
What is an AI-generated presentation?
It’s exactly “what it says on the cover”. AIs, or artificial intelligences, are in constant evolution, and they are now able to generate presentations in a short time, based on inputs from the user. This technology allows you to get a satisfactory presentation much faster by doing a big chunk of the work.
Can I customize the presentation generated by the AI?
Of course! That’s the point! Slidesgo is all for customization since day one, so you’ll be able to make any changes to presentations generated by the AI. We humans are irreplaceable, after all! Thanks to the online editor, you can do whatever modifications you may need, without having to install any software. Colors, text, images, icons, placement, the final decision concerning all of the elements is up to you.
Can I add my own images?
Absolutely. That’s a basic function, and we made sure to have it available. Would it make sense to have a portfolio template generated by an AI without a single picture of your own work? In any case, we also offer the possibility of asking the AI to generate images for you via prompts. Additionally, you can also check out the integrated gallery of images from Freepik and use them. If making an impression is your goal, you’ll have an easy time!
Is this new functionality free? As in “free of charge”? Do you mean it?
Yes, it is, and we mean it. We even asked our buddies at Wepik, who are the ones hosting this AI presentation maker, and they told us “yup, it’s on the house”.
Are there more presentation designs available?
From time to time, we’ll be adding more designs. The cool thing is that you’ll have at your disposal a lot of content from Freepik and Flaticon when using the AI presentation maker. Oh, and just as a reminder, if you feel like you want to do things yourself and don’t want to rely on an AI, you’re on Slidesgo, the leading website when it comes to presentation templates. We have thousands of them, and counting!.
How can I download my presentation?
The easiest way is to click on “Download” to get your presentation in .pdf format. But there are other options! You can click on “Present” to enter the presenter view and start presenting right away! There’s also the “Share” option, which gives you a shareable link. This way, any friend, relative, colleague—anyone, really—will be able to access your presentation in a moment.
Discover more content
This is just the beginning! Slidesgo has thousands of customizable templates for Google Slides and PowerPoint. Our designers have created them with much care and love, and the variety of topics, themes and styles is, how to put it, immense! We also have a blog, in which we post articles for those who want to find inspiration or need to learn a bit more about Google Slides or PowerPoint. Do you have kids? We’ve got a section dedicated to printable coloring pages! Have a look around and make the most of our site!
Search for: Search Button
- Share a link to a specific PowerPoint slide
There’s a way to link someone to view a specific slide in a PowerPoint presentaion which is a lot faster than hunting through a big slide deck.
Requirements
Link to this slide, check the share permissions, sharing settings, edit / view only / no download, or there’s another way ….
Providing a direct link to a specific part of your slideshow not only streamlines the process of receiving feedback but also enables them to locate the content you want them to review more efficiently.
PowerPoint simplifies the process with its “Link to This Slide” feature, generating a direct link that opens the file at the specific slide in your presentation.
The presentation has to be saved in cloud storage that the receiver/s can also access it. If the presentation isn’t already saved online, modern Office will help you do that.
Launch PowerPoint presentation stored on your local drive. Next, navigate to the specific slide you wish to share. Then, right-click on the desired slide and a shortcut menu pops up. From this menu, select the option “Link To This Slide” to generate a direct link to the chosen slide within your presentation.

Selecting “Share Link To This Slide,” will prompt you to upload your presentation to OneDrive to allow sharing.

Office just dumps the file into your OneDrive account, you’ll probably want to choose a specific folder instead.
Once the presentation is saved in a cloud location, you can share it or a slide. Do that from PowerPoint on the web or modern PowerPoint for Windows/Mac. Click on the slide in the slide navigator and select the “Link To This Slide” option.

The system generates a direct link that is ready to be shared but before you copy , check what permissions you’re giving to access the presentation and to whom.
Under the link is a short note to indicate the sharing settings for the current link. Click on Settings to change or verify the sharing. Or select the copy option, and you’ll receive a notification confirming that the link has been copied.

For more specific access privileges, go to the Settings option to customize permissions for reviewers or audience. You can choose with whom you want to share your files. This typically involves setting access permissions or sharing settings with user or user groups.
The sharing settings can include any of the following options, depending on the type of account (personal, business etc).
“Anyone With The Link Can Edit.” – permits anyone with access to the link to edit the slide’s content. This functionality facilitates effective collaboration and sharing among teams or groups. Opting for this setting grants editing privileges to anyone possessing the link.
“People in the Organization – accessible by the organization with the privileges to access the link.
“People you choose – selectively available.
Customize the access privileges more from the More Settings option, where you can define specific permissions, such as editing, viewing, and downloading for reviewers or audience.
Finalize the process by clicking on the “Apply” button ensuring that the changes take effect according to your preferences.
Once you’ve configured the access privileges and applied the changes, you can proceed to share the link via email to the intended audience. Simply copy the link generated by the sharing feature and paste it into your email or other message.

At risk of stating the obvious, there’s another way to share a single slide with ‘read only’ access.

Take a screen shot of the slide and paste it into an email or message.
Using Designer for more eye-catching PowerPoint slides PowerPoint Cameo puts your video selfie into a slide Reuse slides in PowerPoint, the good and the annoying
About this author

Mayurakshi Mohapatra
Office 2021 - all you need to know . Facts & prices for the new Microsoft Office. Do you need it? Office LTSC is the enterprise licence version of Office 2021.
Office 2024 what's known so far plus educated guesses. Microsoft Office upcoming support end date checklist.
Latest from Office Watch
- Coin 🪙 emoji in Word, Excel, PowerPoint and Outlook
- Translate automatic or manual in Outlook
- Microsoft Mesh makes “magical” online meetings
- Why are Teams and Office divorcing?
- Pivotby – Excel’s new faster PivotTables
- More Excel on the web improvements
- All about editing an incoming Outlook message
- What “Update License” means on Microsoft 365 menus
- Excel’s warning about dates and centuries
- Write Excel formulas fast with free Copilot
- Easter images and icons in Microsoft Office
- Credit Card 💳 symbol in Word, Excel, PowerPoint and Outlook
- Yes, there will be a new version of Microsoft Office
- All about Office 2024 for Windows and Mac (so far)
- In person vs virtual event option coming to Outlook
- Checklists now in Microsoft Word
- Start Grouping in Excel for better looking sheets
- Three more Word features reach the web version
- Web link previews in Word for web
Suggestions or feedback?
MIT News | Massachusetts Institute of Technology
- Machine learning
- Social justice
- Black holes
- Classes and programs
Departments
- Aeronautics and Astronautics
- Brain and Cognitive Sciences
- Architecture
- Political Science
- Mechanical Engineering
Centers, Labs, & Programs
- Abdul Latif Jameel Poverty Action Lab (J-PAL)
- Picower Institute for Learning and Memory
- Lincoln Laboratory
- School of Architecture + Planning
- School of Engineering
- School of Humanities, Arts, and Social Sciences
- Sloan School of Management
- School of Science
- MIT Schwarzman College of Computing
- Q&A: Tips for viewing the 2024 solar eclipse
Q&A: Tips for viewing the 2024 solar eclipse
Press contact :.

Previous image Next image
On Monday, April 8, the United States will experience a total solar eclipse — a rare astronomical event where the moon passes directly between the sun and the Earth, blocking out the sun’s light almost completely. The last total solar eclipse in the contiguous U.S. was in 2017, and the next one won’t be until 2044.
If the weather cooperates, people across the United States — from northeastern Maine to southwestern Texas — will be able to observe the eclipse using protective eyewear. Those in the path of totality , where the moon entirely covers the sun, will have the best view, but 99% of people in the continental U.S. will be able to see a partial eclipse. Weather permitting, those on the MIT campus and the surrounding area will see 93 percent of the sun covered, with the partial eclipse starting at 2:15 p.m. and reaching its peak around 3:29 p.m. Gatherings are planned at the Kresge Oval and the MIT Museum , and a live NASA stream will be shown in the Building 55 atrium .
Brian Mernoff , manager of the CommLab in the Department of Aeronautics and Astronautics, is an accomplished astrophotographer and science educator. Mernoff is headed to Vermont with his family to experience the totality from the best possible angle — but has offered a few thoughts on how to enjoy the eclipse safely, wherever you are.
Q: What should viewers expect to see and experience with this solar eclipse?
A: When you’re watching TV (the sun) and your toddler, dog, or other large mammal (the moon) blocks your view, you no doubt move over a bit to try to get a partial or full view of the TV. This is exactly how the path of totality works for an eclipse. If you are exactly in line with the moon and sun, it will be completely blocked, but if you start moving away from this path, your view of the sun will start to increase until the moon is not in the way at all.
The closer you are to the path of totality, the more of the sun will be blocked. At MIT, about 93 percent of the sun will be blocked. Those in the area will notice that things around you will get slightly darker, just like when it starts to become overcast. Even so, the sun will remain very bright in the sky and solar glasses will be required to view the entirety of the eclipse. It really goes to show how incredibly bright the sun is!
Within the narrow path of totality, the moon will continue to move across the sun, reaching 100 percent coverage. For this short period of time, you can remove your glasses and see a black disk where the sun should be. Around the disk will be wispy white lines. This is the corona, the outermost part of the sun, which is normally outshone by the sun’s photosphere (surface). Around the edges of the black disk of the moon, right as totality begins and ends, you can also see bright spots around the edges, known as Bailey’s Beads, caused by sunlight shining between mountains and craters on the moon.
But that’s not all! Although you will be tempted to stare up at the sun throughout totality, do not forget to observe the world around you. During totality, it feels like twilight. There is a 360-degree sunset, the temperature changes rapidly, winds change, animals start making different sounds, and shadows start getting weird (look into “shadow bands” if you have a chance).
As soon as totality ends, and you start to see Baily’s Beads again, put your solar glasses back on as it will get very bright again very fast as the moon moves out of the way.
Q: What are the best options for viewing the eclipse safely and to greatest effect?
A: No matter where you are during the eclipse, make sure you have solar glasses. These glasses should be ISO-approved for solar viewing. Do not use glasses with scratches, holes, or other damage.
If you are unable to obtain solar glasses in time, you can safely view the eclipse using a home-made projection method , such as a pinhole camera or even projecting the image of the sun through a colander.
The best view of the eclipse will be from within the path of totality, but even if you are not within it, you should still go outside to experience the partial eclipse. Use the NASA Eclipse Explorer to find the start, maximum, and end times, and then find a nice spot outside — preferably with some shade — put on your glasses, and enjoy the show.
For a closer view of the sun, find a friend that has a telescope with the correct ISO-certified solar filter. This will let you see the photosphere (or chromosphere if it is an H-alpha scope) in a lot more detail. If you do not have access to a telescope, NASA plans to livestream a telescope view throughout the eclipse. [The livestream will be displayed publicly on a large screen in Building 55 at MIT, rain or shine.]
The only time you can look at or image the sun without a filter is during 100 percent totality. As soon as this period is done, glasses and filters must be put back on.
After the eclipse, keep your glasses and filters. You can use them to look at the sun on any day (it took me an embarrassing amount of time to realize that I could use the glasses at any time instead of lugging out a telescope). On a really clear day, you can sometimes see sunspots!
Q: How does eclipse photography work?
A: This year I plan to photograph the eclipse in two ways. The first is using a hydrogen-alpha telescope. This telescope filters out all light except for one wavelength that is given off by hydrogen. Because it blocks out most of the light from the sun’s surface, it allows you to see the turbulent upper atmosphere of the sun, including solar prominences that follow magnetic field lines.
Because this telescope does not allow for imaging during totality as too much light is blocked, I also plan to set up a regular camera with a wide-angle lens to capture the total eclipse with the surrounding environment as context. During the 2017 eclipse, I only captured close-ups of the sun using a regular solar filter and missed the opportunity to capture what was going on around me.
Will it work? That depends on if we get clear skies, and how many pictures of my 1.5-year-old need to be taken (as well as how much chasing needs to be done).
If you would like to take pictures of the eclipse, make sure you protect your camera sensor. The sun can easily damage lenses, sensors, and other components. Here are some examples of solar damaged cameras . The solution is simple, though. If using a camera phone, you can take pictures through an extra pair of solar glasses, or even tape them to the phone. For cameras with larger lenses, you can buy cardboard filters that slide over the front of your camera or even buy ISO-approved solar film and make your own.
Q: Any fun, unique, cool, or interesting science facts about this eclipse to share?
A: If you want to get even more involved with the eclipse, there are many citizen science projects that plan to collect as much data as possible throughout the eclipse.
NASA is planning to run several experiments during the eclipse , and researchers with MIT Haystack Observatory will also be using four different technologies to monitor changes in the upper atmosphere , both locally and across the continent.
If you are interested in learning more about the eclipse, here are two of my favorite videos, one on “ unexpected science from a 0.000001 megapixel home-made telescope ” and one on solar eclipse preparation .
Share this news article on:
Related links.
- Brian Mernoff
- AeroAstro Communication Lab
- Department of Aeronautics and Astronautics
Related Topics
- Space, astronomy and planetary science
- Aeronautical and astronautical engineering
- Earth and atmospheric sciences
- Photography
- Cambridge, Boston and region
- Science communications
Related Articles

MIT Haystack scientists prepare a constellation of instruments to observe the solar eclipse’s effects

Solar eclipse caused bow waves in Earth's atmosphere

Q&A: Richard Binzel on tips for observing the 2017 solar eclipse
Previous item Next item
More MIT News

A faster, better way to prevent an AI chatbot from giving toxic responses
Read full story →

Has remote work changed how people travel in the US?

Physicist Netta Engelhardt is searching black holes for universal truths

MIT community members gather on campus to witness 93 percent totality

Extracting hydrogen from rocks

When an antibiotic fails: MIT scientists are using AI to target “sleeper” bacteria
- More news on MIT News homepage →
Massachusetts Institute of Technology 77 Massachusetts Avenue, Cambridge, MA, USA
- Map (opens in new window)
- Events (opens in new window)
- People (opens in new window)
- Careers (opens in new window)
- Accessibility
- Social Media Hub
- MIT on Facebook
- MIT on YouTube
- MIT on Instagram
IMAGES
VIDEO
COMMENTS
Create a presentation. Open PowerPoint. In the left pane, select New. Select an option: To create a presentation from scratch, select Blank Presentation. To use a prepared design, select one of the templates. To see tips for using PowerPoint, select Take a Tour, and then select Create, . Add a slide.
To do that, simply go up to the Home tab and click on New Slide. This inserts a new slide in your presentation right after the one you were on. You can alternatively hit Ctrl+M on your keyboard to insert a new blank slide in PowerPoint. To learn more about this shortcut, see my guide on using Ctrl+M in PowerPoint.
1. Open PowerPoint. Click or double-click the PowerPoint app icon, which resembles an orange box with a white "P" on it. This will open the PowerPoint templates page. If you don't have a Microsoft Office 365 subscription, you can use the website instead of the desktop app.
Here's another one of our top PPT tips: tap into Envato Elements' unlimited stock photo library. People are more likely to take you seriously if your presentation is visually appealing. Users view attractive design as more usable. Similarly, they'll view a more attractive PowerPoint as more effective. 11.
Learn everything you need to know to get started using Microsoft PowerPoint! You'll learn all the basics plus more, including: how to choose a design theme...
Get your main point into the presentation as early as possible (this avoids any risk of audience fatigue or attention span waning), then substantiate your point with facts, figures etc and then reiterate your point at the end in a 'Summary'. 2. Practice Makes Perfect. Also, don't forget to practice your presentation.
In PowerPoint, you can create a presentation from scratch, or from a theme with built-in graphics, fonts, and placeholders for your text, images, and content...
Create a blank presentation. Open PowerPoint. Select one of the Blank Presentation and start typing. Note: Microsoft 365 subscribers will find Design Ideas based on the words you type. You can browse and select a new look.
Microsoft PowerPoint is a presentation design software that is part of Microsoft 365. This software allows you to design presentations by combining text, images, graphics, video, and animation on slides in a simple and intuitive way. Over time, PowerPoint has evolved and improved its accessibility to users.
A good presentation needs two fonts: a serif and sans-serif. Use one for the headlines and one for body text, lists, and the like. Keep it simple. Veranda, Helvetica, Arial, and even Times New Roman are safe choices. Stick with the classics and it's hard to botch this one too badly.
One of the basics of PowerPoint presentations is to have a consistent color palette throughout. With these PowerPoint basics covered, let's change the slide background color on slide two. To start, click on the slide background. Next, click on the Design tab. In the toolbar, click on the Format Background button.
Get started with PowerPoint for Beginners. Follow this 20-Minute step by step PowerPoint tutorial to start creating presentations smoothly.Contents of this v...
Getting Started. 1. Open PowerPoint and click 'New.'. If a page with templates doesn't automatically open, go to the top left pane of your screen and click New. If you've already created a presentation, select Open then double-click the icon to open the existing file. Image Source.
Avoid unnecessary animations. Only add content that supports your main points. Do not use PowerPoint as a teleprompter. Never Give Out Copies of the Presentation. Tips To Making Your Presentation More Engaging. Re-focus the attention on you by fading into blackness. Change the tone of your voice when presenting.
Follow the 5/5/5 rule. To keep your audience from feeling overwhelmed, you should keep the text on each slide short and to the point. Some experts suggest using the 5/5/5 rule: no more than five words per line of text, five lines of text per slide, or five text-heavy slides in a row.
Easily edit Microsoft PowerPoint presentations online without converting them, and layer on Slides' enhanced collaborative and assistive features like comments, action items, and Smart Compose. ...
Learn how to use PowerPoint better, from setting up your slide designs to working with text, images, video, charts, multi-media, and more. Discover how to work with PowerPoint's core presentation tools to make great presentations quickly, while maximizing your presentation design workflow. If you only have a few minutes to spare, then be sure ...
For individuals: $7-19 per month. For businesses: $15-29 per month. Prezi is a web-based tool for creating presentations, videos, and infographics that are suitable for business and educational settings. The tool offers a wealth of image and icon assets, as well as templates to get you started on your slide deck.
AI presentation maker. When lack of inspiration or time constraints are something you're worried about, it's a good idea to seek help. Slidesgo comes to the rescue with its latest functionality—the AI presentation maker! With a few clicks, you'll have wonderful slideshows that suit your own needs. And it's totally free!
In this step-by-step tutorial, learn how to use Microsoft PowerPoint. Microsoft PowerPoint is a powerful and versatile tool that allows you to create stunnin...
Launch PowerPoint presentation stored on your local drive. Next, navigate to the specific slide you wish to share. Then, right-click on the desired slide and a shortcut menu pops up. From this menu, select the option "Link To This Slide" to generate a direct link to the chosen slide within your presentation.
The path of totality and partial contours crossing the U.S. for the 2024 total solar eclipse occurring on April 8, 2024. On Monday, April 8, the United States will experience a total solar eclipse — a rare astronomical event where the moon passes directly between the sun and the Earth, blocking out the sun's light almost completely.