
- Databases A-Z
- Guides & Tutorials
- Journals A-Z
- Article Requests
- Distance Education Services
- Group Study Room Reservations
- Interlibrary Loan
- Laptop Lending
- RAP Session
- Open Access Resources
- Publisher Rep Contacts
- Submit Course Reserves
- Submit Textbook Adoptions
- Literature Search Request
- Search Medline via Pubmed with Bryan Holdings
- CINAHL Complete Database
- Nurse Residency Program Resources
- PubMed (with Bryan Library Holdings)
- Library Policies
- Mission & Goals
- Your Librarians

Using Images in an Assignment: Finding and Crediting
Attribution vs. Citation
While attribution and citation are often used interchangeably, they have subtle differences. Attribution is usually more focused on giving credit to the source of images, texts, ideas, etc., while citation is more focused on helping scholars trace back ideas through their development in various scholarly and primary resources. There is no single way to provide attribution, while citations have specific requirements and structure depending on the style guide you are using. Both are acknowledging that someone else contributed content that you are using in your material.
This work is adapted from " Attribution " by Gettysburg College, used under a Creative Commons Attribution-NonCommercial 4.0 International License .
Image Guideline
- Finding Images
- Attribution
- APA Citation
- Image Websites and Tools
Searching for Images
Images can be found anywhere on the internet. They are found on social media, informational or educational websites, clipart and stock image websites, and perhaps the easiest way to find images is by using a search engine. While images may be easy to locate, using them in an assignment isn't as simple. Copying from a website and pasting it into your assignment may make it difficult to properly give credit to the image's creator, may make it difficult for others to find, or might violate copyright law. Links to image websites will be provided in the " Image Websites and Tools" tab to help with these issues, but sometimes the easiest way to get the image needed is to Google it. The guide below will detail how to search for any type of image, Creative Commons images, and where to access the original image, to retrieve the best information for a citation or attribution.
Searching With Google
Searching for ready-to-use images in Google
Finding an image's correct URL in Google
Searching with Google
It is recommended to use the Google Images search rather than the global Google search. If you do use the global search you can select the "Images" option in the blue oval below the search box, as captured in the screenshot below. The screenshot also displays an example of an unlimited search for a "heart diagram." Image results come from Wikimedia Commons, Britannica, healthcare websites, and more. Some of these images may require a fee or copyright permission to use. In order to avoid determining if the image is free to reuse and if permission is already granted, details are below.

One way to find ready-to-use images is to include one of the following phrases in a global Google search. Adding these phrases to the search isn't a guarantee that the images are free and have permission to reproduce elsewhere, so double-checking is recommended. The global search helps as the results include websites that state if they are free.
- public domain
- free to use
- Creative Commons
- royalty free
- license free
Another option for finding ready-to-use images is the Google Images search. Below is the same search as displayed in the image above; however, by clicking on the blue, rectangle, labeled "Tools", a set of options appears, including "Usage Rights." Select "Creative Commons licenses" by clicking on "Usage Rights".

Viewing an image's correct URL in Google
Once an image has been selected, follow the link to the original source. To do this, click on the image in the result list and then, in the large view of the image, click the blue oval labeled "Visit." This will take you to the website where Google found the image. From this website, the information for an attribution or citation should be found. Note: Do not use the URL from the address bar on the Google search page. This is a link to the search and not the image. Results can change order or be completely different for other individuals.

What is Required for an Attribution?
There are best practices for giving attribution for materials you find online. This is different than citing a source in a bibliography or works cited. There is no correct way to attribute, but there are better ways than others. Ideally, in a digital project, if you are using something you found online, such as an image, video, audio, or text, the following elements are crucial: title , author , source , and license , collectively known as TASL .
- The title of the media, as best as you can determine it. If no title, it’s not required.
- The author ‘s name. Sometimes you will see a screen name or other pseudonym, so use that.
- The original source . You need to provide a link to where the media lives on the Internet so others can find it as well.
- The license . If the media includes a Creative Commons or other license, include the specific license as well. If it’s in the public domain, you can simply note that.
It is usually best to include the attribution in the caption for media, if that is available. Some digital tools, such as TimelineJS and StorymapJS, have specific fields for credit. Otherwise, try putting the attribution as close to the media as possible, such as on the same webpage.
Finding Information for Attributions
Sometimes finding information for attributions is easy, other times it can be a bit tricky. It depends on the website where the original media was hosted. Some websites, like Flickr and Wikimedia Commons make it easy. Other times, you just have to use your best judgment. The most important piece of information is the Source part of the attribution, so a user can trace back to where you found it.
Wikimedia Commons
For our first example, we are using a picture of a cat found on Wikimedia Commons.

TASL Analysis
- Title: Mittens, the Cat of Wellington
- Author: Diksha Gaur (no known link to the author’s page)
- Source: A link to the Wikimedia Commons page where the image lives ( https://commons.wikimedia.org/wiki/File:Mittens_the_cat_of_wellington.jpg )
- License: CC-BY-SA, with a link to the license
Finding Attribution Information
This video will show you how to find the TASL attribution information for an image found on Wikimedia Commons.
Our second example is a picture of a penguin found on Flickr.

- Title: Emperor Penguin jumping!
- Author: Christopher Michel, with a link to his author page on Flickr ( https://www.flickr.com/photos/cmichel67/ )
- Source: A link to the Flickr page ( https://www.flickr.com/photos/cmichel67/11235945713/ )
- License: CC-BY, with a link to the license
This video will show you how to find the TASL attribution information for an image found on Flickr.
Public Domain
Images in the public domain don’t need attributions legally, but it’s still the best practice to do so anyway as ethical users of information. This is an image of the earth taken by NASA astronauts; generally, all materials created by the United States government are required to be in the public domain.

- Title: May 18, 1969 – Apollo 10 View of the Earth
- Author: NASA
- Source: A link to the image on NASA’s website ( https://www.nasa.gov/image-feature/may-18-1969-apollo-10-view-of-the-earth )
- License: Public domain, so no license information is required, but you can include Public domain if you want.
Image without Title, Author, or License

- Title: Unknown, so went with the descriptive “Question Mark.”
- Author: Unknown, so not used.
- Source: A link to where you found the image on the Internet (since I made this up on my own, the link just goes to gettysburg.edu for illustrative purposes).
- License: No known license, so not used.
How Do I Attribute Something I Created?
Images that you have taken yourself and uploaded directly to a project can be handled as easily as:
Photo by Abraham Lincoln (Own work)
If you put the image on Flickr or another online repository, or added a Creative Commons license, you can treat it like any other image. Adding a title to the image may help identify it.
Copyright Attribution and Citation for Images (Using APA, 7th edition)
Using personal images
When using your own images, a reference citation and copyright attribution are not required, unless you have published your images elsewhere. If your images have been published elsewhere follow the formats listed below, treating the images as though they were published by another author. For papers, a figure number and title will be needed for your images.
Using others images
When referring to an image, without reproducing it, use an in-text citation and reference citation, as laid out in the APA, 7th edition, Style Guide. If an image is being reproduced, a reference citation and copyright attribution will replace an in-text citation. The formatting for and examples of reference citations and copyright attributions are detailed below.
Reference List Citation
Citation Format:
Creator last name, First initial. (Year). Title of the image [Medium]. Source. Image URL
- Creator- For photographs list the photographer, for clip art list the creator
- Year- the year the image was created, posted, or copyrighted
- Title of the image- some images may have titles, if there is no title either the file name for the image can be used or a description of the image should be used
- Medium- list Photograph, Clip art, Infographic, etc. as the medium, depending on the image
- Source- the name of the website, journal, book, or other material the image is located in
- Image URL- Use the most direct link to the image possible; if the image doesn't have its own URL use the URL of the webpage where the image is located. Note: Google or other search engine URLs will not be the most direct link. Please see the Finding Images tab for more details.
Unknown citation information:
Some images may not have all the information listed above and it is acceptable to fill in as much as you can. Note: If no creator name is found, move the Title to the creator position.
Title of the image [Medium]. (Year). Source. Image URL
HIPAA protected images
If an image is protected under HIPAA, there are two ways to address citing the image. The first would be to receive permission from the patient to disclose the image and associated information. The second way would be to remove all identifying data, following the HHS's Guidance Regarding Methods for De-identification of Protected Health Information in Accordance with the Health Insurance Portability and Accountability Act (HIPAA) Privacy Rule . You would then cite the image using what information you have. An example of an image that has been de-identified can be found in the examples below.
Copyright Attribution
If an image is reproduced in the assignment, a copyright attribution must be included under the image. All the information from the citation is included, with the addition of licensing information. However, the formatting follows a different pattern. A figure number and title (does not need to be the image title in the citation) must be included above an image, in an APA Style paper. The figure number and title are optional for presentation slides.
Attribution format (to be located under the image):
Note. From Title of the image [Medium], by Creator First Initial Last Name, Year, Source, (Image URL). Permissions Statement.
- If changes are made to the image, include "Adapted from" before the title
- Permissions statement format: CC BY-NC.
- Permissions statement format: In the public domain.
Creative Commons Image
The image in the assignment:
The image citation in the reference list:
Public Domain Image
Note: There was no title for this image so a description is used in place of the title.
HIPAA Protected Image - De-identified
Open Access Medical Images
American Society for Microbiology: Image Library
Peer-reviewed images relating to microbes, licensed under the Creative Commons Attribution – Noncommercial-NoDerivatives 4.0 International license.
Centers for Disease Control and Prevention: Public Health Image Library (PHIL)
Images are intended for public health professionals, educators, students, and the public for reference, teaching, presentation, and public health messages. Most of the images are in the public domain.
Open-i is a service of the National Library of Medicine that enables the search and retrieval of abstracts and images (including charts, graphs, clinical images, etc.) from the open-source literature, and biomedical image collections. Searching may be done using text queries as well as query images. Open-i provides access to over 3.7 million images from about 1.2 million PubMed Central ® articles; 7,470 chest x-rays with 3,955 radiology reports; 67,517 images from NLM History of Medicine collection; and 2,064 orthopedic illustrations.
SMART - Servier Medical Art
Over 3,000 free medical images, licensed under the Creative Commons Attribution 3.0 Unported license.
University of Utah: Health Education Assets Library (HEAL)
A collection of over 22,000 free, digital materials for health sciences education. The license for usage is included with the images.
- Last Updated: Dec 4, 2023 9:46 AM
- URL: https://library.bryanhealthcollege.edu/images
Teaching Students to Legally Use Images Online
November 13, 2017

Can't find what you are looking for? Contact Us
As our students create more and more digital products —blog posts, videos, podcasts, e-books—they should be using images to enhance them. Images grab an audience’s attention, they can illustrate key concepts, set a certain tone, and present a more complete understanding of the ideas you’re putting out there.
And the internet is absolutely teeming with images students can grab and use in a matter of seconds. But in most cases, they SHOULD NOT GRAB. Despite the fact that these images are easy to get, using them may be illegal.
Does this Matter at School?
Is legal image use really a big deal with school projects? If our students are just using images to enhance assignments for class, it might be easy to shrug off the technicalities, since most of these images will never be seen by audiences outside the classroom.
Two things to consider:
- Even if your students are working within a tightly monitored, password-protected, closed online environment, there’s no guarantee that the products they create will always remain private . Proud parents might share their child’s work on social media, a student might place their work in a digital portfolio for future use, and household guests might ultimately view things inside that “closed” environment. So it makes sense to operate under the assumption that all digital products could eventually become public.
- Why not prepare students for the day when these rules will carry more serious consequences? As students move out of school and into professional contexts, being trained in the proper, legal use of images will serve them well. And legal use of images is also closely tied to ethical habits and plagiarism.
So in the spirit of complying with the law and preparing the next generation to participate responsibly online, let’s review the different approaches students can take to add images to their written work, blog posts, videos, presentations, and other digital products. We’ll start with the safest, most affordable option.
Disclaimer: I am not a legal expert. My goal is to raise awareness of the complexities of online use of images and get teachers to pass on that awareness to their students. If you find inaccuracies, please point them out and I will make corrections.

Option 1: Make Your Own
If students create their own images, then they own the copyright and can use them without having to pay any money or get permission (unless the photos are of someone else…but we’ll get to that).
ILLUSTRATIONS
When I first started this website, I couldn’t afford to buy nice photos, and I didn’t want to use the same free ones I saw everywhere else online, so despite the fact that my artistic skills are nothing special, I just created my own doodles in MS Paint, like the one shown above. This is a great route to take, because you can get started right away, it’s free, and there’s no copyright to worry about.
Students can create their own illustrations in two ways:
- Handmade : Students can draw or paint an image on paper, create a paper collage, or even build something in 3D like a sculpture, then take a picture of it and use that photo for whatever digital product they are creating.
- Digital : Using simple programs like MS Paint for Windows, Paper by 53 for iOS devices, or web-based tools like Google Drawings , Adobe Creative Cloud Express , Canva , Autodraw , Piktochart , and Sketchpad . On any of these platforms, students can create just about any illustration they can think of, save it as a PNG file, then add it wherever they like.
Students can take their own digital photos and upload them in a heartbeat, using sites like PicMonkey and Pixlr to edit or enhance them for free. When using photos they take themselves, students should keep the following rules in mind:
- If you took the photo at a public event and the photo will be used for journalistic purposes (to simply describe the event, for example)
- If the person is not recognizable in the photo (their face isn’t showing, for example)
- If you’re going to use the photo for commercial purposes (to sell something) or promotional purposes (to promote a product, service, or idea), you need permission from the subject.
- If the photo was taken on private property, even if it is not the subject’s property, you must get permission from the subject to use that photo.
- If you are holding an event, like a festival, party, or concert, and you plan to take photos that you might share with the public, you should get permission from attendees. Event organizers often use crowd release forms at the point of registration: They’ll require attendees to check a box giving permission to use photos of them. Another approach is to hang up crowd release signs at the event itself. Learn more about event release forms in this post from SLR Lounge and this one from Mark Schaefer.
- If you are taking photos of students at school, it’s likely that the parents or guardians of those students signed a media release form at the beginning of the school year, giving the school permission to use that student’s image in various non-commercial publications throughout the year. These permissions may also extend to student photographers, as long as you are using the images for school-related projects. Students should check with their teacher and administrator to make sure.
- If the photo contains an image of a store or business logo. Some businesses have rules about using images of their facilities or that prominently feature their logo, so if you are going to be taking photos that will include any kind of business logo or store, get written permission from the business owner first.
- If the student has a job that includes taking photos, photos taken as part of the job may actually belong to the employer.
Option 2: Use Creative Commons Images
Creative Commons is an organization that has made it much easier for people to share artwork. They have established a set of licenses that artists can place on their work that automatically gives others permission to use that work in their own projects under specific terms and conditions.
A photographer, for example, might use a Creative Commons licenses on a collection of her photographs, so that anyone who finds them online can easily check the chosen license and follow the restrictions of use specified in that license .
If your students want to use images they find online, they should look for images that have Creative Commons licenses. You can learn about all of the licenses here , but the safest bet is to steer students toward pictures that have the two least restrictive licenses:

CC0: Creative Commons Zero This is the least restrictive level, and the one students should look for first. Items marked as CC0 can be used by anyone, for any purpose without having to get permission or give credit to the artist. In other words, an image licensed with CC0 is the same copyright-wise as an image in the public domain .

CC BY: Attribution Items with this license can be used for non-commercial OR commercial purposes, and all the user has to do is give credit to the original artist.
[Both license images above came from Creative Commons and are licensed under CC BY 4.0 ]
WHERE TO FIND CREATIVE COMMONS IMAGES
Free Stock Photo Sites These fantastic sites curate free, high-quality images that are all CC0 licensed. Simply search for what you need, download the photos you like, and use them. Unfortunately, many free stock photo sites contain adult content, so unsupervised students should not use them, but if your students are working under adult supervision, they should try these sites. Here are a few good sites that don’t appear to contain inappropriate content: StockSnap Good Free Photos Foodiesfeed (all food-related)
Flickr Commons Flickr is where thousands of photographers store their photography for public display, and many of these photos have CC0 and CC BY licenses.
Photos for Class This is a handy search engine for finding school-appropriate images. My only hesitation with recommending this site is that it automatically adds attribution to each photo. Although this could be seen as a good feature, I feel it doesn’t really teach students how to give appropriate attribution, because it does the work for them. Also, students may not always want the added black bar with the attribution information at the bottom of each image, and they may be tempted to simply crop it out, which would defeat the whole purpose.
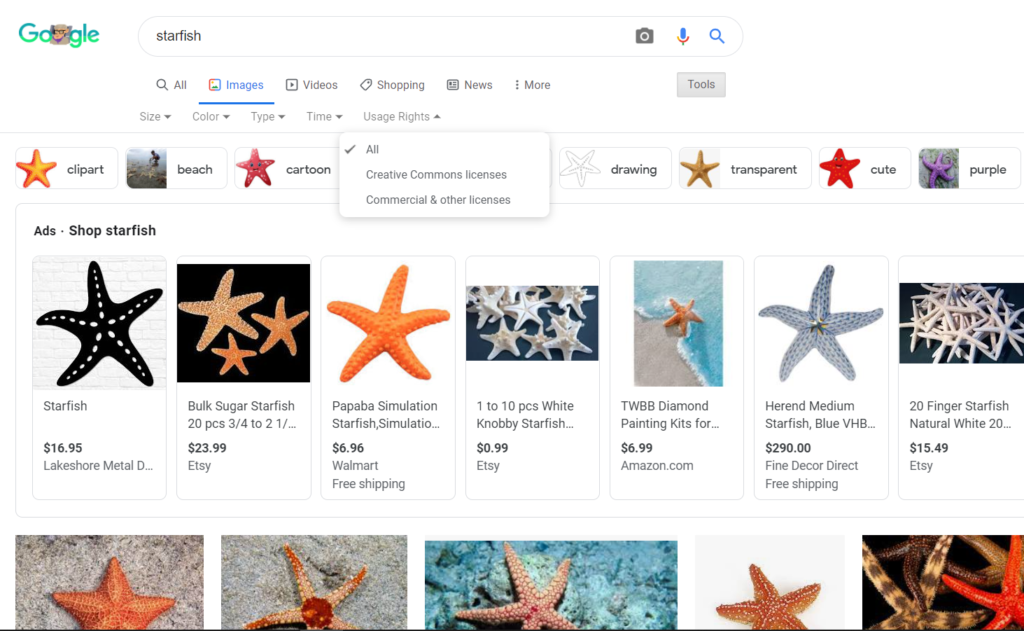
Google Image Search Although a Google search will pull up plenty of images students don’t have permission to use, the search can be filtered so that the results only show images that are licensed for re-use. Just be sure to open up the Tools after you search, and check one of the options under “Usage rights” that will remove all of the photos that have not been labeled for some kind of reuse. Checking “Creative Commons Images” should give you images that have the least amount of restrictions.
HOW TO GIVE PROPER ATTRIBUTION
If students use an image that requires attribution, students should simply add a line of text underneath the image providing four pieces of information (Creative Commons recommends using the acronym TASL to remember these):
T = the title of the image A = the author (or artist) S = the source (or where it is located online) L = the license for the image
Ideally, the attribution should be placed fairly close to the image, so that those who view it connect the information to the picture. Here are some examples of properly attributed images:
Online If you use the image in a blog post or on a website, you can place the attribution in the caption or on a line of text below the image:
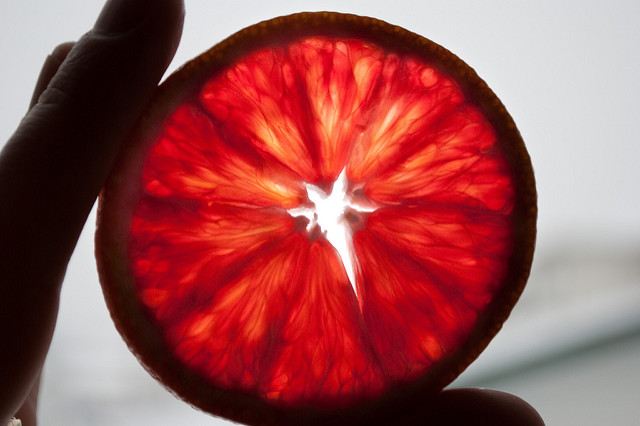
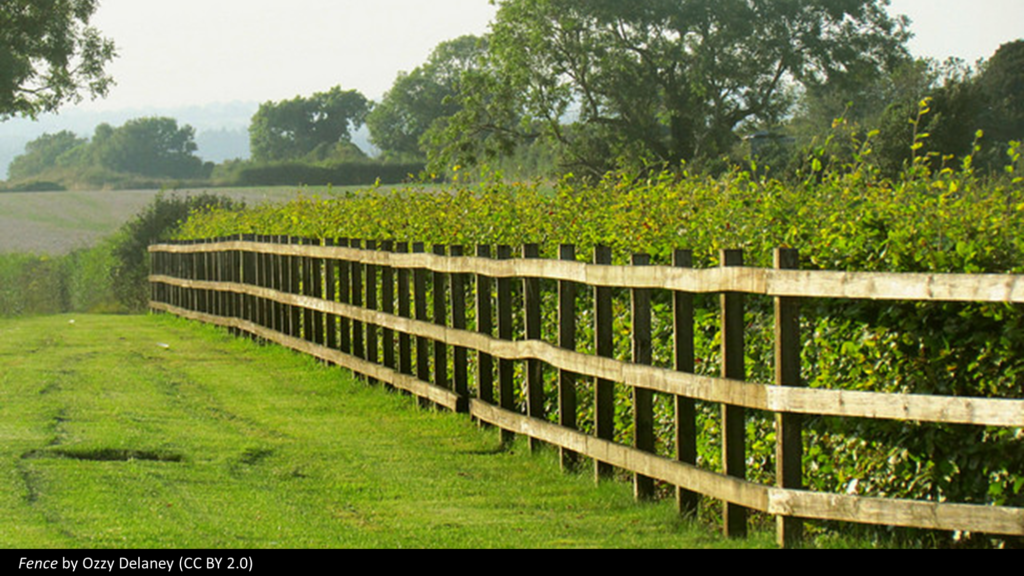
Blood Orange Shine by Derek Gavey is licensed under CC BY 2.0
In the above attribution, I included the title , “Blood Orange Shine,” the name of the author , Derek Gavey, and the code for the license . Because the image will be displayed online, I can include the location by just hyperlinking the title to URL of the site where the image is stored. I can also hyperlink the author’s name to his page on Flickr, the photo sharing site where the photographer stores his photos, and the name of the license to the license page on the Creative Commons website.
In Print Because print publications don’t allow hyperlinking, I would need to add the URL information to the attribution:
Blood Orange Shine (https://www.flickr.com/photos/24931020@N02/14995800960/) by Derek Gavey is licensed under CC BY 2.0 (https://creativecommons.org/licenses/by/2.0/)
If doing this right by the photo would make my product look less attractive, I can add the photo credit to the bottom of the page or on a page of photo credits.
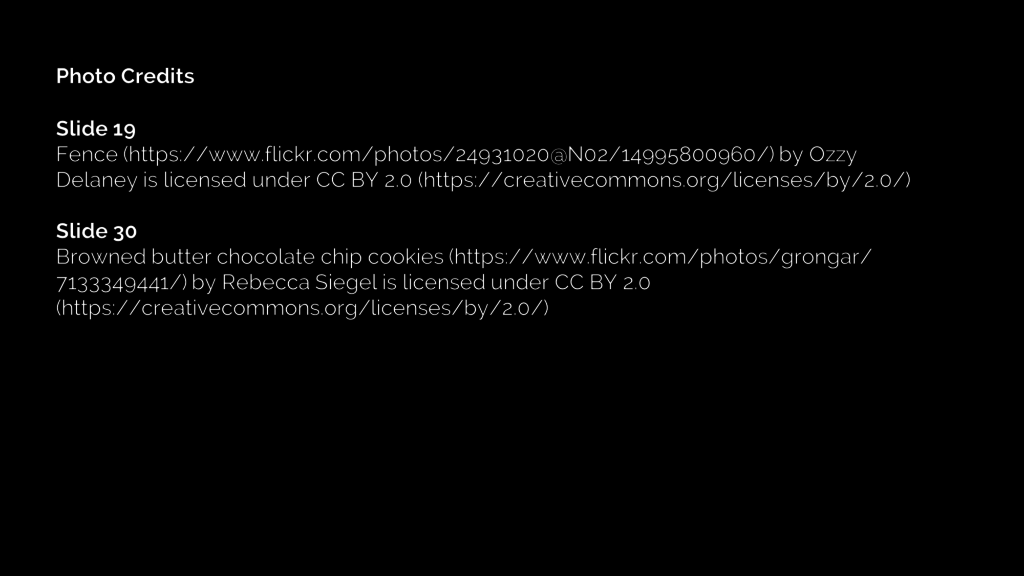
In a Video or Slide Presentation Attribution can be placed in small print right on the slide or frame where the image appears. Because giving full attribution, including URLs, would take up a lot of space and could interfere with the enjoyment of the image, one solution is to place an abbreviated attribution where the image appears (giving the title, author, and license code), then add full credits on a slide or frame at the end.
Here’s what an on-slide attribution could look like, using a simple black rectangle at the bottom with a white-font text box on top of it:
And here is what the photo credits page might look like at the end of the presentation or video:
Option 3: Buy Images
Although it’s not necessarily within most students’ budgets, they do have the option to actually purchase high-quality stock photography and illustrations. When making these purchases, students should read the licensing agreements carefully: In general, the more widely a user plans to distribute the product, the more the image will cost.
- On graphic design sites like Canva , where users can create their own designs with drawing tools and free images, there’s also the option to buy photos and illustrations to use in a single project for as little as $1. If the student wants to use the image in multiple projects, the fee for a single image can go as high as $100. Learn more about Canva licensing here .
- Other sites, like iStock , sell the images without the graphic design tools. These images can be quite expensive depending on how they are going to be used and distributed. Learn more about iStock licenses here .

Don’t Make This Rookie Mistake!
When doing general searches for images, paid items will come up in the results. The way to identify a paid image is if it has a watermark: a translucent design that covers the image but doesn’t prevent you from seeing the picture behind it.
These watermarks are only removed after someone actually pays for the image, but it is possible to download a watermarked image, and people will sometimes do this without realizing that they are basically stealing the image AND broadcasting that fact to the world.
Teach your students not to do this.
Making a Good Effort
With all of this said, using images correctly can be an inexact science: Sometimes you can’t always contact a person for permission. Sometimes it’s nearly impossible to find the name of a photographer. The best rule of thumb is to make a good effort to give credit where it’s due and ask for permission as much as possible. If we can build these habits in our students from an early age, we will be helping to make the internet a more respectful and cooperative place.
Want a Ready-Made Lesson on Image Use?
I’ve pulled the concepts from this post into a ready-to-use lesson you can teach tomorrow. Using Images Correctly includes a beautifully designed PowerPoint (also available in Google Slides), two student handouts that summarize the key points, and a Team Challenge students can take to test their knowledge of appropriate image use. Come check it out !
To Learn More
The Copyright Laws website is a great place to read more about these issues. They even have a course you can take on legally using images online.
All of the images in this post that have no attribution are licensed by CC0 or were created by the author.
What to Read Next
Categories: Technology
Tags: distance learning , library/media , remote learning , teaching with tech
33 Comments

As always, your inquisitive mind leads my lesson planning! I am just introducing eDocs to students and will include your TPT photo credit slides in my presentation. Students will benefit from developing these good habits from the beginning 🙂 Thank you –

This is also an ideal lesson to use your librarian for. Your librarian can talk about the reasons why we cite sources and provide the proper way to cite materials. This lesson can also be added on or extended when talking about plagiarism, note-taking and generally locating, evaluating and using sources. It is important to note that students should also be evaluating the images they use to make sure they are accurate and reliable for whatever they are using them for.

Thank you for making the task of teaching our students about copyrights such a fun and interesting experience.

My #1 go-to site for photographs is Pixabay. All public domain, some really terrific photographs. https://pixabay.com/

Hi Jennifer,
Thanks so much for creating this great resource. It’s certainly one I’ll be able to share with others!
We must really be on the same wavelength as I recently posted an article on a similar topic http://primarytech.global2.vic.edu.au/2017/10/09/where-to-find-free-images-for-students-and-teachers/
As a primary school teacher, one issue I find a real obstacle is that a lot of the sites to either make your own images or find Creative Commons images are 13+. In my post above I’ve listed some good options for students both over and under 13.
Sadly, I have also recently discovered the PicMonkey is no longer free. Canva and Adode Spark are still great options for 13+.
Thanks again, Jennifer. I always enjoy your work. Not only the content, but it’s always so visually pleasing and easy to read too! 🙂
@kathleen_morris

Thanks for sharing. You have certainly shed lights on how students are also in need of great images. We are giving away free images that students and everyone can download the image to be used in their personal/school/commercial project safely and for free. Would be cool if you could take a look and see if you would be keen to add it to the list :). We are also trying to curate public domain illustrations from the past I found the ones on fish, astronomy and botany very interesting and educating.

Hi Tip! I took a look at rawpixel.com and I am REALLY impressed with your mission to bring more diverse images to the world! (Anyone reading this: Go to their site, do a search for “girl” and check out all the variety you get back. SO much more interesting than standard stock photos.) They are beautiful! Since I am trying to encourage students to go with CC0 images, I want to mention to my readers that the licenses at rawpixel are not technically CC0, but they do allow for most of the same uses that a CC0 license would, so this would also be a good option. Just have students read the license details (click “view license”) on each photo page. Load time is really slow on this site, but the images are worth the wait.

I used this in class and it worked really well – a lot of students are using visuals in their final presentations, so it was timely (and worked well for the two days before Thanksgiving Break.)
I also used this article to explain to them why this is important: http://www.livingfornaptime.com/starting-a-blog/blogging-mistakes-to-avoid/ In it a blogger was charged $7,500 for using an image of a pepper illegally. It fits in perfectly with your lesson.

Hi, David–I’m a Customer Experience Manager and wanted to say thank you for adding this to the discussion. Wow. And THAT’S why we have to learn and teach about this stuff! Thanks again!

Dear Jennifer,
Thank you so much for the sharing and its an eye opener for me and my teacher librarian and subject teachers too. I’m now actively giving talk on Information Literacy to schools. Can i use your write up and interpret it in simpler way and using my language ie Bahasa Melayu. I always share it on my FB Pages Literasi Maklumat – Malay version of Information Literacy.
Regards, Norhayati Razali

Great article! If I could recommend one more possible source for Creative Commons/free to use pictures that might make this post an even bigger resource, it would be https://pikwizard.com

Have you tied Unsplash. I might have learned about here or on my twitter PLN. It is free as long as you credit the individual as mentioned above. They are images shared by photographers from around the world.
https://unsplash.com/

Thanks, Jennifer! For several years now, we’ve been teaching students what how images are, and are not, tagged for free use and how to attribute them, in particular when publishing to their blogs. It’s great to see your succinct and informative presentation of appropriate use, credit, and format. Interestingly but not surprisingly, students who incorporate this into their practice influence teachers who do not yet.

I really appreciate your message on properly using images, especially when to give credit (important foundation) and resources (meaningful application) available. As I reached the section on citation I wondered why not use MLA format? I advocate for proper use and credit in and out of the classroom and want to be sure I am aware of best practices.
Thank you! Stephanie

Hey Stephanie, I agree that this is an important topic for teachers to go over with their students, both in terms of foundational knowledge (why we do it) and application (how we do it). I think the answer to your question comes down to the difference between citation and attribution. For a good comparison of the two, see here . The MLA format, as you mention, is one option for citation that’s used mainly in academic settings. Attribution, on the other hand, is used mainly for legal purposes, which is what Jenn is focusing on here in her post. Neither one is better than the other; it just depends on what your purpose is.

Hi Jen, So helpful, as always, this is a great resource, thanks so much. Such an important topic, and one I want to broach soon with my staff, so this is perfect (I’m a teacher librarian so it falls into my area of responsibility).
Thought it might be worth mentioning that teachers should be aware that each country has its own copyright laws, with the link to copyrightlaws.com only relevant for US teachers. Here in Australia we have our own laws and there are different laws again for schools, I presume other countries are similar.
But of course the principles are the same, I love all the various ways you have suggested to avoid violating copyright. Brilliant!

A great resource, many thanks!

This is a great resource and good reminders.

Thanks so much!

Great ideas

I think students need to understand how to use images properly, and to have fun.

I agree with authentic teaching to be most effective. Why not teach from the elementary level the legal and illegal use of images?

As an elementary teacher, I absolutely think this can get started with younger kids.

I agree, Debbie. I think the earlier students learn these the better.

It all makes sense.

I was just referred to this article/blog and found it to be VERY useful and informative. As a secondary school educator I feel there is not enough emphasis put on the ethics of using the internet – basically becoming a free-for-all take what ever you can get a hold of – forgetting the effort it took to create much of what the internet contains.
Hats off to a job well done Jennifer.

Paul, Thank you so much for sharing this positive feedback. It’s so good to hear that as a secondary educator you are finding value in Cult of Pedagogy. Let us know if you have any questions or need help finding a resource. Katrice
I really appreciate all of the great advice regarding teaching students the legal and proper way to select images. I also loved your idea of having students draw their own images and to post them on Pixaby or other sites like PicMonkey. How exciting for students to see their creations posted on a Pic website to be seen and used by others.

Hey! I have a quick question as this has been a source of discourse in some of my studies.
How does the Fair Use policy come into account, in the specific case of private research within study? It is my understanding that this means we do not need to cite copyright or get permission from the image owner. Especially in the case of high-level tertiary study, it can be INCREDIBLY difficult to find scientific diagrams or anatomically correct images on free stock sites. For example, I recently did a research paper on chronic kidney disease in canines, and we had to use images under the fair use policy, as that level of image does not exist for free. This level of research isn’t exactly ‘fun’ either haha!
I understand what you’re going for, but one of our lecturers is determined that we only use free images, even though my institution does not have any rules around using images under the fair use policy, which makes high-level research reports nigh on impossible. They have used this blog to tell us why we must only use free images.
At a secondary level of teaching, I understand what you’re going for and support it, as I’m sure many high school (or younger) students do not understand referencing and copyright laws, I’m just frustrated by being restricted at a higher level of learning.
I would love to hear your thoughts!
Hi there! Really good question, and I’ll be up front about the fact that my knowledge of fair use standards does not run deep. I think a good rule of thumb to follow is if you’re not going to make money from the use of the image, attitudes toward use become much more lenient. As you suggested in your comment, my article is geared toward helping K-12 students break the habit of just grabbing any old image off the internet and sticking it into their own creations; even though their work is not likely to have an audience outside the school building and will therefore not be likely to get the attention of anyone seeking to nail them with copyright infringement, if they never learn the right way to do it, they will take those bad habits into their adult lives, where the consequences could be far more serious.
With all of that said, I’m not quite sure what your options are. I wonder if you could create your own images by using a tool like EasyAnatomy and doing screenshots when you get just the right image you need, then crediting the site as the source. I looked at their FAQs and I’m not sure what the legality of that might be, but it seems like it might be an avenue worth exploring. Outside of that, you might try networking with other students in your field (through something like a Reddit discussion or Facebook group) to look for solutions others have already found.
I hope this helps!!
Hey Jennifer,
Thanks for your feedback, that’s awesome. I’ll definitely check out that anatomy app! Creating our own images is definitely viable, just tricky to do without high levels of artistic ability so an app like that might just be perfect!
I appreciate the thought and for taking the time to reply. 🙂

Many thanks! For the first time, I’m attempting to create something. I was under the idea that most internet pictures were protected and that this discovered me to produce photographs from them! https://pathedits.com/blogs/tips/100-places-to-find-free-stock-photos-for-your-website-and-social-media

This resource provides an invaluable guide to help students cultivate a culture that not only gives credit where it is due but also encourages accountability. Irrespective of a person’s background, cultural disposition worldview, or environmentally conditional influences, originality when well modeled will always be chosen over mediocrity.
Helping my students own their material, giving credit to who it is due grows ethically driven professionals and citizens.
Leave a Reply
Your email address will not be published.
APA (7th Edition) Referencing Guide
- Information for EndNote Users
- Authors - Numbers, Rules and Formatting
- In-Text Citations
- Reference List
- Books & eBooks
- Book chapters
- Journal Articles
- Conference Papers
- Newspaper Articles
- Web Pages & Documents
- Specialised Health Databases
- Using Visual Works in Assignments & Class Presentations
Using visual works in assignments & class presentations
- Images "out of the box"
Online images (standalone)
Image from a journal article, image from an ebook, clip art or stock image.
- Using Visual Works in Theses and Publications
- Using Tables in Assignments & Class Presentations
- Custom Textbooks & Books of Readings
- ABS AND AIHW
- Videos (YouTube), Podcasts & Webinars
- Blog Posts and Social Media
- First Nations Works
- Dictionary and Encyclopedia Entries
- Personal Communication
- Theses and Dissertations
- Film / TV / DVD
- Miscellaneous (Generic Reference)
- AI software
- APA Format for Assignments
- What If...?
- Other Guides
If the image is for use only in an assignment or a PowerPoint presentation, follow the advice in this section.
In text citations
Please Note: This information has been updated for clarity in September 2021
For assignments and presentations that will never be made publicly available you can just use a normal in-text citation in the note section under the image/figure (see the instructions for what to do for a document that is being made publicly available on our page for Theses and Publications). If you are providing a description as part of your note, you can include the citation as (author, date), or if there is no descriptive information you can just state the source of the image is the author, (date).
For example:
Note. Original painting hanging in the WAMA Gallery (Smith, 2017).
Note. Sourced from Smith (2017).
We have previously also suggested Note. Source: (Smith, 2017) for brevity, but many people found this confusing, and the point of the note is to provide context for the in-text citation, so the exact wording is not important as long as it is clear. This is still acceptable if you have already used this pattern.
Reference list
Reference the source where the image was obtained from. If an image was viewed in a gallery or online then cite the image directly as a stand alone work. For images included in other sources reference the book, website or journal article that the image came from.
If the author is the same as the name of the website, omit the name of the website.
Remember to follow the referencing format of the resource you are using (e.g. book, journal article etc.) or include as much information about the image as possible:
- Author or Creator (author, painter, photographer etc.)
- Date (normally the date the book/journal/webpage was published, or the date the artwork was created if you are citing original art)
- Title of the work
- Material type in square brackets [Photograph] [Clipart] [Online image].
- Museum or Institution where the artwork/exhibits is located (if applicable)
References for image that come with the software you are using (e.g. PowerPoint, Canva) are not strictly necessary, but acknowledging the source is important to help your lecturers understand what images are and are not your own.
As such, we recommend mentioning that the image you have used was "supplied" by the software. For example, in your Note under the image, you might include:
Note. Image supplied by Microsoft PowerPoint 365
Include the name of the software developer, the software used and the version if possible. If this information is not available, use what you have:
Note. Image supplied by Canva
This would be treated as equivalent to personal communication, and not included in your reference list.
Please note, this is for images that exist as separate entities on the Internet, such as an image in Wikimedia Commons, Flickr, Pixabay, etc.
If the image is included as part of a webpage with other content, cite the webpage as per the example in the box below this one.
Put the in-text citation in the note under the image/figure.
- << Previous: Images, Figures & Tables
- Next: Using Visual Works in Theses and Publications >>
- Last Updated: Mar 8, 2024 10:56 AM
- URL: https://libguides.jcu.edu.au/apa

- Skip to primary navigation
- Skip to main content
- Skip to primary sidebar
- Skip to footer
Copyrightlaws.com: Copyright courses and education in plain English
Copyrightlaws.com is the place for copyright education. Online eTutorials and Certificate programs to demystify copyright law.
- Certificate Programs
- Join Our List
14 December 2022
Legally Using Images in Presentation Slides

Do you use images in presentations? Whether an in-person or virtual presentation or class, this article will help you establish best practices for legally using images in presentation slides and minimizing your risks of copyright infringement. Images include photographs, charts, maps, illustrations, charts and more. You may also like our online copyright course that includes an entire module on legally using images.
Scroll down to the end of this article to download our Simple Guide to Legally Using Images in Presentations.
Are You Legally Using Images in Presentation Slides?
How much attention do you pay to copyright law when you create slides for a presentation? While it's important to focus on the non-legal aspects of the presentation such as content and images to enhance speaking points, it's just as important to consider copyright issues. Here are some tips to get you started:
- Include copyright management as a regular part of planning your presentations
- Incorporate a permissions process into your planning
- Be aware of your budget, if you have one, to pay for permissions
- Plan for the possibility that if you're unable to secure permissions on time or the fees are too high, you'll need to adjust your content accordingly
As with most copyright issues, the matter of legally using images in presentation slides is nuanced. The answer to many questions is often “it depends” or "maybe" or "let's examine your particular circumstances." Understanding copyright issues will help ensure you're legally using images in presentation slides.
First Ask Yourself: Are the Images Protected by Copyright?
When you find an image online or elsewhere, assume it's protected by copyright. Once you identify the image you want to use, consider its copyright status and whether you need permission to use it.
Google has made it easier to determine an image's copyright status by providing copyright-related metadata for images in Google Images, when this information is available. To learn more, see Google’s article Image Rights Metadata in Google Images . Note that some images don't have this metadata and you'll need to do further research.
How Can You Avoid Copyright Concerns When Using Images in Presentations?
There are several ways to legally use images in presentation slides that don't require you to clear copyright permissions with the images' copyright holders.
Use Public Domain Images
If you determine that copyright in a work has expired and the work is in the public domain , you can use the work without obtaining permission. In the U.S., a work is in the public domain 70 years after the author's death. Most countries have a copyright duration of 50 to 70 years after an author's death.
Be mindful that a work that's been manipulated or adapted may constitute a new work. That new work may have a new and longer copyright duration, even though the underlying work is in the public domain.
State or Summarize Facts, News and Historical Events
You may state or summarize facts, news and historical events without permission as long as you don’t reproduce them exactly as you found them in the source.
This basic principle of copyright law works for text but is more difficult to apply to the use of images. You could, however, use data or summarize it rather than reproduce, adapt or share a source table or chart without permission.
Create Your Own Images
Instead of using third-party content, another way of legally using images in presentation slides is to use a chart or photograph that you or a fellow employee created. An employer generally owns the copyright in any works its employees create during the course of their job duties. So, keep in mind that if you take a photo as part of your employment duties, your company likely owns the copyright in it.
Employers, however, should be aware that you don't own copyright in everything created by your employees. You only own copyright in those works created as part of an employee's duties. So even if an employee posts a vacation photo on your organization's website, you likely don't own the photo if it wasn't created as part of their required duties.
Use a Stock Photo Agency
Your organization may have an account with a stock photo agency where you can find images that suit your purpose. You must follow the terms and conditions of the agency's license agreement to legally use these images in your presentation. Familiarize yourself with the license your stock photo agency uses (e.g., see the iStock Content License Agreement) .
Use Images with a Creative Commons (CC) License
Just because an image has a Creative Commons license doesn't mean you have unrestricted use of it. Read that license! Does it specifically allow your use of the image? Review the terms and conditions of the CC license to ensure your use complies.
Tips for using images governed by CC licenses:
- You need to acknowledge the author of the image
- Read the terms and conditions of the CC license to see what's permitted and what requires further permission
- CC licenses are irrevocable, so you can use the image under the license as long as you need to
Don't Rely on Prior Copyright Permissions
If you already have permission to include a photograph in a management training session at your company’s headquarters in Baltimore, it doesn’t mean you can use that photo in a public presentation being made across North America. Know the terms of licenses and assignments (i.e., permissions). If they don’t apply to the current situation or current presentation, either seek additional permission or use an alternative image.
Use Images As-Is
Even if you have permission from the copyright owner, you may need specific permission to re-color, make black and white, or color, crop or otherwise manipulate images. Standard stock photo agency licenses, for example, may not allow these additional uses without further permission.
Does Fair Use or Fair Dealing Apply to Using Images in Presentation Slides?
Fair use or fair dealing provisions may apply to your use of images in your presentation, permitting you to reproduce a work without permission in some situations. You’ll have to apply the fair use or fair dealing criteria to your particular situation to determine if it falls within these statutory provisions.
Fair use and fair dealing are not without risk. The only way to know for certain if your fair use or dealing assessment is correct is in a court of law. It's wise to know your organization’s risk tolerance for an inaccurate fair use or fair dealing determination. It's also advisable to consult internal policy, a copyright specialist, and/or your legal counsel on these matters.
Familiarize Yourself with Copyright Law
Everyone needs to be familiar with the basics of copyright. Whether you’re designing presentations, writing the company newsletter, or photocopying materials, copyright should be part of your workflow. To understand how to legally use images, concentrate on:
- What images are protected by copyright law
- When you need to obtain permission to use images and when you can use images without permission or additional permission
- Additional rights to consider when legally using images, such as moral rights that protect the paternity and integrity of an author, and privacy rights
You may also be interested in our article on obtaining permission to use comic strips , as well as Copyright Issues in E-Books and Electronic Publishing .
Want more helpful information like this? Our Copyright Leadership Certificate program provides a primer on U.S. and global copyright law, devotes an entire course to legally using images, and teaches you practical skills to interpret copyright in your workplace.

Sign up and we'll send you our Simple Guide.
About Copyrightlaws.com

Copyright Courses

- Library Catalogue
I want to use another person's images and materials in my assignment or class presentation. What am I able to do under copyright?
Most images you find on the Internet, in books and elsewhere are protected by copyright. The act of creating something automatically gives it copyright protection. For example, you own the copyright in the photographs you take with your smart phone.
The use of copyright protected images in student assignments and presentations for university courses is covered by Copyright Act exceptions for fair dealing and educational institution users. The fair dealing exception allows you to use excerpts of copyright protected material in certain circumstances without asking permission. The educational institution exceptions permit specific uses of copyright protected material by instructors in the classroom. See the FAQ "Is there a limit to how much I can copy?" for a simple break down of how much you can copy under SFU's Fair Dealing Policy , which is the University's guidelines for working under fair dealing. See the Copyright Infographic describing both fair dealing and the educational institution exceptions for instructors, to find out what you can do when presenting to your class, handing things out to your classmates, or otherwise acting like an "instructor" in your course.
In general in your course assignments you can, under fair dealing for purposes of research, private study and education, use one entire image from a compilation of images (e.g. a gallery of images on the Web, a coffee table book), or up to 10% of a stand alone image (an image that is not part of a larger compilation but is on its own such as a photograph pinned up on your wall). The educational institution exceptions will allow you to display an entire work (even a whole stand alone image) in the classroom (e.g. in your PowerPoint slides), but not to hand out copies.
In certain circumstances you may be able to use more than a "short excerpt" (e.g. 10%) of a work under fair dealing. SFU's Fair Dealing Policy sets out "safe harbour" limits for working under fair dealing at SFU, but the Copyright Act does not impose specific limits. See the FAQ "What is fair dealing and how does it relate to copyright?" for more information. If you want to use more than is outlined in the policy, and your use doesn't fall under the educational exceptions, contact the Copyright Office to ask for a fair dealing assessment to be performed.
It is also an excellent idea to look for images that come with re-use rights, which you can freely use within the limits of any license terms. Examples are materials posted to the Web under a Creative Commons license, or materials that are out of copyright and now in the public domain. You can search for such material using the Creative Commons search engine .
Please contact the Copyright Officer at [email protected] if you have questions.
Note : The information obtained from or through this website is provided as guidelines for using works for educational purposes and is not intended to constitute legal advice. Contact [email protected] with any questions. The Copyright Officer is not a lawyer or legal expert in copyright law and is able to provide a professional and not a legal opinion. A professional opinion is offered for information purposes only and should not be relied upon as legal advice.

What is a good source of images I can use legally in my papers and presentations?
As a student you can often use images you find on the web in your student papers and presentations, because this typically falls under fair use . Learn more about creating refereces for clip art or stock images straight from APA, and how to cite images in APA style . Also, keep in mind, once you are no longer a student, using images from the web without getting permission and/or paying royalty fees will likely be a violation of copyright law.
To avoid legal, copyright and ethical problems related to images, you can adopt one or all of the following practices:
- Use images you have personally created and/or photographs you have personally taken in your papers, presentations, etc.
- Use Microsoft ClipArt images in your papers, presentations, etc.
- Use images from the public domain and/or that have a Creative Commons license
- Image Quest is easy to use
- Image Quest images are legal to use...as a student and as an employee, even after you graduate
- Image Quest images have the information you need to cite them in APA style!!

- Figure 1: Aerial photo of Waimea Bay Beach Park, Oahu, Hawaii. Taken from: R. Francis (n.d.) Waimea Beach [Photograph]. Retrieved from Encyclopedia Britannica Image Quest database. Copyright 2018 by Photolibrary.
Remember that you need to cite your images. We have how-to and help information for that, too!
- Research and Library
- Research Papers
- Last Updated Feb 27, 2024
- Answered By Kate Anderson, Librarian
FAQ Actions
- Share on Facebook
Comments (0)
Hello! We're here to help! Please log in to ask your question.
Need an answer now? Search our FAQs !
How can I find my course textbook?
You can expect a prompt response, Monday through Friday, 8:00 AM-4:00 PM Central Time (by the next business day on weekends and holidays).
Questions may be answered by a Librarian, Learning Services Coordinator, Instructor, or Tutor.
Educational use of images, video and audio
This page goes deeper into copyright and related legal issues for educational use of images, video, and audio. The information is mainly for instructors at the University of Minnesota.
Copyright Information Services staff members can help with these issues. Contact us with questions, or for training.
Educational use of images
Images can be powerful teaching tools as illustrations related to a class, or for studying concepts outside of the course context.
Most of the time, showing things to students from physical media in in-person classes at the University of Minnesota is totally okay. There’s a legal exception that only applies to teachers, and only in specific situations, but it’s very clear - you don't have to guess at market harm issues, or how much is an appropriately small amount.
It’s not so clear that showing the same image in a non-classroom educational setting is allowed, and neither is scanning or copying things as a step towards showing them in a class. People frequently do copy or scan images and show them in online teaching, at conferences, and at school meetings, and it is often fair use to do so.
It's also likely that not all image copying, even in non-profit instructional contexts, falls under fair use. Courts haven't done much to interpret how fair use might apply to instructional use of images, but they have allowed fair use copying of images in other contexts - sometimes even commercial ones - especially when accompanied by criticism or commentary.
The Visual Resources Association has a very useful "Statement on the Fair Use of Images for Teaching, Research, and Study" . The statement articulates the organization's understanding of fair use principles, but it's not legal advice. It's a bit longer than this website, but very much worth the read for anyone whose teaching is image-heavy. It is also of great value for anyone working with images as the subject of their research, or who wants to include images in published scholarly materials.
The College Art Association has drawn up a " Code of Best Practices in Fair Use for the Visual Arts ". This has been welcomed by many in the visual arts teaching and research community. It articulates accepted community practices around writing and teaching about art, and goes beyond to fair use issues in making new art, and in archival and museum uses.
The Association of Art Museum Directors have " Guidelines for the Use of Copyrighted Materials and Works of Art by Art Museums ", which is a welcome new document in succession to their groundbreaking earlier principled documentation of fair use issues in visual arts
Although the resources above are mostly focused on visual arts disciplines, the principles they explore apply to many different types of educational and research uses.
Back to top
Lecture recordings and streaming with students
As mentioned above, showing things to students , or performing things with or for students from physical media like a DVDs, CD, or existing sheet music at an in-person class at the University of Minnesota is usually totally okay. But that kind of class environment is becoming less common.
If you can limit audio and video use during your online course to relatively brief clips, you may be able to include those in lecture recordings or live-casts under fair use. For media use longer than brief clips, it is often legally easier to have students independently access the content outside of your lecture videos.
The same basic legal provisions apply to the University’s Kaltura platform as they do to YouTube, but there may be some practical differences between platforms. It is more likely that videos posted on YouTube may encounter some automated copyright enforcement, such as a takedown notice, or disabling of included audio or video content. These automated enforcement tools are often -incorrect- when they flag audio, video, or images included in instructional videos - if you encounter something like this that you believe to be in error, you can contact [email protected] for assistance.
Live streaming clips and whole movies or songs for or with students via Zoom, Twitch, etc is a relatively new innovation in teaching with media, and the law around it is very unclear. Technologies that automatically detect and shut down video and audio within streams on commercial services are also evolving very quickly. This is a great area for instructional innovation.
If you’d rather not work on that innovative edge, the Libraries already have quite a bit of licensed streaming video content , which you are welcome to use in your online course. The Libraries also already have subscriptions to a significant set of streaming audio options for UMN users. We may be able to purchase streaming access for additional media, but it does take time to finalize a streaming license, and institutional streaming costs do often exceed our budget constraints.
Terms of service affect media use
Sites like YouTube and Vimeo have Terms of Service that say they are for personal use only. It's unclear whether the terms of service on a site where users never clicked "I Agree" are legally enforceable. Many people use media from these sites in classes and educational presentations.
Subscription services like Netflix, Amazon Prime, and others also have Terms of Service, almost all of which also limit use to personal and/or non-commercial use. With subscription services, users usually do actively agree to the terms of service at some point, so they may be legally binding.
Some copies of media files - such as files downloaded after purchase - may come with their own terms of service. Purchasers usually actively agree to those terms in some way during the purchase, so they may be legally binding.
Terms of service, if they are binding, are legal contracts. No one really knows whether educational uses violate these terms of service. Is your teaching personal, non-commercial use? Maybe! It is common practice to play public online content, such as YouTube videos, in many different educational settings, though not all such users may be aware that the terms of use present questions about such uses. Most service providers have not directly answered questions about these issues. Some of the subscription service providers have, and they usually indicate that they think educational use would need additional permissions.
A service provider can sue users that violate the terms of service, but that’s very uncommon. What’s more common with a contract violation is for the site providing the service to either discipline users (e.g., by limiting access to an account), or end the business relationship (e.g., by terminating the account.)
If you want to use subscription streaming media in class, the most clearly legal option is to have students watch it on their own accounts, or watch with friends.
Sharing copies of video and audio with students
Fair use may cover making media clips and sharing them with students on Canvas/Kaltura or other streaming or download options. Where there are no other options, fair use may sometimes extend to sharing a copy of an entire work, but that will generally only be true for unusual outliers.
Courts haven't done much to interpret how fair use might apply to educational use of video and audio, but they have allowed fair use copying of images in other contexts - sometimes even commercial ones - especially when accompanied by criticism or commentary.
Media that are encrypted (like DVDs, Blu-Rays, and most streaming video) can present additional legal issues related to "anticircumvention" provisions of the Digital Millennium Copyright Act.
Student Assignments
Fair use does likely cover some copying from video and audio for course assignments, especially when students are using media to create new works, or criticizing or commenting on the source material.
Images, figures and tables
- Important information
Figure setup
Table setup.
- Full citation and copyright statement
- For decoration
- Referring to images
In APA style,
- Tables are visual displays of text or data in columns and rows.
- Figure refers to all illustrations except tables including graphs, photos, screenshots, drawings, maps, infographics and images .
Figures and tables can add visual appeal and make your work more understandable.
All figures and tables you have created, adapted or reproduced in your assignment should be:
- set up in APA style (see Figure setup and Table setup ); and
- referred to in the text of your assignment (e.g. Figure 1 shows...).
If you wish to use an image for decorative purposes only and will not refer to it in your text, see For decoration .
All figures and tables included in your assessments are presumed to be your own work unless you state otherwise. As personal images and data are not retrievable, they do not require a full citation and copyright statement nor an entry in your reference list.
When using other people's images in your work there are important factors to consider. Before using an image from a public website, a book or other source, you need to ensure your use of it falls within any limitations set by the copyright or licence. For more information see Full citation and copyright statement .
If you need to cite an image in your assignment (but not reproduce it), see Referring to images .
For more information about questions to ask when deciding to use an image and how to find images:
- Finding images The Library's guide on finding images for your assignments.
- Copyright for students (La Trobe University) Discover what is protected by copyright and how to decide what materials can be used for your studies.
Title of Figure
[Insert figure here]
Figure number
- All figures are numbered as they appear in-text.
- The word Figure and the figure number are in bold, e.g. Figure 1 .
- Figures are numbered in a separate sequence to any tables.
- If you include a figure in your document you should refer to it in your text, e.g. Figure 1 shows... (not 'figure above' or 'figure below')
- The Title is written in italics below the Figure number .
- Give the figure a short clear descriptive title in Title Case .
- The Note is immediately below each figure.
- A note is included if you need to explain the figure or its contents.
- If the figure (or the data you have used to create the figure) is reprinted or adapted from another source the note must include a full citation and a copyright statement .
For more information on how to set up a figure in APA:
- Figure Setup How to set up a figure using APA 7 formatting, including where to place figures in your assignment.
- Sample figures Sample APA 7 figures.
Title of Table
[Insert table here]
Table number
- All tables are numbered as they appear in-text.
- The word Table and the table number are in bold, e.g. Table 1 .
- Tables are numbered in a separate sequence to any figures.
- If you include a figure in your document you should refer to it in your text, e.g. Table 1 shows... (not 'table above' or 'table below')
- The Title is written in italics below the Table number .
- Give the table a short clear descriptive title in Title Case .
- The Note is immediately below each table.
- A note is included if you need to explain the table or its contents.
- If the table (or the data you have used to create the table) is reprinted or adapted from another source the note must include a full citation and a copyright statement .
For more information on how to set up a table in APA:
- Table setup How to set up a table using APA 7 formatting, including where to place tables in your assignment.
- Sample tables Sample tables in APA 7.
If the figure or table (or data you have used to create it) is reprinted (reproduced) or adapted from another source you must include a full citation and a copyright statement in the Note section.
Full citation
- The full citation is used as an in-text citation and includes all elements of the reference in the order of title , author , year of publication and source , determined by where you reprinted or adapted it from.
- Use From when you are reproducing an image / figure as is (i.e. you haven't made any changes).
- Use Adapted from when you are reproducing an image / figure or data from another source and you have changed it for your own purposes, e.g. put data into a graph or table of your own, joined two images together.
- See the Figure examples and Table examples in the boxes below to see how the full citation should be written if the image or data is coming from an article , book , or webpage .
Copyright statement
- Copyright Year by Name of Copyright holder , e.g. Copyright 2020 by La Trobe University.
- Creative Commons Licence abbreviation (with link) , e.g. CC BY 4.0 .
- In the public domain . This statement can only be used if a resource is no longer subject to copyright. A resource is not 'In the public domain' just because it is freely available on the internet.
You must also include a full citation in your Reference List.
Please note if your work is going to be published , the copyright statement must be followed by the permission statement , e.g. Reprinted [or Adapted] with permission. You can ONLY add a permission statement if permission has been sought and granted. Please refer to your supervisor and or the La Trobe University Copyright Officer for more information.
If you are using an image purely for decorative purposes in a presentation or poster (i.e. you are not referring to it in your text), you may not need to include a figure number, title, note, full citation or copyright statement. This will depend on the licencing details of the image as some images (including personal images) require no attribution . However, it is good practice to add a full citation and the copyright statement or CC licence (i.e. attribution) for anything that is not your own.
The La Trobe University Copyright Officer suggests using images from the following public domain image banks for this purpose however, it is very important to check the licence details of each image:
For further information:
- Clip art or stock images referencing Information regarding the special requirements for using clip art and stock images in APA style assignments.
Source: Publication Manual of the American Psychological Association (7th ed., pp. 346-347).
Figure examples
- From an article
- From a book
- From an image database
- From a webpage
Source: Publication Manual of the American Psychological Association (7th ed., pp. 225 – 250, 389 – 391); APA Style Sample Figures .
Source: Publication Manual of the American Psychological Association (7th ed., pp. 225-250, 389-391); APA Style Sample Figures .
Table examples
Source: Publication Manual of the American Psychological Association (7th ed., pp. 195-224, 389-391 ); APA Style Sample Tables .
- << Previous: Government publications
- Next: Indigenous knowledges >>
- UNIVERSITY HOME
- Archives & Special Collections
- Art Collection
- Center for English Language Studies
- University Learning Center
Images for Designers and Art Researchers
- Art, Architecture, Design
- Graphic Design, Posters, Ads
- Magazines, Newspapers
- Maps, Science
- Search Engines
- Stock Photography
- Using Images
- Citing Museum Labels
- Mediated Images
- Physical Images
This guide is intended for students who are working on academic assignments such as research papers, mood boards, presentations, and e-portfolios. The guide is intended to be educational and non-commercial.
Please note the examples contained in this guide are based on the author's interpretation of proper citing procedures. There are few standards for image citation for educational purposes in the Chicago Manual of Style .
It is not intended to be used for scholarship by faculty members; for publishing online to the general public; or for commercial purposes. Students should speak to instructors for guidelines for specific assignments. For example, citations might be unnecessary for certain studio projects.
The four factors used to determine whether fair use applies are:
- the purpose and character of your use
- the nature of the copyrighted work
- the amount and substantiality of the portion taken, and
- the effect of the use upon the potential market.
Resources for Fair Use of Art Images
In 2015, the College Art Association (CAA) published The Code of Best Practices in Fair Use in the Visual Arts , which provides guidance on image use for those who write about, teach, display, archive, or make art.
Resources for Faculty
- Fair Use in the Visual Arts: Lesson Plans for Librarians Crafting learning experiences that empower students to understand copyright and take advantage of fair use in their art, design, and academic practices.
Resources for Documentary Filmmakers
- Documentary Filmmakers’ Statement of Best Practices in Fair Use
Commercial Sources
When using images in a manner that does not qualify as fair use, image copyright holders must be consulted.
For example, when an image is being used in a book that will be published by a for-profit publisher, the author or publisher is usually responsible for clearing copyright (obtaining permission and/or paying a licensing fee) for the images. To clear copyright, contact whoever owns the image. The copyright holder might be a museum, a library, a photographer, an artist, or an artist's estate. Many artists are represented by Artists Rights Society or VAGA .
All databases (library, commercial, and non-commercial) are governed by terms of use:
- Getty Images Site Terms of Use
- ARTstor Terms and Conditions
- Metropolitan Museum of Art Website Terms and Conditions
- MoMA Website Terms of Use
Some web resources provide tools for sharing or embedding images. It is preferable to use these tools whenever they are available (rather than downloading and re-uploading image files, or taking screenshots).
- Flickr Web Embeds
- Getty Images Embed
Copyright for Your Own Work

Did you know that anyone can copyright their creative work? You can do it online at copyright.gov . You can register multiple works under the same copyright and revise the works after they are registered.
Questions? Ask Us , contact Volunteer Lawyers for the Arts , or refer to the resources below:

- << Previous: Examples
- Next: Citing Museum Labels >>
- Last Updated: Mar 5, 2024 4:30 PM
- URL: https://guides.library.newschool.edu/pics
Libraries, Collections, & Academic Services
- Archives & Special Collections
University Resources
- MyNewSchool
- Course Catalog
- Resources and Services A-Z
- Academic Calendar
- Libraries and Archives
- Faculty and Staff Directory
- Your Right to Know
- Harrassment, Discrimination & Title IX
- Shop The New Store
- Working at The New School
- Parsons School of Design
- Eugene Lang College of Liberal Arts
- College of Performing Arts
- The New School for Social Research
- Schools of Public Engagement
- Parsons Paris
- Continuing and Professional Education
Copyright © 2023 The New School
- Privacy Notice
- USC Libraries
- Research Guides
Using Images and Non-Textual Materials in Presentations, Papers, Theses, and Dissertations
- Documenting and Citing Images
- Finding Images - Select Sources
Documenting and Citing Images/Photographs and Their Sources
Please note that this is advice on best practices and considerations in documenting and citing images and non-print materials. It does not represent legal advice on obtaining permissions.
Generally, images copied from other sources should not be used without permissions in publications or for commercial purposes. Many American academic institutions require graduate students to archive their finished and approved theses/dissertations in institutional electronic repositories and/or institutional libraries and repositories, and/or to post them on Proquest's theses database. Unpublished theses and dissertations are a form of scholarly dissemination. Someone else's images, like someone else's ideas, words or music, should be used with critical commentary, and need to be identified and cited. If a thesis/dissertation is revised for publication, waivers or permissions from the copyright holder(s) of the images and non-textual materials must be obtained. Best practices also apply to materials found on the internet and on social media, and, properly speaking, require identification, citation, and clearance of permissions, as relevant.
Use the following elements when identifying and citing an image, depending on the information you have available . It is your responsibility to do due diligence and document as much as possible about the image you are using:
- Artist's/creator's name, if relevant;
- Title of the work/image, if known, or description;
- Ownership information (such as a person, estate, museum, library collection) and source of image;
- Material, if known, particularly for art works;
- Dimensions of the work, if known.
The Chicago Manual of Style online can be searched for norms on appropriate ways to caption illustrations, capitalize titles of visual works, or cite print materials that contain images.
Including images/photographs in a bibliography:
Best practice is to not include images within a bibliography of works cited. It is common, instead, to create a separate list of images (or figures) and their source, such as photographer (even if it's you) or collection. It may be useful to also include location, e.g., museum, geographic reference, address, etc.
Examples of Documenting Images
The image below is scanned from a published book. It can be used in a critical context within a presentation, classroom session, or paper/thesis, as follows:

[ Figure 1. This photograph from 1990 shows the Monument against Fascism designed by Jochen Gerz and Esther Shalev-Gerz, Hamburg, 1986-1993. Image from James Young, ed., Art of Memory: Holocaust Memorials in History (New York: Prestel, 1994), 70]
If you need to use this image in a published work, you will have to seek permission. For example, the book from which this image was scanned should have a section on photo credits which would help you identify the person/archive holding this image.
The image below was found through Google Images and downloaded from the internet. It can be used in a critical context within a presentation, classroom session, or paper/thesis, as follows:

[Figure 2. This image shows the interior of Bibliotheca Alexandrina designed by the Norwegian architecture firm Snøhetta in 2001. Image downloaded from https://mgkhs.com/gallery/alexandria in March 2016.]
If you want to use this image in a published work, you will have to do your best to track down its source to request permission to use. The web site or social media site where you found the image may not be an appropriate source, since it is common for people to repost images without attribution. Just because "everyone does it" does not mean that you should be using such materials without attribution or documentation. In this specific example, you may need to write to the photographer or to the architecture firm. If you have done due diligence and were unable to find the source, or have not received a response, you may be able to use an image found on the internet with appropriate documentation in a publication.
The image below was downloaded from a digitized historic collection of photographs held by an institutional archive. It can be used in a critical context within a presentation, classroom session, or paper/thesis, as follows:

[Figure 3. In the 1920s the urban landscape of Los Angeles started to change, as various developers began building multi-family apartment houses in sections previously zoned for single family dwellings. Seen in this photograph by Dick Whittington is the Warrington apartment building, which was completed in 1928, surrounded by older single family structures. Downloaded from the USC Digital Library in February 2016]
I f you plan to use this photograph in a publication, seek permission from the library/institution from whose digital archive you downloaded the image. Contact information is usually found in the record for the image.
The image below was taken by the author. It can be used in a critical context within a presentation, classroom session , paper/thesis, or a publication* as follows:

[Figure 4. Genex Tower, also known as West City Gate, is a residential tower located in New Belgrade. This example of late 20th century brutalist-style architecture was designed in 1977 by Mihajlo Mitrović. Photographed by the author in 2013.]
*Please note, if you re-photographed someone else's photograph or a work of art, or if you re-photographed a published image, you may not be able to publish your photograph without first seeking permission or credit for its content. If you have done due diligence and were unable to find the source or have not received a response, you may be able to use your image with appropriate documentation.
- << Previous: Fair Use
- Next: Finding Images - Select Sources >>
- Last Updated: Jan 19, 2023 3:12 PM
- URL: https://libguides.usc.edu/fair_use
The Innovative Instructor
Pedagogy – best practices – technology.

Teaching with Images
Today’s students are surrounded by visual media in their everyday lives. With their heavy use of the Internet, they are accustomed to accessing information in both textual and visual forms. The use of images in the classroom is a pedagogical strategy aimed at engaging students who have grown up in a media-rich environment. Digital technology has made images more readily available and easier to incorporate into teaching and learning materials.
Finding images While a Google Image Search , which draws from the many images available on the Web, can be useful for finding a specific or obscure image, there are problems associated with this method. Google retrieves images based on the text appearing nearby or on the image file names, often resulting in hundreds of unrelated results that have nothing to do with your subject. In addition, images posted to the Web may have incomplete or incorrect data attached and may have rights restrictions. Finally, the images found by Google are often of insufficient resolution for classroom projection or printing.
High quality images can be found through the Johns Hopkins Libraries, which provide access to a number of specialized image resources. These databases provide downloadable, high-resolution images, include reliable information about the images, and allow advanced search capabilities. The resources include:
- ARTstor , a database of over one million images in the arts, humanities, and social sciences.
- Digital Image Database at JHU (DID@JHU) provides JHU faculty and students with access to thousands of images in a variety of subjects. You can also request to add images for specific courses to the database.
- Accunet/AP Multimedia Archive , a database of images, audio files and texts from 160 years of news and world events.
- There are thousands of free, public domain images available through the U.S. government, easily searchable at the USA.gov website.
- The Image Research Guide contains search tips, information about copyright and publications, and subject-specific web recommendations.
- The CER has a list of websites containing freely available images and multimedia for educational use
Copyright & Permissions While technology has made it easier than ever to download, manipulate, and re-publish images, it has also made it easier to inadvertently violate the copyrights associated with them. The use of copyrighted images for educational purposes is allowed under the Fair Use exemptions to the US Copyright Act. As there are several factors to take into account when determining whether your use of an image may be considered a fair use, it is a good idea to familiarize yourself with these criteria. Many image databases and websites will stipulate the extent to which educational use of their materials is permitted.
There are resources available online to help guide you in determining whether your use qualifies under the Fair Use exemptions.
- The University of Georgia’s Guide to Understanding Copyright & Educational Fair Use
- Information about the different types of Creative Commons-licensed materials
In addition, there are some best practices to follow to facilitate the legal and ethical use of images. These include:
- Restrict online access to images to class members only. Post images to a password-protected website or space, such as Blackboard, or in a shared folder in ARTstor or the Digital Image Database (DID@JHU). If you’re not sure how to do this, consult your Research Services Librarian or a CER staff member .
- If you are posting or publishing images to a forum that is open to members of the public, use public domain or Creative Commons-licensed images.
Uses of Images Images will be more effective in the classroom if they are meaningfully integrated into course curricula. Think of ways images can support the delivery of content, illustrate class themes, serve as primary research materials, or be built into assignments.
If you would like to learn more about integrating visual materials into your teaching, contact Macie Hall, Instructional Designer, CER: [email protected] . The following are additional resources on how to use images in the curriculum:
- Harris, Benjamin R. “Visual Information Literacy via Visual Means: Three Heuristics.” Reference Services Review 34.2 (2006): 213-221.
- Click! Photography Changes Everything , a Smithsonian project with essays on the impact of photographic images on human behavior, belief, memory, and more. Great for ideas on how to use images in the classroom.
Some ways you can introduce images into your course materials:
- Presentations in PowerPoint, Keynote, the ARTstor Offline Viewer, or the DID@JHU image viewer
- Blackboard resources
- Other learning tools, such as the CER’s Timeline Creator or Interactive Map Tool
- Primary source materials: photographs as historic documents, maps to inform urban planning and site architecture, diagrams and technical drawings to show the evolution of bridge design, or medical images to practice diagnosis
- Class assignments: images can be powerful as illustrations, didactic materials, or stimulating starting points for structured writing exercises
Adrienne Lai, Emerging Technologies Services Librarian, North Carolina State University Libraries
Ms. Lai was the 2008/9 Art Libraries Society of North America Intern and did her internship at Sheridan Libraries and Department of the History of Art, Johns Hopkins University. She wrote the original Innovative Instructor print series article, Teaching with Images , adapted for this blog post. She completed Master’s Degrees in Library Studies and Archival Studies at the University of British Columbia in Vancouver, BC, Canada and holds a Master’s Degree in Fine Arts from the University of California, Irvine. She came to the library profession from several years of teaching art, art history, and cultural and media studies at art colleges in Canada and the US, and is interested in the possibilities of collaborative instructional efforts between libraries, faculty, and technology.
Image Source: Images in the collage were obtained from USA.gov Photos and Images and include images from NASA, National Gallery of Art, National Park Service, and National Agricultural Library, ARS, USDA.
One thought on “ Teaching with Images ”
I want to appreciate you sharing this remarkable knowledge. Please I want to know how pictures as an instructional material use for teaching and learning social studies in junior secondary school
Leave a Reply Cancel reply
Your email address will not be published. Required fields are marked *
Best practices for image use
Select the best images.
Images can tell a story and bring content to life.
See finding images for an annotated list of search tools.
If you're selecting images of people to include in your courses, be sure to represent diversity of gender, ethnicity, and culture. Free sources of diverse images include Unsplash , Pixabay , Women of Color in Tech , Jopwell (also see photos of interns ), Gender Spectrum Collection , and Iwaria . The Gender Spectrum Collection's usage guidelines share ways to improve representation and avoid stereotypes.
Purdue's Online Writing Lab explains other issues to consider when choosing images .
Recognize and comply with copyright
For maximum flexibility, look for images that are in the public domain (not restricted by copyright). Wikimedia Commons lists a number of free and public-domain image sources . Check out Pixabay , Unsplash , and SnappyGoat . Europeana (Europe's digital library, museum and archive) offers many public domain images. The British Library has released more than 1 million images into the public domain. You can freely use, copy, modify, and share public-domain images, even commercially. While attribution is not legally required, it's good practice.
Images with a Creative Commons (CC) license are another good option. The specific CC license explains what you're allowed to do with the image. At a minimum, you must credit the image's creator. Wikimedia Commons features more than 71 million CC-licensed and public-domain images. You can also use Google , Flickr , and Bing to search for Creative Commons and public-domain images.
If you need to use a copyrighted image, track down the copyright owner and get permission. If you can't find contact information or licensing information for an image, avoid using it outside your course site.
Use images in the classroom
You may display copyrighted images in face-to-face instruction without permission from the copyright owner. For online instruction, following fair use guidelines , you can display legally acquired copyrighted images without permission when only people in your course can see them (for example on your D2L Brightspace course site). This includes slide decks, assignments, and other content. Just make sure your content isn't open to the world in something like Slideshare or Google Drive.
Instructors, include a notice in your syllabus that "the images should not be downloaded, copied, retained, printed, shared, modified, or otherwise used beyond the permitted educational uses."
Cite images
It's best practice to credit your images (list the source and link to it whenever possible). Students, ask your instructors if they have a preferred citation style .
Attribution is required for all images with a Creative Commons license. When using Creative Commons images, use best practices for attribution . Include:
- Title – the name of the material (if available)
- Author – the owner of the material (this could be a person's name, a company name, or a user name on a site such as Flickr)
- Source – where the image can be found (usually a URL or hyperlink)
- License – which Creative Commons license the image has (e.g., CC BY 4.0 )
Here's an example of a complete citation for a Creative Commons image: " Creative Commons 10th Birthday Celebration San Francisco " by tvol is licensed under CC BY 2.0
Open Washington provides a handy Open Attribution Builder tool that makes it easy to generate citations.
Make your images accessible
Be sure to follow best practices for accessibility , including the use of alternative text .
Identify existing images
TinEye Reverse Image Search You can submit an image to TinEye to find out where it came from (and how it should be attributed), how it is being used, if modified versions of the image exist, or to find higher resolution versions.
Google Reverse Image Search Like TinEye, Google Images allows you to search by image. Select the camera icon in the search box and follow the directions. Tips for using Google Images .
PrePost SEO You can directly paste an online image URL or you can upload a picture.
Editing images
UA students, faculty, and staff have free access to Adobe Creative Cloud , which includes Photoshop and other design tools. Adobe Photoshop and other graphics software programs are also installed on computers in the Main, Science-Engineering, and Fine Arts libraries.
A number of free photo editing tools are available online, including:
- GIMP (GNU Image Manipulation Program)
See tips on image editing ethics from Photo Review.
If you have any usage questions, get in touch with copyright librarian E llen Dubinsky .
If you have trouble finding images, contact your librarian – we're happy to help.

- Types of Plagiarism
- Avoiding Plagiarism
- Using Images
- Academic Integrity
Feedback & Suggestions
- Library Feedback Comments, suggestions, & kudos
- Suggest a Resource Recommend resources to the library
- Request Instruction Request individual or class instruction
You might think to yourself that it is okay to use an image you found on the internet for your assignment.
Did you know that you may need to cite that image or it can be considered plagiarism? These popular activities are considered plagiarism:
- Making a video using footage from others' videos or using copyrighted music as part of the soundtrack.
- Copying media (especially images) from other websites to paste them into your own papers or websites.
- Composing a piece of music that borrows heavily from another composition.
- Performing another person's copyrighted music. (i.e., playing a cover)
These tend not to fall under the Creative Commons License. Which is essentially open access photos, meaning anyone can use them.
However, images should always be cited.
Information directly from Plagarism.org
Creative Commons License
Creative Commons is a non-profit organization that is trying to create more creative works (i.e., images) that are available for others to use and share legally.
Not all images you see online or in books are freely available for you to use, you made need to verify the licensing.
- Creative Commons Creative Commons helps you legally share your knowledge and creativity to build a more equitable, accessible, and innovative world.
- Creative Commons Zero (CC0) This short document provides information about what a Creative Commons Zero license is and how it pertains to images that you may want to use.
- CC: About The Licenses Creative Commons provides a great read about understanding what the licenses do and about the different types.
Here is a short list of some resources where you can find open access images.
- Coverr Free videos that you can use. It is licensed under Creative Commons Zero.
- Creative Commons Search The Creative Commons Search searches images that are under the creative commons license. It will search YouTube, Flikr, and more. *Please note that it is not a search engine, but rather offers convenient access to search services provided by independent organizations.*
- Flickr: Creative Commons Many Flickr users have chosen to offer their work under a Creative Commons license, and you can browse or search through content under each type of license.
- Google Advanced Image Search You can use the Advanced Image Search by Google to find images that you can freely reuse. To show "free to use" images scroll down until you see "Usage Rights" and click on any of the "free to use" and then proceed with your search.
- Pixabay All images and videos on Pixabay are released of copyrights under Creative Commons CC0. You may download, modify, distribute, and use them royalty free for anything you like, even in commercial applications. Attribution is not required.
- Unsplash all photos published on Unsplash are licensed under Creative Commons Zero which means you can copy, modify, distribute, and use the photos for free, including commercial purposes, without asking permission from or providing attribution to the photographer or Unsplash.
- << Previous: Avoiding Plagiarism
- Next: Academic Integrity >>
- Last Updated: Dec 30, 2020 12:06 PM
- URL: https://library.an.edu/plagiarism
- Link to facebook
- Link to linkedin
- Link to twitter
- Link to youtube
- Writing Tips
How and When to Use Images in an Essay
3-minute read
- 15th December 2018
Pages of text alone can look quite boring. And while you might think that ‘boring’ is normal for an essay, it doesn’t have to be. Using images and charts in an essay can make your document more visually interesting. It can even help you earn better grades if done right!
Here, then, is our guide on how to use images in an academic essay .
How to Use Images in an Essay
Usually, you will only need to add an image in academic writing if it serves a specific purpose (e.g. illustrating your argument). Even then, you need to make sure images are presently correctly. As such, try asking yourself the following questions whenever you add an image in an essay:
- Does it add anything useful? Any image or chart you include in your work should help you make your argument or explain a point more clearly. For instance, if you are analysing a film, you may need to include a still from a scene to illustrate a point you are making.
- Is the image clearly labelled? All images in your essay should come with clear captions (e.g. ‘Figure 1’ plus a title or description). Without these, your reader may not know how images relate to the surrounding text.
- Have you mentioned the image in the text? Make sure to directly reference the image in the text of your essay. If you have included an image to illustrate a point, for instance, you would include something along the lines of ‘An example of this can be seen in Figure 1’.
The key, then, is that images in an essay are not just decoration. Rather, they should fit with and add to the arguments you make in the text.
Citing Images and Illustrations
If you have created all the images and charts you want to use in your essay, then all you need to do is label them clearly (as described above). But if you want to use an image found somewhere else in your work, you will need to cite your source as well, just as you would when quoting someone.
The exact format for this will depend on the referencing system you’re using. However, with author–date referencing, it usually involves giving the source author’s name and a year of publication:

In the caption above, for example, we have cited the paper containing the image and the page it is on. We would then need to add the paper to the reference list at the end of the document:
Find this useful?
Subscribe to our newsletter and get writing tips from our editors straight to your inbox.
Gramblička, S., Kohar, R., & Stopka, M. (2017). Dynamic analysis of mechanical conveyor drive system. Procedia Engineering , 192, 259–264. DOI: 10.1016/j.proeng.2017.06.045
You can also cite an image directly if it not part of a larger publication or document. If we wanted to cite an image found online in APA referencing , for example, we would use the following format:
Surname, Initial(s). (Role). (Year). Title or description of image [Image format]. Retrieved from URL.
In practice, then, we could cite a photograph as follows:
Booth, S. (Photographer). (2014). Passengers [Digital image]. Retrieved from https://www.flickr.com/photos/stevebooth/35470947736/in/pool-best100only/
Make sure to check your style guide for which referencing system to use.
Need to Write An Excellent Essay?

Share this article:
Post A New Comment
Get help from a language expert. Try our proofreading services for free.
4-minute read
The Benefits of Using an Online Proofreading Service
Proofreading is important to ensure your writing is clear and concise for your readers. Whether...
2-minute read
6 Online AI Presentation Maker Tools
Creating presentations can be time-consuming and frustrating. Trying to construct a visually appealing and informative...
What Is Market Research?
No matter your industry, conducting market research helps you keep up to date with shifting...
8 Press Release Distribution Services for Your Business
In a world where you need to stand out, press releases are key to being...
How to Get a Patent
In the United States, the US Patent and Trademarks Office issues patents. In the United...
The 5 Best Ecommerce Website Design Tools
A visually appealing and user-friendly website is essential for success in today’s competitive ecommerce landscape....
Make sure your writing is the best it can be with our expert English proofreading and editing.
- Staff Directory
- Workshops and Events
- For Students
Creative Assignments: Teaching with Images – Part 2 (Digital Exhibitions)
by Thomas Keith | Feb 19, 2020 | Instructional design , Services

The homepage of Prof. James Allen Evans’ digital exhibition on the history of science, Scipedia
Note: This post was updated on 6/17/2020 to reflect updated information about Omeka.
In Part 1 of this series we examined some basic types of image assignments, such as using images in discussion boards or annotating images. Instructors looking to move beyond these fundamentals and engage their students on a deeper level may wish to consider the digital exhibition. In a digital exhibition, students create a digital mock-up representing a physical display space and populate the space with carefully chosen text and images, which work in conjunction to argue for a central thesis. The digital exhibition space makes it possible to exhibit objects typically considered too fragile for student exhibitions, like parchment rolls, fragments, or manuscripts, alongside other biodegradable objects that are challenging to preserve and provide access to . Digital exhibitions can circumvent the issue of spatial scarcity that often afflicts physical exhibitions, and also last longer than physical exhibitions. UChicago faculty have used digital exhibition assignments to teach their students independent research skills in a way that can supplement, or even supplant, the traditional research paper, while also helping their students learn how to write for a public audience.
There are several different tools available for the faculty member interested in teaching digital exhibitions to his/her students. The choice of tool for a particular assignment may depend upon a number of factors, such as the learning curve involved in mastering the tool or the pedagogical objectives of the assignment. In this post, we will survey a few examples of digital exhibitions created in UChicago courses and consider the tools chosen in each case.
UChicago Wiki (supported by Academic Technology Solutions)
For faculty seeking a digital exhibition tool with a relatively shallow learning curve, UChicago Wiki may be ideal. It provides a dedicated wikispace for collaborative knowledge construction, including multimedia uploads. Professor James Allen Evans had the students in several successive iterations of his course “Science, Culture & Society III (Modern Science)” use UChicago Wiki to create Scipedia , a Wikipedia-like digital encyclopedia with media-rich articles on the evolution of modern science. Students were instructed to think of the space as a digital museum, and to use the platform as a space for critical thinking and making carefully supported arguments. Prof. Evans made note of especially strong articles and took them as examples to show to future classes, thus refining and improving the collective product over time. He found the platform easy and simple to use, as well as more persistent than past platforms. Scipedia is now available to view to anyone with a UChicago CNetID, and offers a public example of a thematically focused digital exhibition.
Omeka (supported by UChicago Library)
If a faculty member or instructor wishes his/her students to create a digital exhibition with detailed image information (metadata), such as provenance, date, type, or style, Omeka may be a good choice of tool. Omeka is a web publishing platform designed for creating media-rich digital exhibitions featuring image galleries. It offers a range of different templates from which users can choose to organize content in visually creative ways. In addition, Omeka allows users to customize the type of metadata to record according to the needs of a particular class or project.
At the University of Chicago, Professor Christopher Wild used Omeka for a digital exhibition within “Reforming Religious Media,” an undergraduate research course in Special Collections. Prof. Wild was seeking a means of teaching undergraduate research skills other than a traditional research paper. Initially he planned to have his students curate physical showcases within the Special Collections space, but when this proved unfeasible, Omeka offered a means for them to create digital “showcases” instead. His students were instructed to find five to ten items in Special Collections that related to their topic and then fill out the appropriate metadata fields for each item according to the Dublin Core schema. Using this as a scaffold, each student wrote a research proposal and was given charge of a digital showcase, for which s/he chose items to display and wrote explanatory text to accompany them. His students were excited to have this opportunity to create public-facing material and to work with items in Special Collections. Prof. Wild himself was pleased with the success of the digital exhibition and plans to use Omeka again in other courses in the future.
UChicago Voices (WordPress; supported by Academic Technology Solutions)
Omeka’s ability to catalogue metadata also proved appealing to Prof. Joe Stadolnik in his course “The Archives of Early English Literature”. Prof. Stadolnik had his students work with the archives of the Chicago-based Chaucer Research Project . Like Prof. Wild, Prof. Stadolnik scaffolded the assignment to make the prospect of creating a digital exhibition less daunting. His students were assigned to find ten items that interested them in the collection and create skeletal Omeka records, including metadata, for each item. They then chose five of the ten to research more deeply and write up in a short description. Finally, they chose two of these five about which to write an object note that ran to greater length and tied into an aspect of the archives that interested them. The ultimate goal was to allow students to figure out their interests within the collection so that they could then go back and create a digital exhibit, as part of a larger collaborative digital exhibition.
In the end, while Prof. Stadolnik and his students found Omeka very helpful as a cataloging tool, they were less content with its performance as a publishing tool, finding it too inflexible for their purposes. They therefore turned to a public instance of the blogging/website design platform WordPress for the actual publication of their digital exhibition. Using WordPress allowed them to get a public-facing product out swiftly and without too steep a learning curve. To see the resulting digital exhibition, “Making the Canterbury Tales in Chicago,” please visit https://chicagochaucer.wordpress.com/ .
The University has its own instance of WordPress, UChicago Voices , which can also be used for this purpose. While Voices lacks the metadata capabilities of Omeka, it is easier to master quickly and is suitable for simple digital exhibitions combining text and images. Academic uses of UChicago Voices are fully supported by Academic Technology Solutions .
As the above examples demonstrate, digital exhibition assignments can entail a significant amount of initial effort on the part of both instructors and students. They are particularly well-suited to quarter-length or longer projects, including projects like Scipedia in which the faculty member can build on the same digital exhibition over several iterations of the same course.
As a general rule, digital exhibition assignments require careful planning with regard both to the choice of tool(s) used and the structure of the assignment if they are to succeed. That said, they offer a unique and compelling means of teaching research skills. By allowing students to engage both with text and images and to think through the connections between them, they spur creative thinking in a way that goes beyond the traditional research paper. As such, they can be a valuable addition to the faculty member or instructor’s pedagogical toolkit.
Digital Exhibition Tools Feature Comparison
Further resources and getting help.
- Academic Technology Solutions supports the use of both UChicago Voices and UChicago Wiki for academic purposes. Send an email to [email protected] to get started.
- For more information on getting started with Omeka, please see the Library’s guide (in development): https://guides.lib.uchicago.edu/omeka
- If you would like to learn more about digital exhibition assignments and other topics at the intersection of technology and pedagogy, consider attending the Symposium for Teaching with Technology . The Symposium will be held Wednesday, April 22, 2020 , from 8:00 A.M. to 4:00 P.M. , in the John Crerar Library . For more information and to RSVP, please visit the Symposium website .
Search Blog
Subscribe by email.
Please, insert a valid email.
Thank you, your email will be added to the mailing list once you click on the link in the confirmation email.
Spam protection has stopped this request. Please contact site owner for help.
This form is protected by reCAPTCHA and the Google Privacy Policy and Terms of Service apply.
Recent Posts
- Share Your Stories of Progress for Global Accessibility Awareness Day
- Explore “Hallucinations” to Better Understand AI’s Affordances and Risks: Part Two
- Learn How UChicago Instructors Promote Learning with Social Annotation
- Explore “Hallucinations” to Better Understand AI’s Affordances and Risks: Part One
- Instructors: Participate in Our Academic Technology Survey
- A/V Equipment
- Accessibility
- Canvas Features/Functions
- Digital Accessibility
- Faculty Success Stories
- Instructional design
- Multimedia Development
- Surveys and Feedback
- Symposium for Teaching with Technology
- Uncategorized
- Universal Design for Learning
- Visualization

Productively Addressing Artificial Intelligence in the Classroom
- Introduction
- Identifying AI-Generated Work
- Addressing AI-generated content in your syllabus
- Adjusting assignments to be AI-resistant
- Embracing AI to improve student learning
- Additional Resources
Readjusting assignments to be AI resistant
Probably the best way to guard against inappropriate use of AI-generated text is to redesign your assignments, both the prompts themselves and the related processes. These options vary in their usefulness across contexts, but consider these ideas as starting points:
Avoid simple fact-based questions
The first step with avoiding AI-generated responses is to avoid prompts with specific, factual answers. ChatGPT, however, still does a pretty good job with higher-order questions (analysis, synthesis, etc.), and it can be pretty creative (see the viral PBJ in a VCR example ). So, aim for assignments calling for more complex cognitive skills, and then layer on some of the other techniques below.
Use class-specific cases and examples
Tie writing prompts to unique or fictional cases or scenarios in your class, particularly if those cases build over time and draw on in-class activities or group work. Relying on in-class activities as a basis for assignments leaves AI without necessary information, and feeding it all that information would be time-consuming for students. If you use this approach, be ready to have an alternate assignment ready for students who cannot come to class for medical or other legitimate reasons.
Break large assignments into smaller stages
Giving an assignment in one big chunk can add pressures that sometimes drive students to cheat, while breaking an assignment into smaller pieces can improve learning and writing skills while mitigating these pressures and reliance on AI. Consider breaking larger assignments into multiple stages, giving feedback and grades on each one, and perhaps incorporating peer feedback. This helps in multiple ways: 1) It mitigates the pressure to cheat that emerges from procrastination and feeling lost on a big, high-stakes assignment; 2) It gives you some sense of students’ writing styles along the way, especially if in-class writing is added to the mix; and 3) It leads to better learning and writing in general.
Mix in some in-class writing
This can be anywhere in the writing process—early idea-development stages, syntheses of in-class activities that will be incorporated into the project, or reflections on their work and process. Aside from being a valuable approach to teaching writing in your discipline, in-class writing can provide a baseline of a student’s style that can be used to identify writing that isn’t the student’s original work. Those of us who have dealt with plagiarism before know that those students rarely know the submitted work well, nor are they able to talk about their writing process. But try to use in-class writing for learning opportunities, not just a policing tool.
Ask for personal connections and examples
Sure, students can ask ChatGPT to do this—there are already examples of AI generating passable "personal" college admission essays—but adding a personal element like this might reduce the likelihood that students will turn to AI, especially if you have also built personal relationships with them. In general, anonymity makes cheating easier, both functionally and psychologically.
Use very recent sources
When it first launched, ChatGPT drew on a database that only went through September 2021. As of April, OpenAI was experimenting with developer plug-ins that allow ChatGPT to access some live web content, and that access will likely only grow over time. Other applications like Bard and Bing are built into web search tools, so they certainly will have access to current online content. Consider keeping track of how much access these tools have to recent materials related to your assignments, particularly discipline-specific information, pre-print scholarship, or items behind paywalls. A student could feasibly feed more recent information into the AI, but relying on very recent sources may continue to be a valuable approach, especially when layered with other strategies.
Use sources not available online
Consider incorporating videos, guest speakers, or other sources that would not be available online. We've seen assignments that ChatGPT seems to address well until they include phrases like, "Using evidence from the video we viewed in class..." or "Based upon the case described during the guest lecture on February 21st ...."
Use images in prompts
For now, ChatGPT only takes text input, so having students respond to a unique image or diagram makes the AI unable to answer the question. ChatGPT has solved some pretty good application/diagnostic questions in biochemistry, for example, but it cannot currently view and interpret an image of a chemical reaction or cell. Further, asking for student responses to be in the form of a diagram or image can take AI text-generators out of the mix. The emerging GPT-4 tool can detect some images, but it cannot yet analyze charts or diagrams. Two things to be aware of:
- Using images might be a problem for students with vision impairments, so be ready to provide an alternative assignment for them.
- Text generators are improving. Although the function is not available to the public (at the time of writing this) Chat-GPT can already begin to interpret images.
Utilize alternative assignments
Consider other ways that students could demonstrate their knowledge and mastery of learning outcomes, including “performative tasks.” This is a useful practice in general, aligning well with precepts of Universal Design for Learning , but it also avoids AI text generators altogether, or at least relegates them to a supporting role. Could students develop a video , podcast, drawing, or vlog (video blog) to demonstrate their knowledge? Remember that ChatGPT can be very creative in text, so asking for alternate outputs is the key here.
Run your own assignments through ChatGPT
Curious as to how well AI answers your assignments? Try running them through yourself to see both how well it does and what markers you see of its work. If it provides solid answers, you might want to keep working on the assignment.
- << Previous: Addressing AI-generated content in your syllabus
- Next: Embracing AI to improve student learning >>
- Last Updated: Aug 3, 2023 9:22 AM
- URL: https://libguides.dominican.edu/artificial-intelligence-in-the-classroom
CS 2110: Object-Oriented Programming and Data Structures
Assignment 5: interactive image selection, part i.
Graphical User Interfaces (GUIs) enable richer human–computer interaction by responding to more kinds of input, such as mouse movements, and presenting users with more dynamic output, such as animated graphics. The capabilities and configurations of a program become more discoverable when they can be controlled via familiar graphical “widgets” like buttons, menus, and sliders. Moreover, object-oriented toolkits, like Swing, make GUIs easy to build (some IDEs, including IntelliJ, even let you drag-and-drop widgets to form a GUI).
But programming an interactive application requires some different techniques from what you’ve used so far, namely inversion of control . Instead of prescribing the order of operations yourself, your program must respond to whatever the user decides to do, typically by executing event handlers that you have defined and configured to “listen” for certain user actions or data changes.
Of course, before any of this can happen, the interface itself needs to be defined. Designing an attractive and usable interface is an artform, and GUI toolkits provide a wealth of reusable and customizable components to help you realize your vision, but assembling them in code by hand can admittedly be rather tedious.
In this project, you will complete an application that allows users to copy subjects out of images, saving their selection to a new file. You will write code to assemble the interface, keep track of the selection process, draw the selection boundary, and handle a variety of user interactions. In the process you’ll work with Swing components both from inside (inheritance) and from the outside.
While this assignment will give you practice programming GUIs, it is also intended to give you practice learning new skills from reference materials. You will be using widgets, layout managers, and event handlers that have not previously been shown in lecture or discussion, and this is intentional . The release code includes numerous links to API documentation and official tutorial pages that directly relate to the new classes you’ll need to use, and reading and understanding this material on your own is a big part of the assignment.
Learning objectives
- Arrange standard widgets like buttons and file menus into a graphical user interface using Java’s Swing framework.
- Leverage standard dialogs to help users select files and inform them of concerns.
- Separate the concerns of an interactive application into Model, View, and Controller roles.
- Define the look of a custom component by overriding how it is painted.
- Respond to button activations, mouse movement, and mouse clicks.
- React to changes in model state using the Observer pattern.
- Interpret state transition diagrams and sequence diagrams to follow modal behavior and control flow in an interactive application.
Recommended timeline
Don’t try to do this assignment at the last minute. You will need to look at a significant amount of API documentation, and you don’t want to be trying to ingest that while in a hurry. Note that consultants will expect that you have already read the relevant Swing tutorials when you ask for assistance diagnosing issues.
There are about 23 TODOs to complete. Here is one way to spread out the work:
- Day 1: Read the “functional requirements” and “getting started” sections of this handout. Familiarize yourself with the structure and contents of the release code. Complete the tasks in “step 1.”
- Day 2: Read the handout sections on Model–View–Controller, Observer, and the selection model and familiarize yourself with the model’s state transitions. Read the provided source code for SelectionModel for awareness of which methods are available to clients and to subclasses and which serve as helpers to others. Complete the tasks in “step 2.”
- Day 3: Read the source code for SelectionComponent and compare it with the sequence diagrams in the handout to get a sense for how various objects interact in response to events. Complete the tasks in “step 3.”
- Day 4: Complete the tasks in “step 4” (these are the most difficult parts of the assignment).
- Day 5: Continue implementing, testing, and debugging the features from “step 4.” If you finish early, complete some of the embellishment tasks. Respond to the questions in the reflection document. Have fun using the program to cut out stickers!
Collaboration Policy
On this assignment you may work together with one partner. Having a partner is not needed to complete the assignment: it is definitely do-able by one person. Nonetheless, working with another person is useful because it gives you a chance to bounce ideas off each other and to get their help with fixing faults in your shared code. If you do intend to work with a partner, you must review the syllabus policies pertaining to partners under “programming assignments” and “academic integrity.”
Partnerships must be declared by forming a group on CMSX before starting work. The deadline to form a CMS partnership is Friday, April 12, at 11:59 PM . After that, CMSX will not allow you to form new partnerships on your own. You may still email your section TA (CCing your partner) to form a group late, but a 5 point penalty will be applied. This is to make sure you are working with your partner on the entire assignment, as required by the syllabus, rather than joining forces part way through. New groups may not be formed on or after the due date.
As before, you may talk with others besides your partner to discuss Java syntax, debugging tips, or navigating the IntelliJ IDE, but you should refrain from discussing algorithms that might be used to solve the problems, and you must never show your in-progress or completed code to another student who is not your partner. Consulting hours are the best way to get individualized assistance at the source code level if you get stuck diagnosing an issue on your own.
Frequently asked questions
Note: This is a brand-new assignment for Spring 2024, and while it is shorter than A4, there are still a lot of interactions to keep track of. Some tasks may be a little unclear at first, but we will try to post fixes and clarifications as these are reported on Ed. Additionally, it may be a few days before the smoketester is deployed.
If needed, there will be a pinned post on Ed where we will collect any clarifications for this assignment. Please review it before asking a new question in case your concern has already been addressed. You should also review the FAQ before submitting to see whether there are any new ideas that might help you improve your solution.
Assignment overview
The end goal (“functional requirements”).
The Selector application should allow users to open an image file, draw a selection around a region of the image, then save their selection as a new file (analogous to a “sticker” in smartphone messaging). To draw the selection, the user will click a sequence of points. For this assignment, the points will be connected with straight lines, forming a polygon. However, in a future assignment, you will implement a more sophisticated tracing tool that automatically follows edges in the image. To accommodate both versions, the core functions required to make and manipulate a selection have been collected into an abstract base class.

After the selection (shown in blue above) has been drawn, the user will have the opportunity to move any of the polygon’s vertices (shown as cyan disks above) by clicking and dragging on them. Additionally, the user can “ undo ” to erase the edges that have been added to their selection one-by-one (for simplicity, however, they won’t be able to undo a move). When choosing a new point or moving an old point, the application will draw guide lines from neighboring points to the current mouse location (shown in yellow above).
It is helpful to make a list of the user actions (verbs) that the application needs to support. These include:
- Open an image from a file
- Add points to a selection by clicking
- Finish the selection by connecting back to the starting point
- Undo the most recently added point
- Reset the selection (undoing all of the points)
- Save the current selection to an image file
You will also see a disabled “cancel” button in the design; this will be used in the next assignment to interrupt a computational task that is taking too long.
As you browse the application’s source code, you will see several tasks marked “TODO (embellishment)”. These are the “challenge extensions” for this assignment—they are not worth many points (5% altogether) and should be postponed until all of the functional requirements have been met. Once you have a functional application, come back to these embellishments and tackle a few to customize the app to your liking. Keep track of which embellishments you complete in your reflections.
Getting started
Open the release project in your IDE and try running SelectorApp ; you should see a window with a file menu at the top.

Take note of the classes that make up this application. Here is a brief tour of them:
The code you need to write is marked with TODO comments. Each item is numbered in the order we recommend completing it in. This is not the order in which they appear in the files. This handout gives tips on how to test your changes along the way, but if something doesn’t work, you will need to debug your code. Debugging event-driven code can be tricky; a general tip is to add println() statements to each method so you can distinguish between a buggy method implementation and a bug that prevents the method from being called in the first place (just remember to remove all such print statements before submitting your code).
There are too many widget types and properties to cover them all in lecture, so you will need to learn how to use the ones you need yourself. Get comfortable with the API pages for classes like JComponent , and browse some of the Swing Tutorial . When a TODO references tutorial pages, read them thoroughly so you know how to use the component it describes. Most importantly, play around—since a GUI is interactive, you can see the effects of small changes right before your eyes.
Step 1: Expanding the basic layout
You’ll start your work in SelectorApp . Browse its fields, then read its constructor and its makeMenuBar() helper method. To complete the main application window, you’ll need to add a status bar, scroll bars, and eventually buttons. Complete TODOs 1A & 1B, then run the application again to check that your changes had the desired effect (you may need to resize your window for the scrollbars to appear).
Now it’s time to display an image. From reading makeMenuBar() , you’ll note that activating the “Open” item under the “File” menu will result in openImage() being called. Jump to that function (you can click on its name while holding down Ctrl [Windows, Linux] or ⌘ Cmd [Mac] in IntelliJ), then complete TODO 1C.
This task requires using three new classes from Java’s standard library: JFileChooser , JOptionPane , and ImageIO . The code you need to write isn’t much more complicated than an if statement and a try - catch block, but first you need to teach yourself how to use the Application Programming Interfaces (APIs) that these classes provide. Read the linked tutorial pages thoroughly, follow along with their examples, then return to this assignment to finish the tasks. When you’re done, you should be able to activate File | Open, select the image bundled with the assignment, and see it displayed in the application window. You should also test opening a non-image file (by changing “Files of Type” to “All Files”) to check that your error dialog works.

Interlude: the Model–View–Controller and Observer patterns
Modular, maintainable software is designed by following the principle of separation of concerns . In a graphical application, some of these concerns include drawing the user interface, responding to user input, and maintaining application “state”. These concerns are related, but also separate.
For example, if you rename a file in IntelliJ, you expect the new name to be shown in the project browser. However, you would also expect the new name to be shown there if you renamed the file using your operating system instead, even though you didn’t type the new name into IntelliJ. And you expect file names to be shown not just in the project browser, but also in your editor tabs. A single piece of application state (a file’s name) may need to be drawn in multiple parts of the user interface, and it may change either as the result of user input or through other mechanisms. Therefore, it would not make sense to handle everything related to file names in a single class.
A common way to organize the responsibilities of an interactive graphical application is to divide them into Model , View , and Controller roles (MVC):
With this decomposition, it is possible for multiple View components to show data from the same model in different ways, both updating when the Model changes and neither responsible for knowing how those changes get made. Note that this decomposition does not have to be strict, and there are many variations . In Swing, it is common for Views and Controllers to be tightly coupled in the same class, while the Model is a separate class. For example, SelectorApp both assembles UI widgets in its window (View) and listens for their events, dispatching them to the appropriate application-specific functions (Controller). Likewise, SelectionComponent both draws the current selection boundaries (View) and interprets mouse events that occur over the image (Controller). But both share a SelectionModel (Model), which can even be used independently of any graphical display at all (e.g., in a unit test).
These roles typically communicate with each other via the Observer pattern. Objects that produce events maintain a list of listeners . When events occur, each of the listeners is notified by calling a method on it. A Controller may observe View components by registering listeners for user input events. And both Views and Controllers may observe Models by registering listeners for property change events so that they can react when the model’s state has changed. SelectionModel has a field named propSupport that helps it keep track of these listeners and to “fire off” events that they will be notified of.
Warning: Earlier in the course we talked about “observer methods;” they are not related to the “observer pattern” being discussed here, but both employ the word “observers.” Use context to disambiguate the term. For example, “ Observers (the role in the observer pattern) may call observers (accessor methods) in order to get updated information about the state of an observed model object."
Step 2: The selection model
The SelectionModel class models how a “selection path” drawn on top of an image can grow, shrink, or move over time. It is an abstraction that provides the following behaviors related to our functional requirements:
- addPoint : Append a segment to the path, connecting its last point to the given point.
- undo : Remove the most recently added segment from the path, or remove the starting point if there are no segments yet.
- finishSelection : Close the path by appending a segment connecting its last point to the starting point.
- movePoint : Change the location of a point that joins two segments in a finished selection.
- save : Extract the image pixels contained in the selected region and write a new image with those pixels (the rest of the rectangular region around those pixels will be transparent).
- reset : Remove all segments, as well as the starting point, from the path.
Not all of these behaviors make sense all of the time, and some might behave differently in different circumstances. For example, it wouldn’t make sense to try to save a selection before a selection has been finalized, so we should disable any “save” buttons in that situation. It would be helpful to represent the current “status” of the selection model in a variable. We’ll use a dedicated type to represent that status: SelectionState . It is a Java enumeration ( enum ), which is restricted to a handful of pre-defined values. Review the JavaDoc comments for those values to understand their meaning.
Note: Because this enumeration is nested inside of the SelectionModel class, it can be tedious to refer to its values by their full name; e.g., SelectionModel.SelectionState.SELECTED . Therefore, the files in this project contain the line import static selector.SelectionModel.SelectionState.*; , which allows you to simply type the name SELECTED .
For convenience, the current selection state is always shown in the status bar you added in TODO 1A. It stays in sync because SelectorApp listens for changes to the “state” property of the model and invokes its reflectSelectionState() method in response, which updates the label’s text.
Once we’ve identified these states, we need to define how a SelectionModel can transition between them, typically in response to an operation. These rules are easiest to express visually using a state transition diagram , as shown below. Each operation that can be performed in a state is depicted as a labeled arrow, showing which state the model will be in after the operation is performed. For example, if a client invokes addPoint on a model that is in the SELECTING state, it will remain in the SELECTING state.
If an operation is invoked in a state where that operation’s behavior is not defined (for example, saving when the state is not SELECTED), than an IllegalStateException should be thrown with a message indicating the current operation and state.
Implementing and testing SelectionModel
Study the class invariants for SelectionModel , and read the code of the methods that have been implemented for you to understand how they are achieving their specified effects. Pay particular attention to the selection field, which is a LinkedList of segments of the selection path. A Java LinkedList can be used as a List, a Queue, or a Stack (since it implements both the List and the Deque interfaces); you will be responsible for deciding which of these ADTs’ operations best meets your needs.
Obviously, adding points to the selection is pretty important behavior, to direct your attention to the addPoint() method. Its behavior depends on the current state: it might start a new selection, append to an existing selection, or thrown an exception if the selection is already finished. The release code implements everything needed to start a new selection, and the testStart() case over in PointToPointSelectionModelTest walks through such a scenario. But one of its assertions depends on the lastPoint() accessor method, which has not yet been implemented. Complete TODO 2A and confirm that the test now passes. This should get you familiar with thinking about the selection field, and you may find lastPoint() to be a useful helper when completing your next tasks.
The scenario in testStart() only covers the case where a starting point has been chosen but the end of the first segment has not. There are a couple of other test cases that start from a similar setup: testLiveWireEmpty() and testUndoEmpty() . The latter should pass out-of-the-box, but the former needs your help.
The purpose of liveWire() is to provide a preview of the segment that would be added if its argument were added as the next selection point (this will allow the View to draw the preview as the mouse moves without modifying the selection until it is clicked). However, while the endpoints of that segment are fixed by liveWire() ’s specification, it’s allowed to take some twists and turns in between. It is the job of subclasses of SelectionModel to specify that in between behavior. PointToPointSelectionModel adopts the simplest behavior: a straight line. Complete TODO 2B to override liveWire() in PointToPointSelectionModel ; check your work with testLiveWireEmpty() .
In order to test non-empty selections, we need a way to add segments to the selection path. As with live wires, the details are left to subclasses, which must override appendToSelection() . Complete TODO 2C in PointToPointSelectionModel , testing with testAppend() (which will also cover lastPoint() again). Now that you can set up non-empty selection paths, you should check the behavior of other functions in that context. Complete TODO 2D in PointToPointSelectionModelTest to test liveWire() again.
As you write your first test case on your own, pay attention to how the PclTester helper class is used to check behavior related to the Observer pattern (the class definition is at the bottom of the file). This is handy for asserting that listeners have been notified of important property changes in accordance with function specifications.
Finally, what users can add, they should be able to undo. Reading the implementation of undo() , you will see that it handles the PROCESSING state as a special case (not used on this assignment), then delegates its work to the undoPoint() helper method (tip: Ctrl - or ⌘ Cmd -click to jump to this helper). Complete TODO 2E to remove the most recently added segment (you can assume that at least one segment exists, since the empty case is handled for you above). testUndoSelected() covers undoing a finished selection, while TODO 2F asks you to test undoing while a selection is still in progress.
All the tests related to adding and undoing points should be passing now (we’ll come back to the others later). Those green checkmarks give us confidence to move forward with providing a graphical way for users to interact with this model.
Step 3: A UI for selections (view and controller)
Open SelectionComponent and read its code. As a subclass of JComponent , instances of this class can be added to Swing GUI windows (and in fact, ImagePanel does precisely that). We also see that it implements MouseListener and MouseMotionListener , suggesting that it will respond to mouse interactions. Finally, the fact that it implements PropertyChangeListener suggests that it will be observing a Model in order to know when to redraw itself. The class doesn’t maintain a lot of state itself (though it does maintain some to track ephemeral user interactions); rather, it contains an instance of SelectionModel , whose state it is responsible for visualizing and updating.
Your job will be to implement those event listeners to fulfill the component’s Controller duties, as well as to implement its paintComponent() method to visualize the selection represented by its model.
The flow of control for event-driven applications can be very difficult to trace, especially when the Observer pattern is used. To help you keep track of it, here are a pair of sequence diagrams illustrating what happens for two different mouse events. The participants in the interaction are arranged into columns, and time flows from top to bottom. Each solid arrow represents a method call—they point from the object that made the call to the object the method was invoked on; dashed arrows represent a returned value. The duration of a method (the time when its call frame is on the call stack) is shown by a tall rectangle.
These diagrams can help us keep track of responsibilities. For example, user interactions that modify the selection model, such as clicking to add a point, do not need to request a repaint themselves, since that will be handled by the propertyChange() method that gets called in response to any model changes. However, interactions that only affect temporary “interaction state”, such as moving the mouse to get a preview of the next segment, do need to request a repaint themselves. The diagrams also show that the View only reads properties of the Model during painting.
Start with TODO 3A, which will allow you to interact with the model using mouse clicks. To see what you are doing, implement TODO 3B to draw the outline of the current selection. Note that this component’s paintComponent() method relies on four helper functions, which you will implement one-by-one. You will need a good understanding of the coordinate system used when painting: the origin is in the upper-left corner, and y increases downward, as if it were counting rows of pixels in an image. You will also need to familiarize yourself with the API of the Graphics class—at least one of its methods looks like a good match for our PolyLine class…
After implementing paintSelectionPerimeter() , run the app, open an image, and click in a few places to test your code (lines should appear after your second click). A right-click should undo the most recently added segment. If you have the ability to middle-click, that should close the selection by connecting back to the start (don’t worry if you don’t have a middle mouse button; you’ll be adding a “finish” button to the UI later in the assignment).
It would be even more interactive to have a preview of the segment that would be drawn as we move the mouse around; we call this preview a “live wire”. You have already written code to return the appropriate segment, and the release code already implements mouseMoved() to save the last-observed mouse position in a field. With that in mind, complete TODO 3C to draw the live wire to that saved mouse location. Test your work by re-running the app.
To make the app a useful tool, we need to allow users to save their selections as new images. Since not everyone has a middle mouse button, we need to add another way for users to finish their selections. Return to SelectorApp and implement TODOs 3D & 3E to add a panel of buttons to the side of the image display. This task involves both View work (creating and laying out the buttons) and Controller work (registering action listeners with each of the buttons). Test that these buttons achieve their desired effects.
When testing your buttons, you may have encountered an exception printed to the console if tried to activate one in a state where that behavior wasn’t valid. To provide a friendlier user experience, we should only enable a button when its behavior is valid. Fortunately, it is easy to disable and re-enable these widgets in response to events, including observed property changes.
SelectorApp already responds to changes to its model’s state by calling reflectSelectionState() (see propertyChange() ). Complete TODO 3F to enable and disable the application’s buttons and menu items as described. Test your changes by running the application—hopefully you can’t trigger an IllegalStateException anymore, even if you try!
Finally, users need to be able to save the results of their work. Read the implementation of saveSelection() in SelectionModel to check that you understand the steps required to do this. In order to activate this function, complete TODO 3G back in SelectorApp . Test your work by saving some selections and admiring them with your operating system’s image viewer.
Congratulations—you’ve assembled a functional GUI program! It even supports live previews and an “undo” feature to help users make careful selections with confidence. But what if a user doesn’t notice a mistake until they’ve finished their selection? Rather than undoing the whole thing, what if they could adjust individual points?
Step 4: Manipulating selections
Once a selection has been finished, the user should have the ability to move the “control points” joining its segments by clicking and dragging them. You’ll need to make changes across Models, Views, and Controllers to accomplish this. On the View front, we first need to be able to see these control points. Complete TODO 4A by implementing paintControlPoints() in SelectionComponent , then visually confirm that your points look consistent with the selection perimeter.
On the Model side, when a point is moved, the two segments it was joining need to be updated to go through the new point. The path of these segments depends on which subclass of SelectionModel is active; the point-to-point model will again use straight lines. Complete TODO 4B in PointToPointSelectionModel to update these segments. Test it with the provided testMovePointMiddle() case, but be sure to write more tests of your own (TODO 4C); the logic for moving the starting point needs special attention. If you have trouble with the specification or implementation of the movePoint() method, test cases are often a great way to think through the details of an example without first worrying about how the work gets done.
The above task requires replacing elements in a linked list. While you could use remove() and add() methods that take an index as an argument, each of these invocations would require traversing the list from its start. It would be more efficient to traverse the list once and do all the work you need when you get to the right spot. While LinkedList is encapsulated and does not provide clients access to its nodes, its Iterator s do provide a way to achieve what we want.
Specifically, you will learn to use the ListIterator class. In addition to the familiar next() and hasNext() methods, a ListIterator provides methods to add, remove, and replace elements at its current position. To make sense of their specifications, it is important to understand that a ListIterator ’s position in the list is like that of an “insertion caret” in a text editor—it lives between list elements. The behavior of remove() and set() also depends on whether the last call you made was to next() or previous() . With this analogy, remove() after a call to next() is like typing “backspace”—it removes the element to the left of the iterator’s current position.
There’s one more Model task to take care of before moving on to the Controller for this interaction. We need a way to know which control point a user clicked on. Complete TODO 4D by implementing closestPoint() in SelectionModel . A pair of test cases are provided, but you will need to write more (TODO 4E).
Now for the user interaction in SelectionComponent . When clicking and dragging over a component, Swing generates three kinds of events: the mouse button being pressed ( mousePressed() ), the mouse moving while a button is pressed ( mouseDragged() ), and the mouse button finally being released ( mouseReleased() ). For our interaction, we want to choose the control point when the mouse button is pressed, draw guide lines to the mouse pointer while the mouse is dragged, and ask the model to perform the move when the mouse button is released.
Complete TODO 4F in mousePressed() to call your closestPoint() function when a drag is initiated over a completed selection. Since mouseReleased() has already been implemented for you, you should be able to test that you can move control points by clicking, dragging, and releasing (you won’t see visual feedback during the drag yet, but the point should move when you release).
To get visual feedback during the drag, implement paintMoveGuides() (TODO 4G). This is the trickiest of the painting methods. As usual, try to avoid calling get(i) on a LinkedList in a loop. Test that you now get visual feedback while dragging.
Congratulations! That’s all the required functionality for this assignment. Assuming that your application is behaving as you expect, you should be in a good place to enhance it during the next assignment, where you’ll implement a new, smarter subclass of SelectionModel .
Step 5: UI embellishments
Once you have the above functional requirements working, if you have time, you can try to improve the user experience of the application. Complete as many of the suggested embellishments as you can (search for TODO (embellishment) ), which include improving colors, adding keyboard shortcuts, and handling corner cases when opening and saving files. Document which embellishments you attempted in your reflection document.
You are also welcome to embellish your application in other ways (though no extra credit is awarded for doing so). Just be sure that:
- Your submission satisfies the functional requirements and adheres to given specs.
- Your GUI at least has the controls shown in the “wireframe” mockup at the top of this handout.
- Your tweaks do not require any changes to files other than those you are submitting.
Feel free to share embellishment ideas (and stickers) on Ed. Have fun!
II. Submission
In “reflection.txt”, estimate the amount of time you spent on this assignment, and answer the verification and reflection questions. Then submit the following files:
- SelectorApp.java
- SelectionModel.java
- PointToPointSelectionModel.java
- SelectionComponent.java
- PointToPointSelectionModelTest.java
- reflection.txt
6. Image Classifier
Download Project Zip | Submit to TigerFile
- To learn about object-oriented programming concepts.
- To learn about machine learning (ML).
- To implement the perceptron algorithm - a simple and beautiful example of ML in action.
- To write a client program that classifies images.
Getting Started
Read/scan this entire project description before starting to code. This will provide a big picture before diving into the assignment!
Download and expand the project zip file for this assignment, which contains the files you will need for this assignment.
Read Sections 3.2 and 3.3 of the textbook on creating data types and designing data types.
Review the Picture and Color data types.
This is a partner assignment. Instructions for help finding a partner and creating a TigerFile group can be found on Ed.
The rules for partnering are specified on the course syllabus . Make sure you read and understand these rules, and please post on Ed if you have questions. In your readme.txt file, you must indicate that you adhered to the COS 126 partnering rules.
ML algorithms like this are widely used to classify handwritten digits (e.g., to recognize postal ZIP codes, process bank checks, and parse income tax forms). The full power of ML derives from its amazing versatility. ML algorithms rely upon data to learn to make predictions, without being explicitly programmed for the task. For example, the same code you will write to classify handwritten digits extends to classifying other types of images, simply by training the algorithm with different data.
Moreover, ML techniques apply not only to images but also to numerical, text, audio, and video data. Modern applications of ML span science, engineering, and commerce: from autonomous vehicles, medical diagnostics, and video surveillance to product recommendations, voice recognition, and language translation.
Implementation Tasks
- Perceptron.java
- MultiPerceptron.java
- ImageClassifier.java - a template is provided.
- Submit a completed readme.txt file.
- Submit a completed acknowledgments.txt file.
Supervised learning. To classify images, we will use a supervised learning algorithm. Supervised learning is divided into two phases — training and testing .
Training. In the training phase , the algorithm learns a function that maps an input to an output (or a label) using training data consisting of known input–output pairs. For the handwritten digit application, the training data comprise 60,000 grayscale images (inputs) and associated digits (labels). Here is a small subset:
In the binary classification problem , we seek to classify images into one of two classes (e.g., either the digit 6 or some digit other than 6). By convention, we use the binary labels : \(+1\) ( positive ) and \(-1\) ( negative ) to denote the two classes. In the multiclass classification problem , we allow for \( m \) classes and label them \( 0, 1, …, m-1 \). For our handwritten digit application, there are \( m = 10 \) classes, with class \( i \) corresponding to digit \( i \).
Testing. In the testing phase , the algorithm uses the learned function to predict class labels for unseen inputs.
Typically, the algorithm makes some prediction errors (e.g., predicts 9 when the handwritten digit is 6). An important quality metric is the test error rate — the fraction of testing inputs that the algorithm misclassifies. It measures how well the learning algorithm generalizes from the training data to new data.
Perceptrons . A perceptron is a simplified model of a biological neuron. It is a function that takes a vector \( x = x_0, x_1, \ldots, x_{n-1} \) of \( n \) real numbers as input and outputs (or predicts) either a \(+1\) or \(−1\) binary label . A perceptron is characterized by a vector \( w = w_0, w_1, \ldots, w_{n-1} \) of \( n \) real numbers known as the weight vector . The perceptron computes the weighted sum
$$ S = w_0 \times x_0 +w_1 \times x_1 + \ldots + w_{n-1} \times x_{n-1} $$
and outputs the sign of the sum.
For the handwritten digit application, a perceptron will be trained to predict the binary label \(+1\) for images that correspond to a target digit and the binary label \(−1\) otherwise; the input vector \( x \) holds the grayscale values of each pixel in an image; and the weight vector \( w \) is pre-computed by a process described in the next paragraph.
Perceptron algorithm. How do we determine the values of the weight vector \( w \) so that the perceptron makes accurate predictions? The core idea is to use the training data of known input–output pairs to incrementally refine the weights. Specifically, we initialize all the weights to 0 and then process the labeled inputs one at a time. When we process a labeled input, there are three possibilities:
Correct prediction : The perceptron predicts the correct binary label (\(+1\) or \(-1\)) for the given input vector \( x \). In this case, we leave \( w \) unchanged.
False positive : The given input vector \( x \) is labeled \(-1\) but the perceptron predicts \(+1\). In this case, we adjust \( w \) as follows - for each \(j\): $$ w^\prime_j=w_j-x_j $$
False negative : The given input vector \( x \) is labeled \(+1\) but the perceptron predicts \(-1\). In this case, we adjust \( w \) as follows - for each \(j\): $$ w^\prime_j=w_j+ x_j $$
Example. Here is an example trace of the perceptron algorithm using four (4) labeled inputs, each of length \( n=3 \). In this example, an input \( x \) has a positive label \(+1\) if and only if the following is true: \( x_0 \le x_1 \le x_2 \) ; otherwise it has a negative label \(-1\).
Perceptron data type
Create a data type that represents a perceptron by implementing the following API:
Corner cases. You may assume that the arguments to the constructor and instance methods are valid. For example, you may assume that any binary label is either \(+1\) or \(-1\), any input vector \( x \) is of length \( n \), and \( n \ge 1 \).
Multiclass classification
In the previous section, we used a single perceptron for the binary classification problem. For a multiclass classification problem with \( m \) classes, we create an array of \( m \) perceptrons, each solving its own binary classification problem. For our handwritten digit application, each perceptron \( i \) solves a binary classification problem: does the image correspond to the digit \( i \)
We train each perceptron independently and make predictions by distilling the results from the \( m \) perceptrons.
Multiclass training. Initialize the weight vector of each of the \( m \) perceptrons to be zero and process the labeled training inputs one at a time. To train the perceptrons on an input vector \( x \) with multiclass label \( i \) (0 to \( m-1 \)):
- Train perceptron \( i \) on input vector \( x \) with the binary label \(+1\)
- Train the other \( m-1 \) perceptrons on input vector \( x \) with the binary label \(-1\)
That is, when training perceptron \( i \), we treat an input vector labeled \( i \) as a positive example and an input vector with any other label as a negative example.
Multiclass prediction. To make a prediction for an input vector \( x \), compute the weighted sum for each of the \( m \) perceptrons on that input. The multiclass prediction is the index of the perceptron with the largest weighted sum. Intuitively, each perceptron with a positive weighted sum predicts that x is a positive example for its class, but we need to pick only one. Note that the perceptron with the largest weighted sum makes that prediction with the most intensity, so we assign the class label associated with that perceptron, even if the largest weighted sum is negative.
This one-vs-all strategy decomposes a multiclass classification task into \(m\) binary classification tasks. In computer science, this decomposition is known as a reduction ; this particular kind of reduction is used all over ML.
Example . Here is an example of a multi-perceptron with \(m\) = 2 classes and \(n =\) 3 inputs.
MultiPerceptron data type
Create a data type that represents a multi-perceptron by implementing the following API:
Ties . If two (or more) perceptrons tie for the largest weighted sum in predictMulti() , return the index of any such perceptron (between 0 and \( m-1 \)).
Corner cases . You may assume that the arguments to the constructor and instance methods are valid. For example, you may assume that any class label is an integer between 0 and \( m-1 \), any input vector \( x \) is of length \( n \), and \( m \ge 1 \) and \( n \ge 1 \).
ImageClassifier data type
Your final task is to write a data type ImageClassifier.java that classifies images using the MultiPerceptron data type described in the previous section by:
- Training it using the input–output pairs specified in a training data file.
- Testing the predictions using the input–output pairs specified in a testing data file .
- Printing a list of misclassified images and the test error rate.
Organize your client according to the following API:
Here are some details about the API:
Configuration file format. A configuration file consists of a sequence of lines:
- the first line contains the width and height, respectively, of the images in the training and testing data files;
- the second line contains the number of classes \(m\);
- the remaining \(m\) lines contain the names of each class.
Training and testing file format. A training data file and testing data file have the format - a sequence of lines where:
- each line contains the name of an image file (e.g., corresponding to a handwritten digit) followed by an integer label (e.g., identifying the correct digit), separated by whitespace.
For testing data files you will use the integer labels only to check the accuracy of your predictions.
Input files. We provide a variety of datasets in the specified format, including handwritten digits, fashion articles from Zalando, Hirigana characters, and doodles of fruit, animals, and musical instruments. The handwritten digits and fashion articles are provided in your project folder. You can download the other datasets from here .
Constructor . The ImageClassifier constructor takes a single argument - the file name for a configuration file. The constructor reads the data from configuration file and creates a MultiPerceptron object with \( m \) classes and \( n = width \times height \) inputs. It also stores the class names provided in the cofiguration file.
Feature extraction . The extractFeatures() method converts a grayscale image into a one-dimensional array suitable for use with the MultiPerceptron data type. In one pass over the pixels of the image:
- extract the grayscale values from each pixel and
- rearrange them into a single 1D array (vector).
extractFeatures() must throw an IllegalArgumentException when the image’s dimensions are not equals the dimensions provided in the configation file.
Recall that a shade of gray has its red, green, and blue components all equal
The one-dimensional array must be of length width x height
In one pass, you must iterate over the image RGB pixel values in row-major order , extracting the grayscale value and setting the appropriate element in the 1D array (vector).
Training a classifier . The trainClassifier() method takes the name of the training data file, and trains the image classifier using the images and labels provided in the file.
classNameOf() . The classNameOf(int classLabel) method must thrown an IllegalArgumentException( when classLabel less than \(0\) or greater than \(m - 1\), where \(m\) is the number of class names.
classifyImage() . The classifyImage(Picture picture) returns the predicted class \(i\), where \(0 \leq i \leq m - 1\) and \(m\) is the number of classes.
Testing a classifier . The testClassifier() method takes the name of the testing data file, and tests the image classifier using the images and labels provided in the file. For each misclassified image , it must also output the following information:
- the misclassified image’s filename,
- its correct class name, and
- the incorrectly predicted class name
in the format shown below. For example:
The testClassifier() method returns the test error rate (the fraction of test images that the algorithm misclassified).
Main. The main() method takes three command-line arguments:
- The name of a file that contains the configuration data.
- The name of a file that contains the training data.
- The name of a file that contains the testing data.
It then creates an ImageClassifier object, trains the classifier, tests the classifer and prints the error rate.
A template for the main() test client is provided in ImageClassifier.java in the project folder.
Here are some sample executions:
Possible Progress Steps
We provide some additional instructions below. Click on the ► icon to expand some possible progress steps or you may try to solve Classifier without them. It is up to you!
Implementing Perceptron.java
- Test: In the main() method, instantiate a few Perceptron objects and print the number of inputs for each object.
- Test: In the main() method, print the various Perceptron objects. What should the output be for a newly instantiated Perceptron object?
- Test: In the main() method, print the result of invoking the weightedSum() method on the various Perceptron objects (using, of course, appropriately sized arrays).
- Implement the predict() method.
- Implement the train() method. Note: train() should call predict() .
- You can test your implementation by using the code in the Testing section (below) and then submitting to TigerFile. Do not move onto MultiPerceptron until Perceptron is working properly.
Testing Your Perceptron.java Implementation
Here is Java code that trains a Perceptron on four input vectors (of length 3) from the assignment specification:
And the desired output:
Implementing MultiPerceptron.java
- Test: In the main() method, instantiate a few MultiPerceptron objects and print the number of classes and inputs for each object.
- Test: In the main() method, print the various MultiPerceptron objects. What should the output be for a newly instantiated MultiPerceptron object?
- Implement the predictMulti() method.
- Implement the trainMulti() method.
- You can test by using the code in the Testing section (below) and then submitting to TigerFile.
Testing Your MultiPerceptron.java Implementation
Here is Java code that trains a MultiPerceptron on four input vectors (of length 3) from the assignment specification:
Here is Java code that tests a MultiPerceptron on two input vectors (of length 3) from the assignment specification, based on the trained Multiperceptron object:
Implementing ImageClassifier.java
Part I. Constructor .
- Implement the ImageClassifier() constructor.
- Read the configuration file data, and store the configuration data in your instance variables.
- Review the In data type from Section 3.1, which is an object-oriented version of StdIn .
- We recommend using the instance variables: integers width , height , a String array classNames[] and a MultiPerceptron with \( m \) classes and \( n = width \times height \) inputs.
- Print the instances variables to standard output.
- Test your constructor in main() by creating various ImageClassifier objects using some different configuration files ( image3x3.txt , digits.txt , fashion.txt , etc.)
- Printing is solely for checking progress; comment out the print statements once you have confidence your constructor is working properly.
Part II. Feature extraction .
- Review Section 3.1 of the textbook, especially Program 3.1.4 ( Grayscale.java ) for using the Picture and Color data types. Note that the images are already grayscale, so you don’t need to use Luminance.java . In particular, the red, green, and blue components are equal, so you can use any of getRed() , getGreen() , or getBlue() to get the grayscale value.
- Comment out the test client code provided in ImageClassifier.main() .
- Create a Picture object for the image 49785.png (in the project folder) and display it in a window. (Remove this code after you have successfully displayed the image.)

- Extract its width and height and print the values to standard output. Then, extract the grayscale values of the pixels and print. If it’s not already in row-major order, adjust your code so that it prints the values in the specified order.
- If you are using IntelliJ, do not type the import java.awt.Color; statement that is normally needed to access Java’s Color data type. IntelliJ is pre-configured to automatically add import statements when needed (and remove them when not needed).
- Create a one-dimensional array of length width x height and copy the grayscale values to the array. Print the values of this array to confirm you can create a vector (row-major order) of values from a Picture object.
- Using the code from steps (4) and (5) as a guide, implement the method extractFeatures() that takes a Picture as an argument and returns the grayscale values as a double[] in row-major order .
- Write a main() method that tests extractFeatures() . Using image3-by-3.png , your main() method should print the values returned by extractFeatures() as shown in the above figure: ImageClassifier test = new ImageClassifier("image3x3.txt"); // create a small test Picture image3x3 = new Picture("image3x3.png"); double[] values = test.extractFeatures(image3x3); // print the array values
- Once you are confident that extractFeatures() works, remove your testing code before submitting the assignment to TigerFile.
Part III. Classifying images.
- Implement the classifyImage() method. For the given image, extract its features and use the multi-perceptron to predict its class label.
- Implement the classNameOf() method. For the given class label, return the class name associated with it.
- Test these two methods by creating an ImageClassifier object using the digits.txt configuration file.
- Implement the trainClassifier() method. Read the training file data just as you read the configuration file. For each training image, extract its corresponding features and train the classifier using the corresponding label.
- Implement the testClassifier() method. Read the test file data just as you read the configuration file. For each testing image, predict its class. Print each misclassified image to standard output and compute the error rate on these images.
Training and Testing ImageClassifier Using Large Datasets
Now, the fun part. Use large training and testing input files. Be prepared to wait for one (1) minute (or more) while your program processes 60,000 images.
Don’t worry about the odd looking filenames. It’s just a verbose way to specify the location to a specific image file in a JAR ( Java ARchive ) file. Modern operating systems are not so adept at manipulating hundreds of thousands of individual image files, so this makes training more efficient. In this case, jar:file:digits.jar identifies the JAR file digits.jar , and /training/7/4545.png identifies a file named 4545.png , which is located in the subdirectory /training/7/ of the JAR file.
Analysis - readme.txt
Provide your answers to Parts 1, 2 and 3 (below) in your readme.txt file.
Part 1 : Run the following experiment (you may want to redirect standard output to a file):
- What digit is misclassified the most frequently?
- For this digit, what are the top two digits that your MultiPerceptron incorrectly predicts?
- Examine some of these misclassified images. Provide an explanation of what might have caused these misclassifications.
Part 2 : Compute the following quantities using the experiments:
- The error rate on the images specified in digits-testing1K.txt before training your classifier.
To do this, you will need to modify the main in ImageClassifier . Comment out the line: // classifier.trainClassifier(args[1]);
- The error rate on the images specified in digits-testing1K.txt after training your classifier.
To do this, you will need to modify the main in ImageClassifier . Uncomment the line: classifier.trainClassifier(args[1]);
- Can we conclude that the classifier is actually learning?
Part 3 : Some people (especially in Europe and Latin America) write a 7 with a line through the middle, while others (especially in Japan and Korea) make the top line crooked.
- Suppose that the training data consists solely of samples that do not use any of these conventions. How well do you think the algorithm will perform when you test it on different populations? What are the possible consequences?
- Now suppose that you are using a supervised learning algorithm to diagnose cancer. Suppose the training data consists of examples solely on individuals from population X but you use it on individuals from population Y. What are the possible consequences?
Submit to TigerFile : Perceptron.java , MultiPerceptron.java , ImageClassifier.java , and completed readme.txt and acknowledgments.txt files.
It is a really simple, beautiful algorithm that, nevertheless, can do something interesting.
- The perceptron algorithm is one of the most fundamental algorithms in an area of ML called online learning (learning from samples one at a time).
- The perceptron algorithm is closely related to the support-vector machine algorithm, another fundamental ML algorithm.
- The perceptron algorithm has some beautiful theoretical properties. For example, if the training data set is linearly separable (i.e., there exists some weight vector that correctly classifies all of the training examples), and if we cycle through the training data repeatedly, the perceptron algorithm will eventually (and provably) find such a weight vector.
- Perceptrons are a building block in neural networks. In neural networks, many perceptrons (or other artificial neurons) are connected in a network architecture, in which the outputs of some neurons are used as the inputs to other neurons. Training multi-layer neural networks requires a more sophisticated algorithm to adjust the weights, such as gradient descent.
Geometrically, you can view each input vector \( x \) as a point in \( R^n \) and the weight vector \( w \) as a hyperplane through the origin. The goal of the perceptron algorithm is to find a hyperplane that separates the positive examples from the negative examples. Using vector terminology, the weighted sum is known as the dot product ; its sign determines on which side of the hyperplane the point lies.

During training, when we encounter a point \( x \) that is on the wrong side of the hyperplane (i.e., a false positive or negative), we update the weight vector, thereby rotating the hyperplane slightly. After the rotation, x is either on the correct side of the hyperplane or, if not, at least a bit closer to the hyperplane (in terms of Euclidean distance).
Here are three simple ideas:
- Multiclass perceptron . Instead of training all m perceptrons on each input vector, when there is a prediction error (multiclass perceptron predicts \( i \) but correct label is \( k \)), train only two perceptrons: train perceptron \( i \) (with label −1) and perceptron \( k \) (with label \(+1\)).
- Adjust the weights with a fraction of \(+1\) or \(-1\) for correct or incorrect predictions (this helps with a smoother convergence) and iterate over the training step multiple times, each time training the perceptron with the same set of training data (randomized in order).
- Normalize the Features array data to have values between 0 and 1 (divide the values with 255) and initialize the perceptron weights to random values (with uniform random or Gaussian random to be less than 1 and on average 0).
- Averaged perceptron . Instead of using the last weight vector, take the average of the weight vectors that are computed along the way.
- Incorporate more features . Instead of using the feature vector \( x_0, x_1,\ldots, x_{n-1} \), create additional features. In particular, for each pair of features \( x_i \) and \( x_k \), create a new feature \(x_{ik} = x_i * x_k \). You could also keep going, adding not just pairs of features, but also triples, etc. This can significantly improve accuracy, but it becomes prohibitively expensive in terms of computation.
See this paper for additional ideas, including the kernel trick and the voted-perceptron algorithm.
The current champion uses convolution neural networks and achieves a 99.79% accuracy rate on the MNIST testing database consisting of 10,000 images. Here are the 21 incorrect predictions:

There is not much room for improvement; indeed, some of the errors appear to be due to incorrectly labeled (or ambiguous) inputs.
This assignment was developed by Sebastian Caldas, Robert DeLuca, Ruth Fong, Maia Ginsburg, Alan Kaplan, Kevin Jeon, and Kevin Wayne.
CSci 4061 MultiThreaded Image Matching Server
CSci 4061: Introduction to Operating Systems, Spring 2024 Project #3: MultiThreaded Image Matching Server Instructor: Jon Weissman Intermediate submission due: 11:59pm (CDT), 4, 4, 2023 Final submission due: 11:59pm (CDT), 4. 12, 2023 1. Background The purpose of this lab is to construct a multithreaded client and a multithreaded server using POSIX threads (pthreads) in the C language to learn about thread programming and synchronization methods. In this project, we will use multithreading to improve the performance of a server that is programmed to accept an image from the user, match it against a database of known images, and return the closest matching image. In this programming assignment we will be using the dispatcher-worker model of threads. There is both concurrency and parallelism at play (the latter if the server is running on a multicore system). Note: even if threads are dispatched to different cores, they still have direct access to all of the process memory. The purpose of this programming assignment is to get you started with thread programming and synchronization. You need to be familiar with POSIX threads, mutex locks and condition variables. 2. Project Overview Your project will be composed of two types of threads: dispatcher thread and worker threads.The purpose of the dispatcher threads is to repeatedly accept an incoming connection, read the client request from the connection, and place the request in a queue. We will assume that there will only be one request per incoming connection. The purpose of the worker threads are to monitor the request queue, retrieve requests (in the form of an input image) and read the image into memory (ie. get the bytes of the image), match the image against a database of images, and serve the best or closest matching image back to the user. The queue is a bounded buffer and will need to be properly synchronized. All client-server communication is implemented for you. 3. Server Overview Your server should create a fixed pool of worker and dispatcher threads when the program starts. The worker thread pool size should be num_worker (you can assume that the number of worker threads will be less than the number of requests) and dispatcher thread should be of size num_dispatcher. Your server should bring the database of images into memory when the server starts up. 3.1 Server Database: ● The database is a directory filled with images. These images are utilized for comparing input images received from clients, with the closest match subsequently returned to the respective client. It is imperative to load this database into memory upon the server's startup to ensure efficient access during the matching process. 3.2 Request Queue Structure: ● Request Queue Structure: Each request inside the queue will contain an image (i.e. a stream of bytes) sent from the client via an image file they specify and file descriptor of where to send the best matching image back. You may use a struct to hold this data before adding it to the queue. The queue structure is up to you. You can implement it as a queue of structs or a linked list of structs, or any other data structure you find suitable. 3.3 Dispatcher Thread The purpose of the dispatcher threads is to repeatedly accept an incoming connection, read the client request from the connection (i.e. the image contents), and place the request in a queue. We will assume that there will only be one request per incoming connection. You will use locks and condition variables (discussed Thursday) to synchronize this queue (also known as a bounded buffer). The queue is of fixed size. ● Queue Management: The identified image stream of bytes are added to the request queue along with a file descriptor of where to send the image back. This queue is shared with the workers. ● Signaling New Request: Once a request is added to the request queue, the dispatcher thread will signal to all of the worker threads that there is a request in the queue. ● Full Queue: Once the queue is full, the dispatcher thread will wait for a signal from any worker thread that there is a space in the queue. ● Network Functions the dispatcher will call: ○ int socketfd = accept_connection(): returns a file descriptor which should be stored in the queue ○ Char * buffer = get_request(int socketfd, size_t *size): Takes the file descriptor as the first argument, and takes a size_t pointer as a second argument which will be set by this function. Returns a char * with the raw image bytes. 3.6 Worker Threads The worker threads are responsible for monitoring the request queue, retrieving requests, comparing images from the database with the request image, and serving the best image back to the user. Here's a breakdown of its functionality: ● Parameters: The worker thread will take a threadID as a parameter (0, 1, 2, …) which will later be used for logging. You can assign the threads an ID in the order the threads are created. Note that this thread ID is different from the pthread_id assigned to the thread by the pthread_create() function. ● Queue Monitoring: Worker threads continuously monitor the shared request queue. When a new request arrives from the dispatcher thread, one of the worker threads retrieves it for further processing. ● Request Handling: Once a request is obtained, a worker thread will compare against the in-memory copy of the database for the best matching image. ● Response to request: After finding the image, the worker thread prepares the image to be served back to the user by sending the image bytes. The client then writes the returned image into a file. An example would be: input file is foobar.png output file could be foobar_similar.png. ● Empty Queue: Once the queue is empty, the worker thread will wait for a signal from any dispatcher thread that there are now requests in the queue. ● Synchronization: Proper synchronization mechanisms such as mutex locks and condition variables are used to ensure that multiple worker threads can safely access and modify shared data structures (queues) and other global variables without race conditions or deadlocks. ● Network Function the worker will make: ○ database_entry_t image_match(char *input_image, int size): ○ send_file_to_client(int socketFd, char *buffer, int size): Takes the client file descriptor, the matching image memory block, and its size. 3.8 Request Logging The worker threads must carefully log each request to a file called “server_log” and also to the terminal (stdout) in the format below. The log file should be created in the same directory where the final executable “server” exists. You must also protect the log file from race conditions. The format is: [threadId][reqNum][fd][Request string][bytes/error] ● threadId is an integer from 0 to num_workers -1 indicating the thread index of request handling worker. (Note: this is not the pthread_t returned by pthread_create). ● reqNum is the total number of requests a specific worker thread has handled so far, including the current request (i.e. it is a way to tag each request uniquely). ● fd is the file descriptor given to you by accept_connection() for this request ● database string is the image filename sent by the server ● bytes/error is either the number of bytes returned by a successful request. The log (in the “server_log” file and in the terminal) should look something like the example below. We provide the code for this. [8][1][5][/DB/30.jpg][17772] [9][1][5][/DB/30.jpg][17772] Make sure serer_log file is opened for write with truncation to 0. 3.8 Server termination We will keep this very simple: ^C. If you wish you can catch ^C, and do some cleanup or goodbye, but not needed. If the client is running, then this may hang the client or possibly make it crash. Do not worry about that. 4. Client Overview Your client will take a directory name as command line argument and be tasked with traversing its contents. For each file encountered within the directory, the client will initiate a thread to request the server to process it. This thread will handle the transmission of the file to the server for processing. Subsequently, the thread will remain active, awaiting the receipt of the corresponding matching image from the server, writing the contents to a file, and then terminating. The reason the client is multithreaded is to emulate multiple concurrent requests to the server. 4.1 Client Main Thread ● Directory Traversal: The main thread will traverse the directory contents, for each image encountered within the directory, it will spawn a thread to process it. This will give us some concurrency at the server, hopefully. 4.2 Client Threads ● File Preparation: Once the thread starts it will load the image into memory and send it to the server using send_file_to_server() function. ● User Response: After the thread successfully sends an image to the server. The thread will remain active, awaiting the receipt of the corresponding matching image from the server. ● Matching image Handling: Once the matching image has been received by the client, the thread will save the image into a new file and log the request. ● Network Functions the client needs to call: ○ int socketFd = setup_connection(): returns a file descriptor for where to send data to the server ○ send_file_to_server(int socketFd FILE *fd, size_t size) : takes a server file descriptor, the image file descriptor and size of the image. ○ receive_file(int socketFd, char * path): server file descriptor and path to output the new image. 5. Compilation Instructions You can create all of the necessary executable files with Command Line $ make Running the program with various directories can be accomplished with Command Line $ ./server <Port> <Database path> <num_dispatcher> <num_workers> <queue_lenght> $ ./client <directory path> <server Port> <output directory path> Example: Command Line $ ./server 8000 database 50 50 20 $ ./client img 8000 output/img 6. Project Folder Structure Please strictly conform to the folder structure that is provided to you. Your conformance will be graded. Project structure Contents (initial/required contents [1] ) include/ .h header files (server.h client.h utils.h) lib/ .o library files (utils.o) src/ .c source files (server.c client.c) database/ Contain the server database expected/ expected output Makefile file containing build information and used for testing/compiling README.md 1 This content is required at minimum, but adding additional content is OK as long as it doesn’t break the existing code. 7. Assumptions / Notes 1. The maximum number of dispatcher threads will be 100. 2. The maximum number of worker threads will be 100. 3. The maximum length of the request queue will be 100 requests. 4. The maximum length of a filename will be 1024. 5. The maximum number of database entries is 100. 8. Documentation Within your code you should use one or two sentences to describe each function that you write. You do not need to comment every line of your code. However, you might want to comment portions of your code to increase readability. 9. Submission Details There will be two submission periods. The intermediate submission is due 1 week before the final submission deadline. The first submission is mainly intended to make sure you are on pace to finish the project on time. The final submission is due ~2 weeks after the project is released. 9.1 Intermediate Submission For the intermediate submission, your task is to perform directory traversal on the server to form the in-memory version of the database - that is, add the directory content into the database list. You will also create N dispatcher and worker threads and join them in the main thread, with each thread printing its thread ID and exiting. The main client thread will make one request to the server. It should just accept the request, and print it out to stdout. There is no worker or queue needed for the intermediate. Note that you do not need to implement any synchronization for the intermediate submission. One student from each group should upload a .zip file to Gradescope containing all of your project files. We’ll be primarily focusing on *.c and your README, which should contain the following information: ● Project group number ● Group member names and x500s ● The name of the CSELabs computer that you tested your code on ○ e.g. csel-kh1250-01.cselabs.umn.edu ● Any changes you made to the Makefile or existing files that would affect grading ● Plan outlining individual contributions for each member of your group ● Plan on how you are going to construct the worker threads and how you will make use of mutex locks and condition variables. The member of the group who uploads the .zip file to Gradescope should add the other members to their group after submitting. Only one member in a group should upload. 9.2 Final Submission One student from each group should upload a .zip file to Gradescope containing all of the project files. The README should include the following details: ● Project group number ● Group member names and x500s ● The name of the CSELabs computer that you tested your code on ○ e.g. csel-kh1250-01.cselabs.umn.edu ● Members’ individual contributions ● Any changes you made to the Makefile or existing files that would affect grading ● Any assumptions that you made that weren’t outlined in section 7 ● How could you enable your program to make EACH individual request parallelized? (high-level pseudocode would be acceptable/preferred for this part) The member of the group who uploads the .zip file to Gradescope should add the other members to their group after submitting. Only one member in a group should upload. Your project folder should include all of the folders that were in the original template. You can add additional files to those folders and edit the Makefile, but make sure everything still works. Before submitting your final project, run “make clean” to remove any existing output/ data and manually remove any erroneous files. 10. Miscellaneous 1. We will provide an initial set of code, but you will be doing most of the coding. 2. Do not use the system call “system”. 3. Said before: KILL all of your stray processes during debugging as needed. 4. Any provided binaries are meant for the CSELAB Linux environment. No other binaries will be distributed. 5. ChatGPT or other significant “other” code reuse is prohibited. The purpose of this course is to learn by doing, and not meeting some deadline. If you are unsure about any located online code, contact us. 6. On the other hand, locating code snippets that show how system calls can be used is fine 11. Rubric (tentative) ● [10%] README ● [15%] Intermediate submission ● [15%] Coding style: indentations, readability, comments where appropriate ● [20%] Test cases ● [30%] Correct use of pthread_create(), pthread_join(), pthread_mutex_t , pthread_cond_t, pthread_mutex_lock(), pthread_mutex_unlock(), pthread_cond_wait(), pthread_cond_signal() ● [10%] Error handling — should handle system call errors and terminate gracefully Additional notes: ● We will use the GCC version installed on the CSELabs machines to compile your code. Make sure your code compiles and runs on CSELabs. ● A list of CSELabs machines can be found at https://cse.umn.edu/cseit/classrooms-labs ○ Try to stick with the Keller Hall computers since those are what we’ll use to test your code ● Helpful GDB manual. From Huang: GDB Tutorial From Kauffman: Quick Guide to gdb WX:codehelp
IMAGES
VIDEO
COMMENTS
Images can be found anywhere on the internet. They are found on social media, informational or educational websites, clipart and stock image websites, and perhaps the easiest way to find images is by using a search engine. While images may be easy to locate, using them in an assignment isn't as simple.
Teaching Students to Legally Use Images Online. November 13, 2017. Jennifer Gonzalez. As our students create more and more digital products —blog posts, videos, podcasts, e-books—they should be using images to enhance them. Images grab an audience's attention, they can illustrate key concepts, set a certain tone, and present a more ...
If the image is for use only in an assignment or a PowerPoint presentation, follow the advice in this section.. In text citations. Please Note: This information has been updated for clarity in September 2021. For assignments and presentations that will never be made publicly available you can just use a normal in-text citation in the note section under the image/figure (see the instructions ...
Whether an in-person or virtual presentation or class, this article will help you establish best practices for legally using images in presentation slides and minimizing your risks of copyright infringement. Images include photographs, charts, maps, illustrations, charts and more. You may also like our online copyright course that includes an ...
In general in your course assignments you can, under fair dealing for purposes of research, private study and education, use one entire image from a compilation of images (e.g. a gallery of images on the Web, a coffee table book), or up to 10% of a stand alone image (an image that is not part of a larger compilation but is on its own such as a ...
Use Microsoft ClipArt images in your papers, presentations, etc. Use images from the public domain and/or that have a Creative Commons license. Use images that are rights-cleared, such as those from the library's FABULOUS Encyclopedia Britannica Image Quest database. Image Quest is easy to use.
Educational use of images. Images can be powerful teaching tools as illustrations related to a class, or for studying concepts outside of the course context. Most of the time, showing things to students from physical media in in-person classes at the University of Minnesota is totally okay. There's a legal exception that only applies to ...
In APA style, Tables are visual displays of text or data in columns and rows. Figure refers to all illustrations except tables including graphs, photos, screenshots, drawings, maps, infographics and images. Figures and tables can add visual appeal and make your work more understandable. All figures and tables you have created, adapted or ...
Image annotation is the ability to mark up an image with text or visual symbols in order to highlight some aspect within the image. Applied to an assignment, instructors can use the idea of image annotation to introduce skills like visual literacy or visual analysis, by asking students to annotate images in order to make an argument about or ...
Students should speak to instructors for guidelines for specific assignments. For example, citations might be unnecessary for certain studio projects. Fair Use. ... (CAA) published The Code of Best Practices in Fair Use in the Visual Arts, which provides guidance on image use for those who write about, teach, display, archive, or make art.
Yes, if your assignment has a Contents page , which is likely if you are writing a dissertation or other major project. ... Title of Figure or Table in Italic Title Case - s uccinctly describe the image or table or use the title from the original source. The figure or table - if a key or legend is included, position them within the borders of ...
If you want to use this image in a published work, you will have to do your best to track down its source to request permission to use. The web site or social media site where you found the image may not be an appropriate source, since it is common for people to repost images without attribution. Just because "everyone does it" does not mean ...
While teaching with images has been at the core of disciplines like art history for decades, all courses can benefit from the use of visual materials in class lectures, assignments, exercises, and resources. Images can be an effective way of presenting abstract concepts or groups of data. Instructors have reported that their use of images in ...
When using Creative Commons images, use best practices for attribution. Include: Title - the name of the material (if available) Author - the owner of the material (this could be a person's name, a company name, or a user name on a site such as Flickr) Source - where the image can be found (usually a URL or hyperlink)
Crop the images to a similar shape or size. Group and align the visuals in a consistent manner to increase scannability. Fit different-sized images into a cohesive shape and neatly aligned grid. 4. Maintain consistent tone and aesthetic quality of images if your presentation emphasizes a single overarching message.
These popular activities are considered plagiarism: Making a video using footage from others' videos or using copyrighted music as part of the soundtrack. Copying media (especially images) from other websites to paste them into your own papers or websites. Composing a piece of music that borrows heavily from another composition.
Make sure to directly reference the image in the text of your essay. If you have included an image to illustrate a point, for instance, you would include something along the lines of 'An example of this can be seen in Figure 1'. The key, then, is that images in an essay are not just decoration. Rather, they should fit with and add to the ...
In Part 1 of this series we examined some basic types of image assignments, such as using images in discussion boards or annotating images. Instructors looking to move beyond these fundamentals and engage their students on a deeper level may wish to consider the digital exhibition. In a digital exhibition, students create a digital mock-up ...
How to reference images for your assignment using APA 7th referencing style.
The use of images in research and assessment allows participants to express ideas or feelings that might not have emerged through words alone. Sandra Weber describes how "images can be used to capture the inefable, the hard-to-put-into-words... Images can be used to communicate more holistically, incorporating multiple layers, and evoking ...
The assignments use the Sociological Images blog and students' own visual images (e.g., photographs) to meet course learning goals: (1) link sociological theories and concepts to social events/trends, and (2) apply these ideas to real life by identifying sociologically relevant images in daily life, and (3) communicate sociological analysis ...
Using images might be a problem for students with vision impairments, so be ready to provide an alternative assignment for them. Text generators are improving. Although the function is not available to the public (at the time of writing this) Chat-GPT can already begin to interpret images. Utilize alternative assignments.
Download and use 1,000+ Assignment stock photos for free. Thousands of new images every day Completely Free to Use High-quality videos and images from Pexels. Photos. Explore. License. Upload. Upload Join. study writing school homework work. Free Assignment Photos. Photos 1.1K Videos 209 Users 163.
Complete the tasks in "step 3.". Day 4: Complete the tasks in "step 4" (these are the most difficult parts of the assignment). Day 5: Continue implementing, testing, and debugging the features from "step 4.". If you finish early, complete some of the embellishment tasks. Respond to the questions in the reflection document.
classifyImage (). The classifyImage(Picture picture) returns the predicted class i, where 0 ≤ i ≤ m − 1 and m is the number of classes. Testing a classifier. The testClassifier() method takes the name of the testing data file, and tests the image classifier using the images and labels provided in the file.
methods. In this project, we will use multithreading to improve the performance of a server that is programmed to accept an image from the user, match it against a database of known images, and return the closest matching image. In this programming assignment we will be using the dispatcher-worker model of threads.